Jun 25, 2017
HOW TO REPAIR TRAVEL TRAILER WALLS
Step 1: Remove Siding
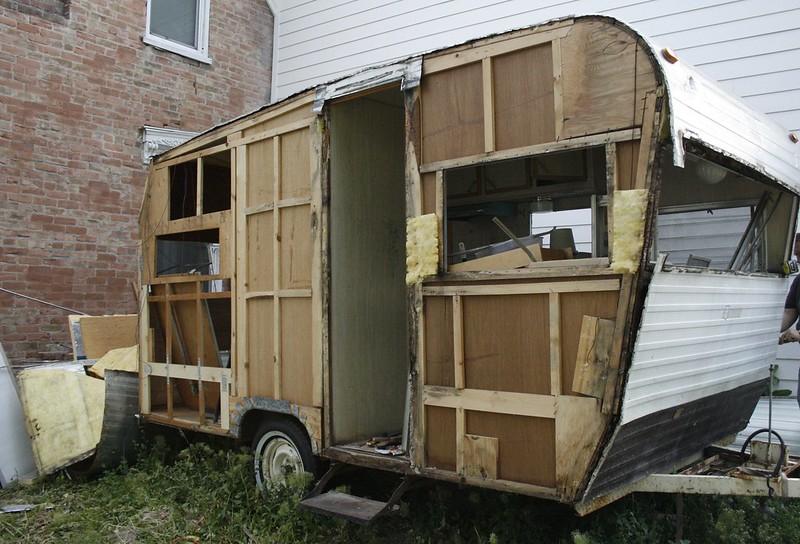
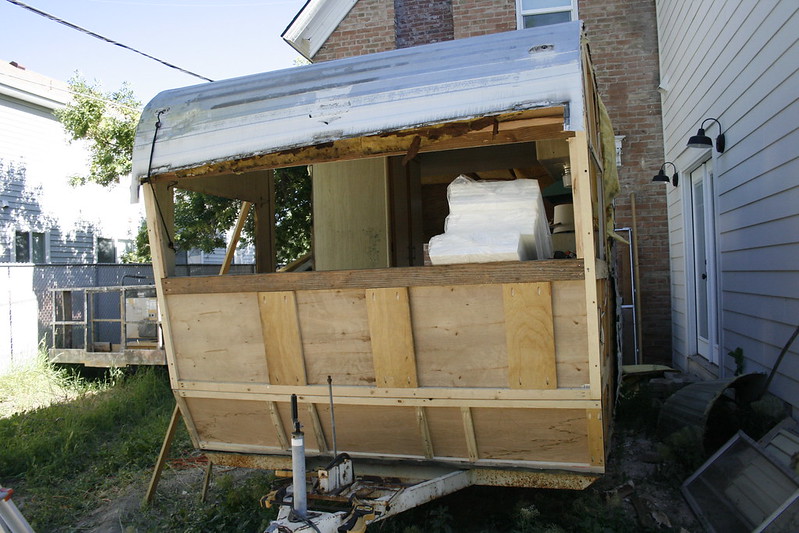
I'm pretty sure trailers and motorhomes like this were built by building the wall flat on the ground (or whatever surface they were using. Don't lets get hung up on semantics here.) They laid out their framing and stapled it together. Then they laid the interior paneling on top and stapled it in place. Then the whole completed wall could be lifted up and secured to the floor. Once all the walls were in place the trailer could be wrapped with aluminum siding.
My point is, if you need to gain access to the framing inside the trailer walls, your best bet is to do it from the outside.
You'll have to remove all the drip trim, lights and other do-dads attached to the exterior of the trailer. After that it is just a matter of pulling out all the staples holding the siding in place - a flat head screw driver and a pair of needle-nose pliers should do the trick.
Step 2: Assess the Damage
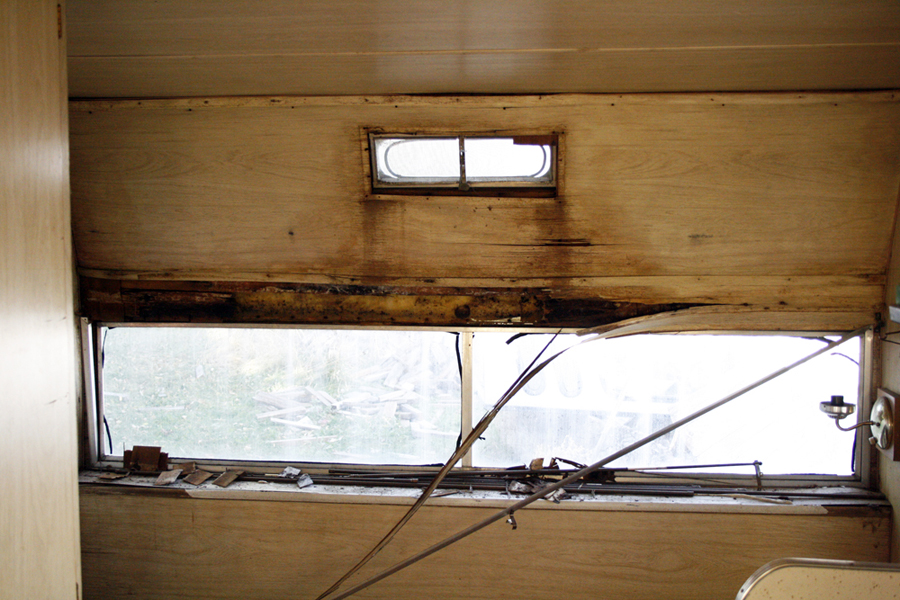
The problem is, sometimes you can't tell what is damaged until you get the siding off and look at it. We were getting ready to finish up the rear of our travel trailer and just call it good, but both of us started thinking "What if there is more damage that we don't know about?" Especially because there was a pretty big dent near the roof in the front that had been repaired with metal tape.
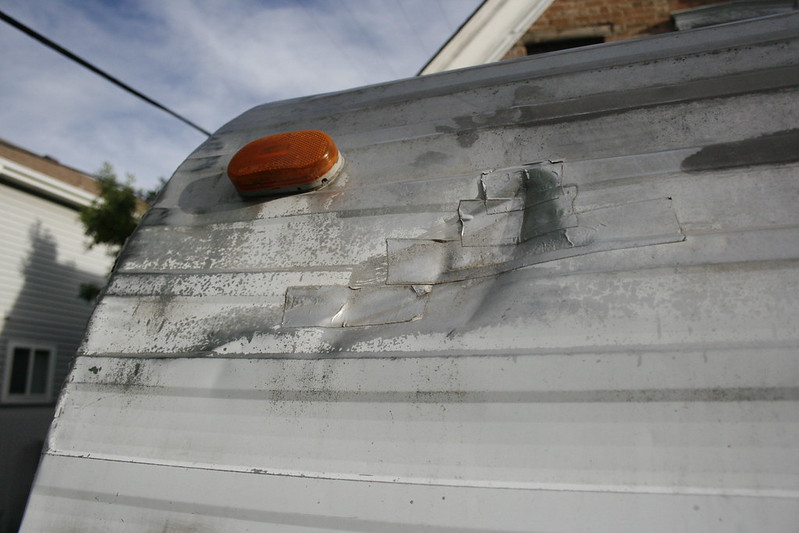
What were the chances that hadn't caused some problems? So we pulled the rest of the siding off.
What were the chances that hadn't caused some problems? So we pulled the rest of the siding off.
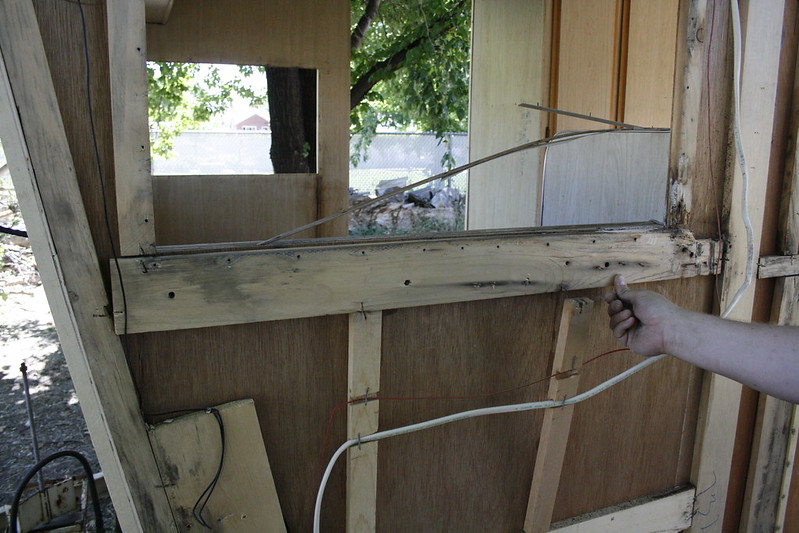
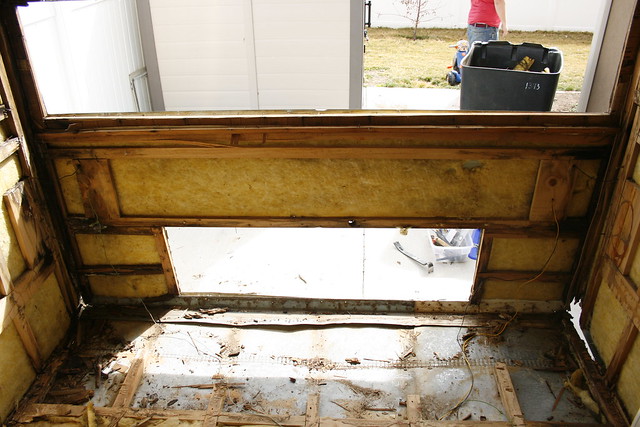
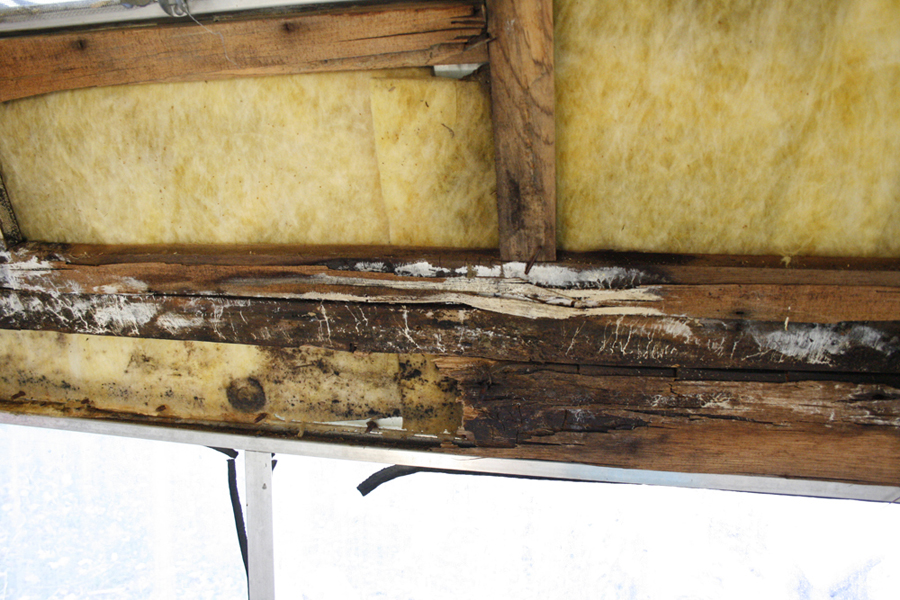
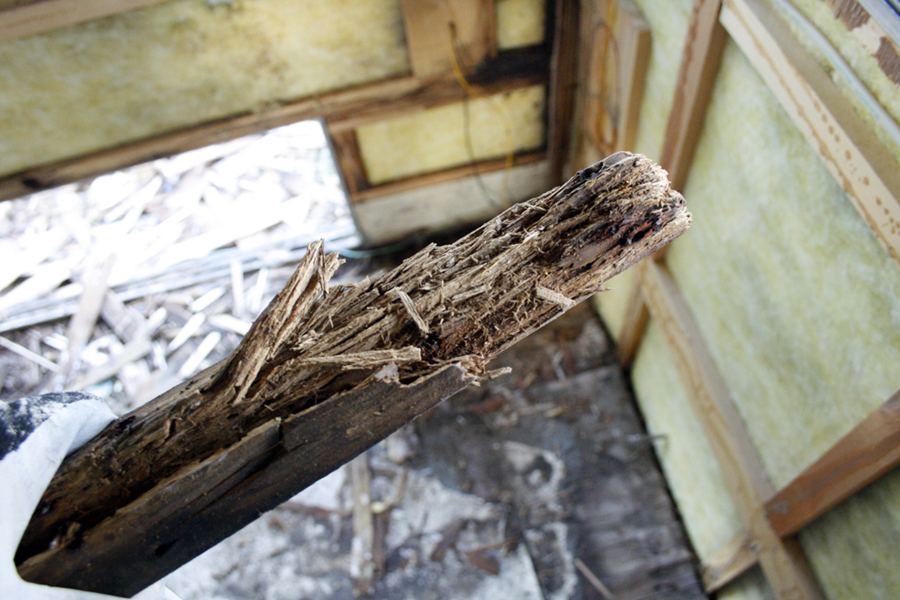
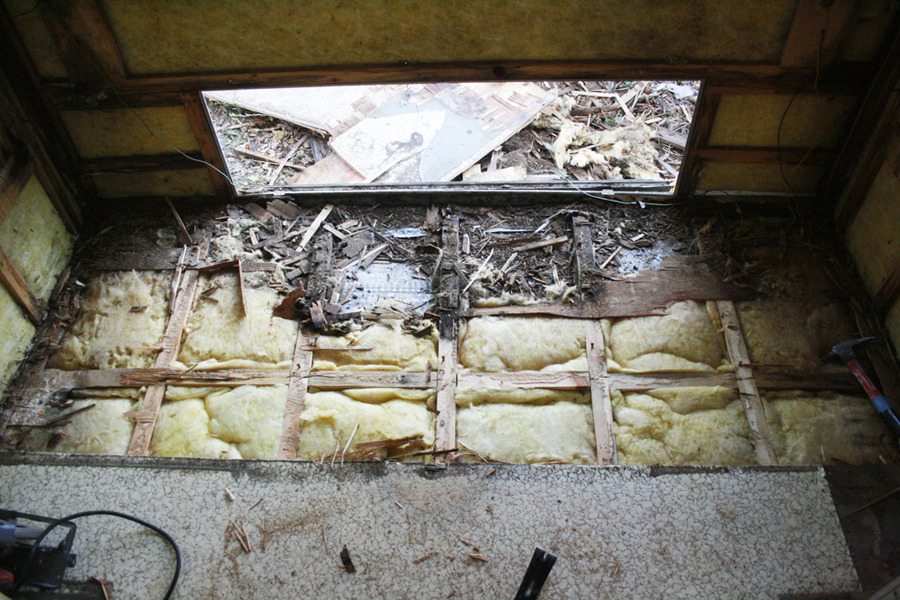
And see what we found?

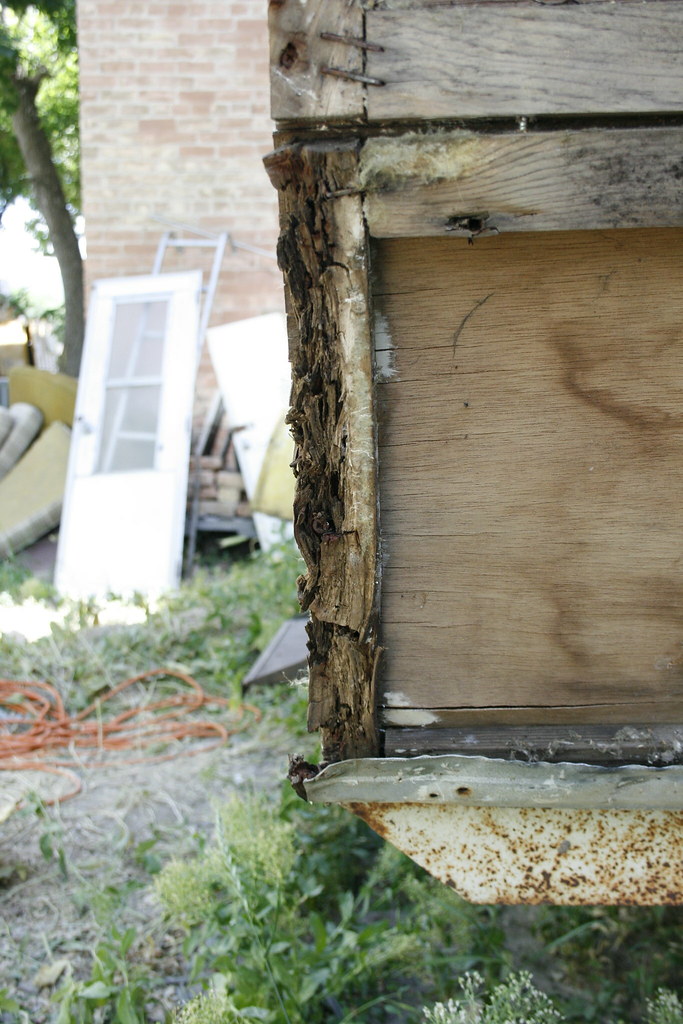
This wood in the above picture rotted because the seal behind the light up near the roof had gotten old and worn away. So this was just from water dripping through the hole the wires for the light ran through. One tiny hole can cause so much damage.
From the inside the walls looked okay, but clearly they were NOT. I'm so glad we checked. How much longer would we have been able to tow the trailer around before the front of it just collapsed? There were enough bad boards in the front wall we decided to replace the whole thing.
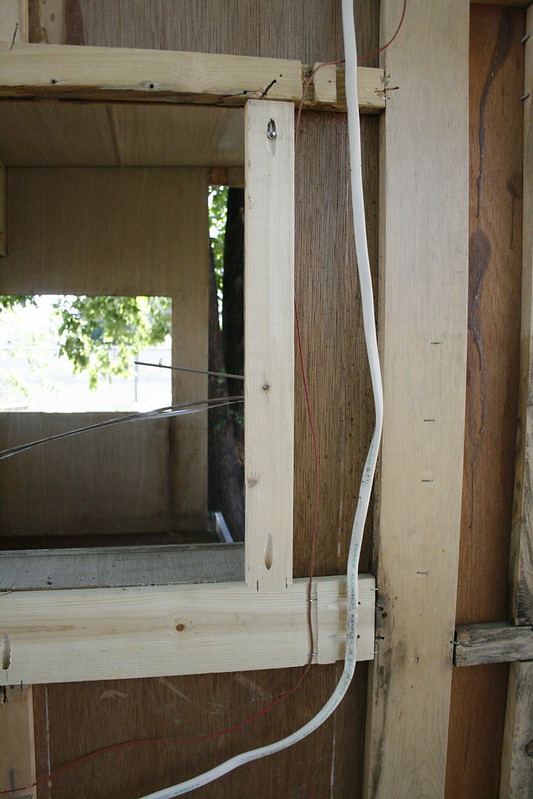
Maybe so many boards are bad, or maybe the interior paneling is so bad that it makes more sense to replace the whole wall. Lucky you, you have that whole wall in front of you to use at a life size pattern of exactly what the wall should look like. If your wood has rotted so bad that you can no longer tell what should go where, then, dang, I don't know how to help you.
Using the exposed wall, you now know what size to cut all your wood. So, Cut it! And hook it together! In the Right Places! Like so!
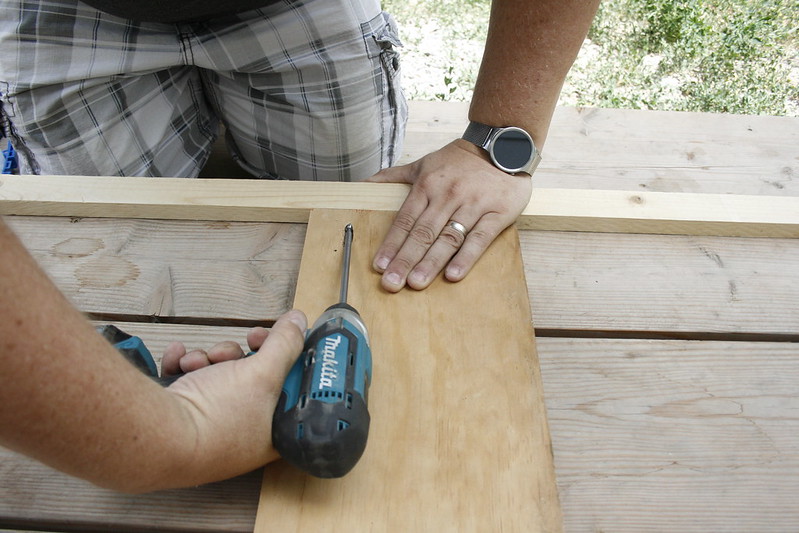
Step 3: Use the Existing Wall as your Template
If just a few boards are rotted and soft, cut new ones and replace them. Our bad boards were held in place with glue, and big staples, but it wasn't too much work to get them out, on account a them being mostly dead.
What follows is a story in pictures representing how this is done:
What follows is a story in pictures representing how this is done:
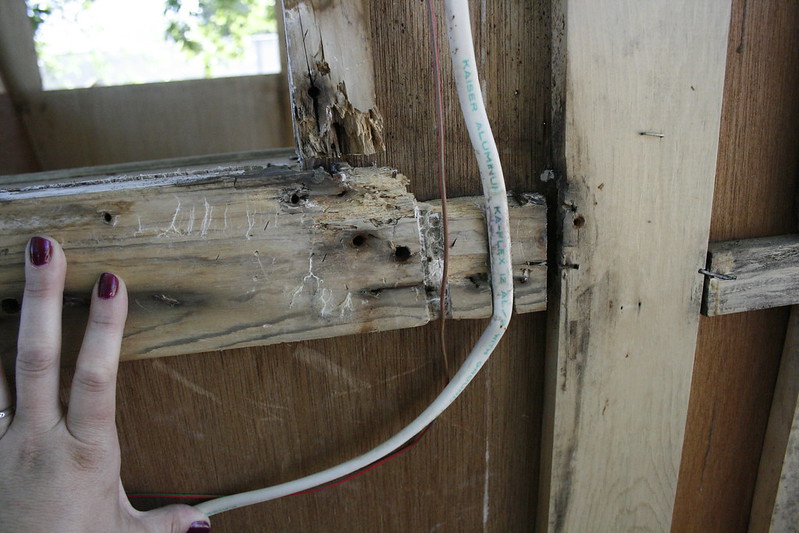
See the ugly, sad piece of wood.
So, so ugly. And also sad.
Happy, new piece of wood! But no! The piece above it is also sad!
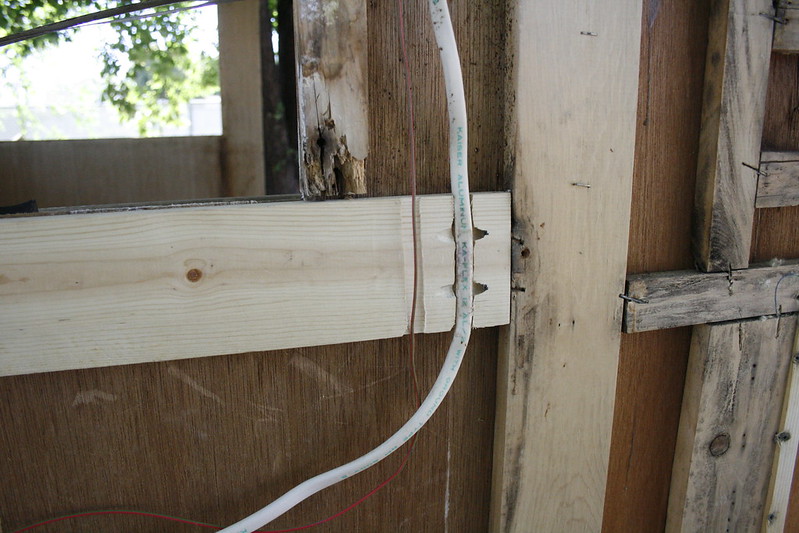
New, happy piece of wood!
Happy Wall!
Ok. so I used words in my picture story. But I clearly made my point, very eloquently: Remove the bad board, cut a new board the same size (or you can measure the space you pulled the bad board out of), put the new board in. High Five your friend for a job well done. Or high five yourself if you have no friend.
Step 4: If you need to rebuild the Whole Wall, get busy.
Maybe so many boards are bad, or maybe the interior paneling is so bad that it makes more sense to replace the whole wall. Lucky you, you have that whole wall in front of you to use at a life size pattern of exactly what the wall should look like. If your wood has rotted so bad that you can no longer tell what should go where, then, dang, I don't know how to help you.
Using the exposed wall, you now know what size to cut all your wood. So, Cut it! And hook it together! In the Right Places! Like so!
If you don't have a method for making those pocket holes like you see above, you can also use braces like these:
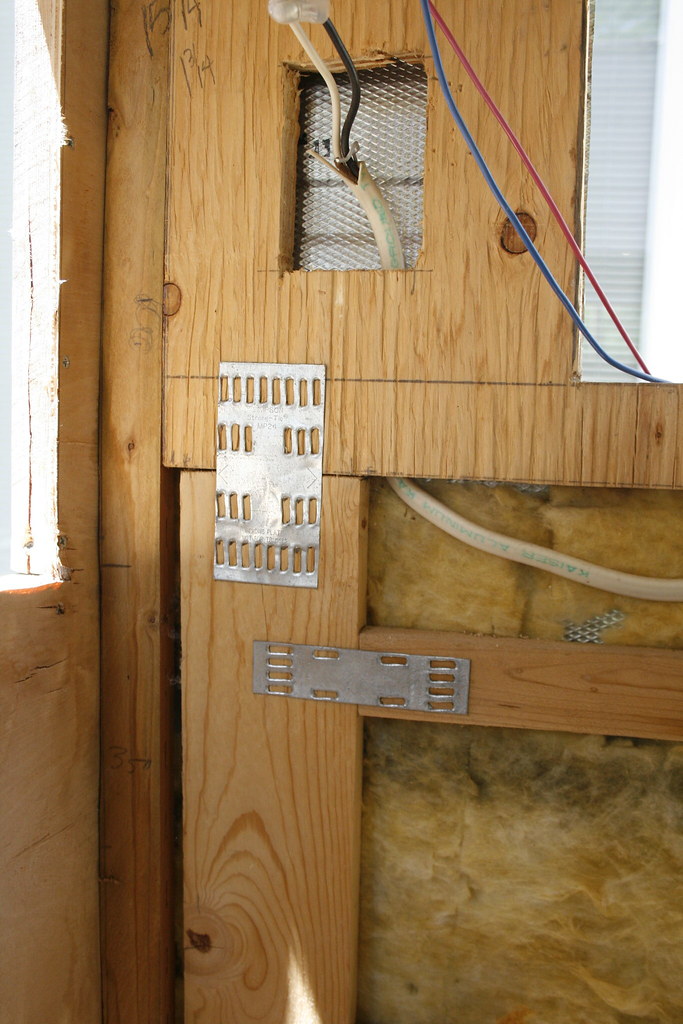
Just remember that they are kind of a pain in the bum. And you might hate me for suggesting them.
Step 5: Attach your interior paneling to the framed wall you just built.
I don't have picture of this. You'll just have to take my word for it that this is a necessary step. We used underlayment, and secured it with staples.
Step 6: Make sure you know exactly where your new wall goes.
If you are using the original siding, you need to make sure your wall is the same as the old one, or your windows and edges won't line up. You could do this by taking pictures of every single joint where one wall meets another. You could make some marks where certain edges are supposed to meet. Or you could do something even smarter that we didn't think of.
Just remember that you have to get that wall back in in the right place, or your holes won't match up and you will be screwed.
Step 7: Pull off the bad wall.
Bad wall! Bad! Take that bad wall down!
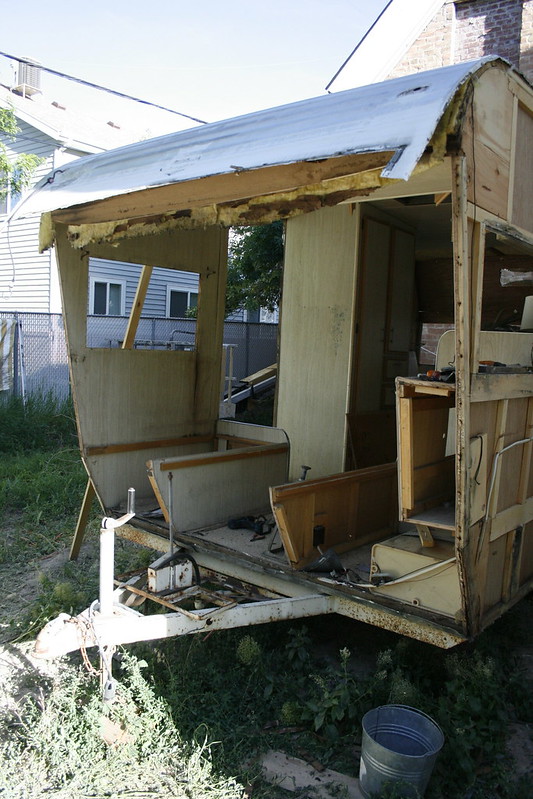
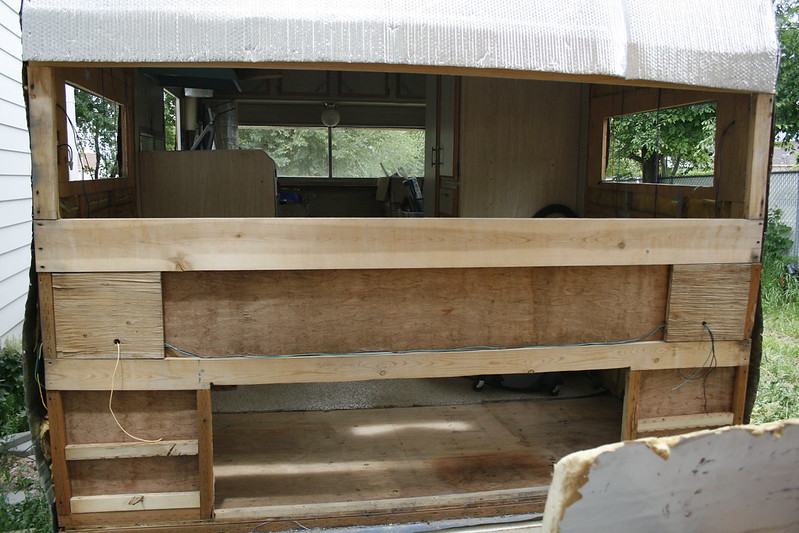
Step 7: Attach the New Wall.
This was a little tricky with only two people. Clamps were our friends.
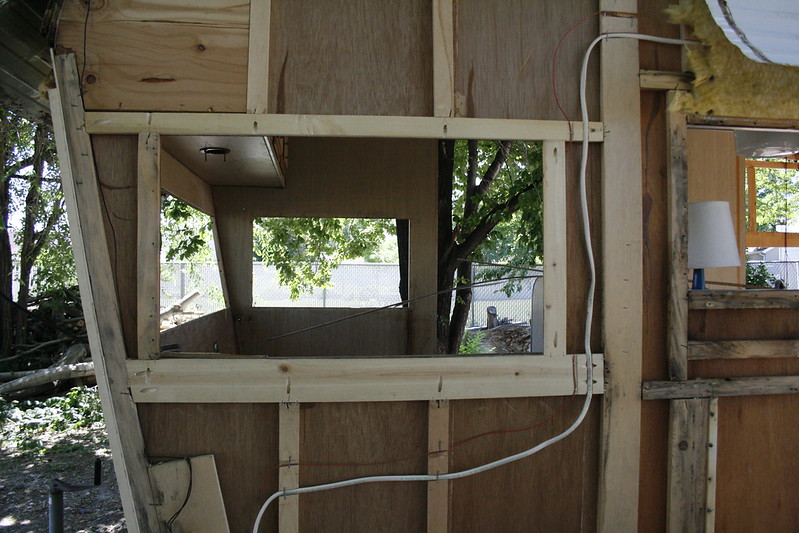
We used screws to attach the front wall to the side walls, but it wasn't until we attached it to the boards that make up those benches you see in the picture above, and to the cabinets you can't see in the picture above, that the wall really became secure.
Keep that in mind as you are rebuilding your trailer. You may be tempted to remove cabinets and shelves and benches to get more space, but every one of those built in pieces of furniture help to strengthen the trailer structurally. So proceed with caution.
And there you have it! New wall! And boy, howdy! is it sturdy! You know, for a trailer.
Things are getting exciting! Until next time, Adieu!
Jun 16, 2017
WHAT WE ACCOMPLISHED SO FAR
Not long after we bought the travel trailer, we moved out of our house so that the renovations could begin. My brother-in-law's parents let us live in their empty house for a few months, and we took our little 1968 Kit Companion with us.
Here is a little of what Richard was able to accomplish in his spare time (and what with the kids, work, and his church calling, spare time is obviously just coming right out of his ears.)
Here is a little of what Richard was able to accomplish in his spare time (and what with the kids, work, and his church calling, spare time is obviously just coming right out of his ears.)
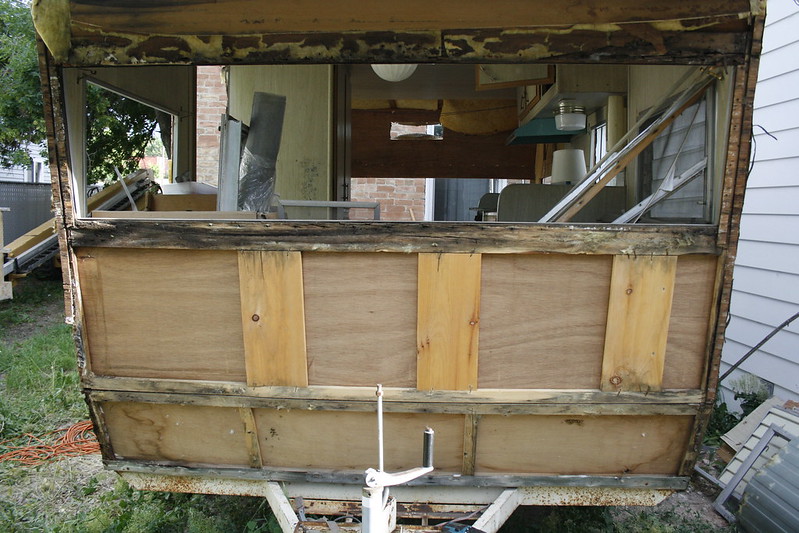
These pictures are pretty self explanatory, right? He replaced some wood. Around the windows he used a solid piece of plywood instead of the hodge podge of stapled together wood that they originally used. We rebuilt the back wall and floor. It is very sturdy now. There is no telling about the rest of the trailer, but this spot, here in the back, will be as sturdy as can be.
Then it was time to move out of that house and go live in my sister's basement. And we left the trailer there. Cuz we had no where else to put it and they said they really didn't care.
When we finally moved back into our house and the remodel was finished, we kept saying to each other, "We should go pick up the travel trailer." But we never did. Cuz life is busy.
It wasn't until they told us they needed the space our trailer was parked in that we got our bums in gear and went and picked it up. And now our 1968 Kit Companion is parked in the back yard where we can work on it any time we want. We've got a family campout planned for the end of July and we're going to try to get it done by then. Can we do it? Who knows? But we are going to try! Tune in next time to find out more on this fascinating story!!
Cranky Windows
I've decided this trailer is called the Kit Companion, because when Knight Rider was out fighting bad guys, and defending truth and justice in his super car, Kit, sometimes he was gone all night long, and needed a place to sleep. Enter the Kit Companion! Every intelligent robot car needs a travel trailer for a friend! It is a theory in progress.
The current window cranks in the trailer are all missing. They look to me like they were cut off with pruning shears. I don't know why anyone would do that, but the marks on them are not consistent with breaking through regular wear and tear.
So I might be jumping the gun, but I bought new window cranks! Most of the ones for sale on Amazon included very few measurements, so I just had to guess. I tried to put one on. I got the screw to the old one out, but the nub still won't come off. So I am stuck. I still don't know if I even got the right cranks, because I can't get the old useless ones off. Woop dee do.
I got them here, because inquiring minds just gotta wanna know.

So whether I can actually use them or not, I still paid for them, and don't really know what to do at this point.
$18.75 including shipping for 10 cranks.
I got them here, because inquiring minds just gotta wanna know.
So whether I can actually use them or not, I still paid for them, and don't really know what to do at this point.
$18.75 including shipping for 10 cranks.
Jun 14, 2017
TO IMPROVE, WE MUST FIRST DESTROY
The most useful bit of information I have for you today is that cleaning things makes them look better.
Exhibit A:
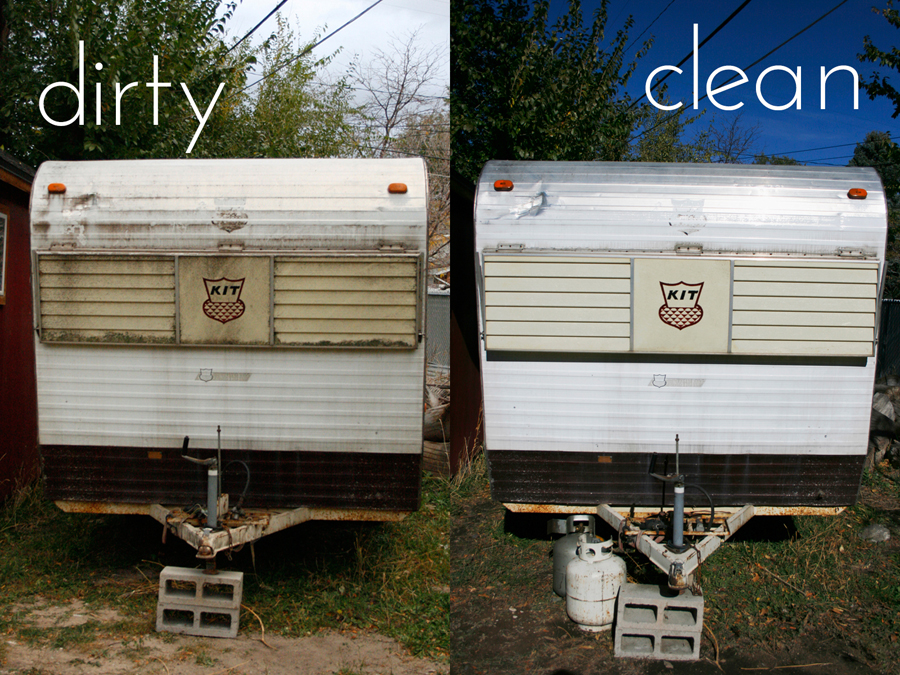
But sometimes when you start fixing things, at first they just look worse.
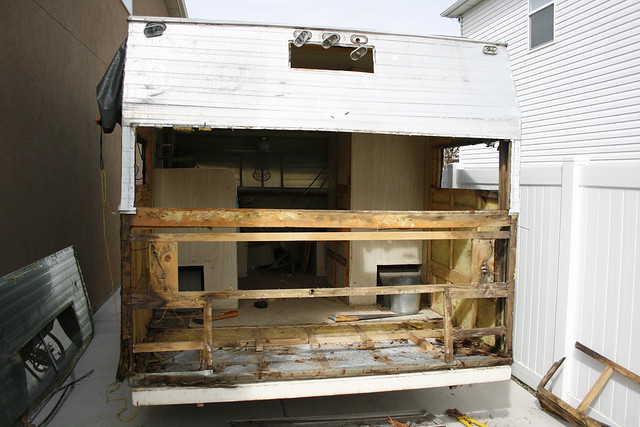
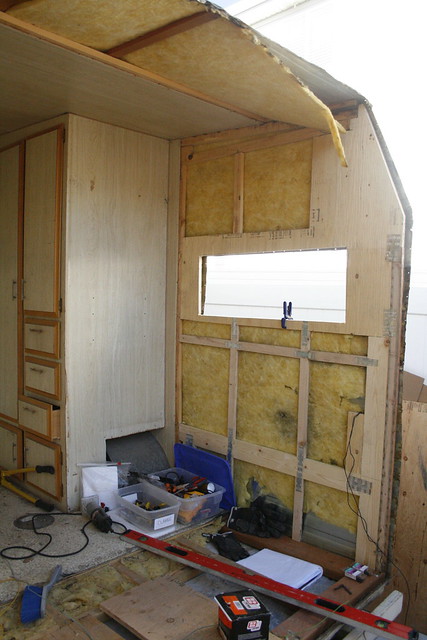
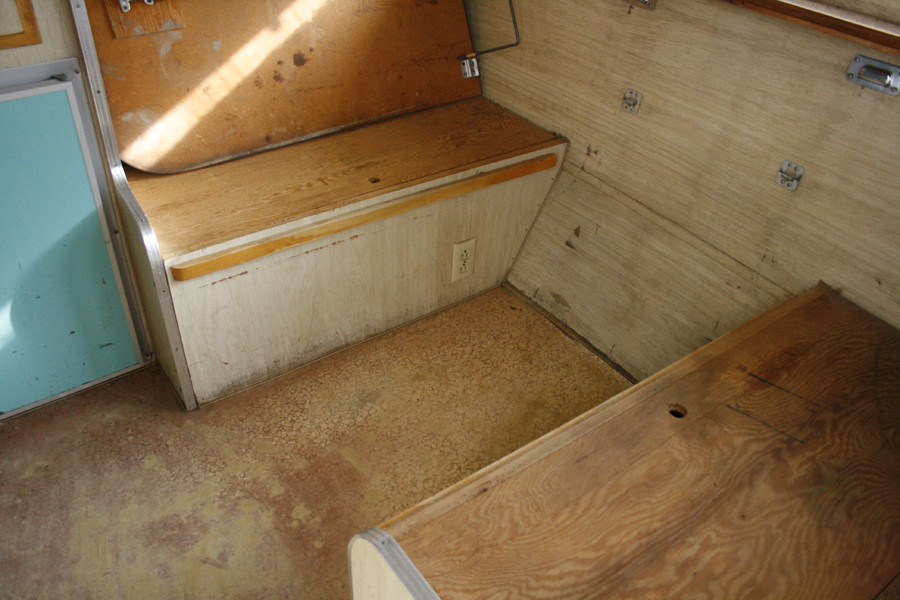
See here, where we pulled out the bunk bed. Pretty..
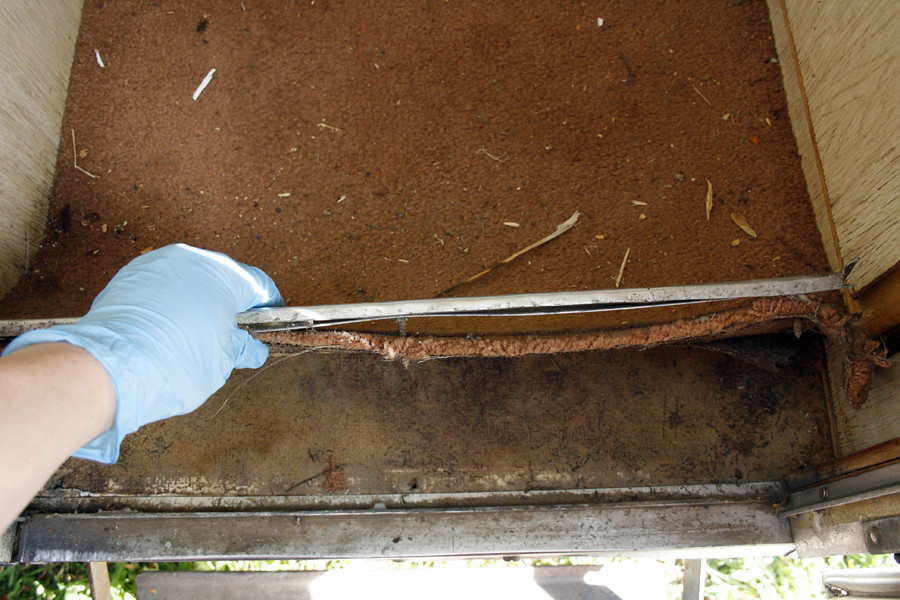
Then we pulled the paneling off the back wall. It was all pretty soft. Richard did most of it with a pry bar in the time it took me to set up my camera.
This is where the majority of the water damage was. Some of the framing came right out with the siding, if that tells you how structurally unsound it was.
Next using a prybar and a hammer, we took out the bench.
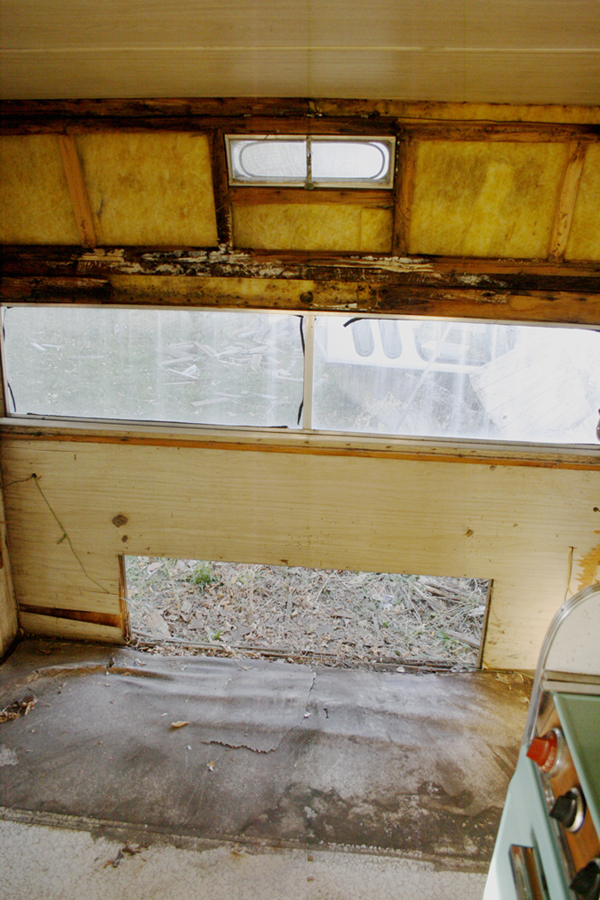
Mmm, boy, just look at that floor. It was all kinds of wiggly.
And please note the wasps nests that were in the wall behind the bench.
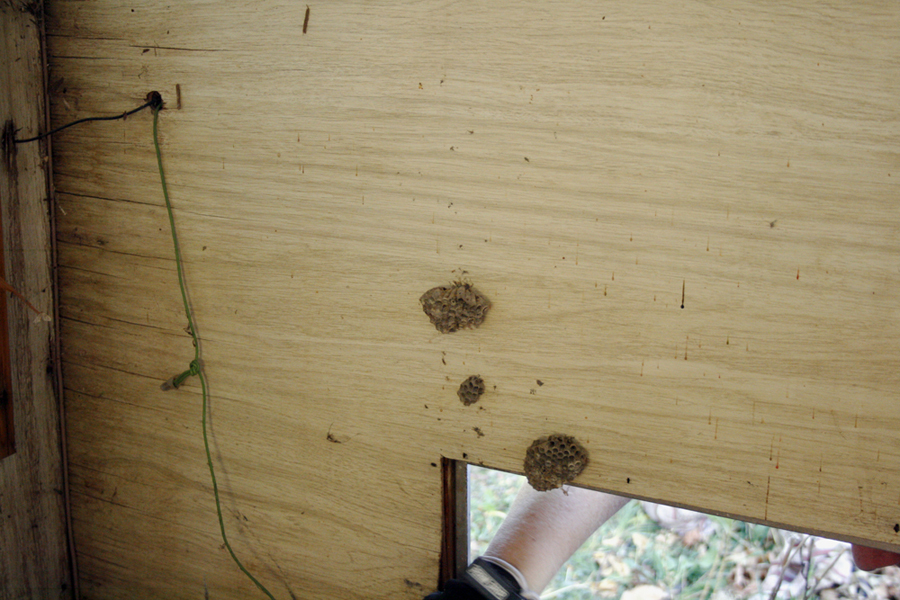
They are industrious little devils.
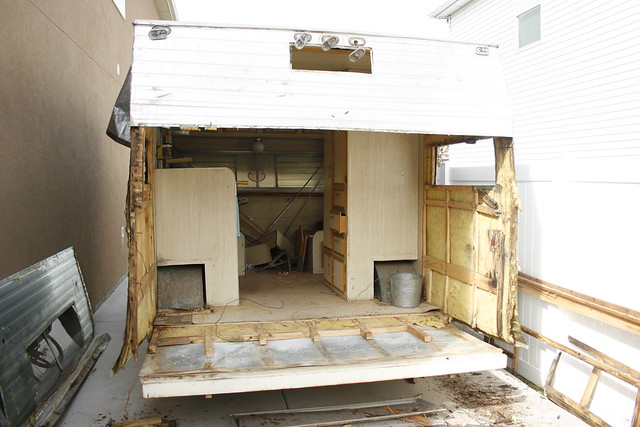
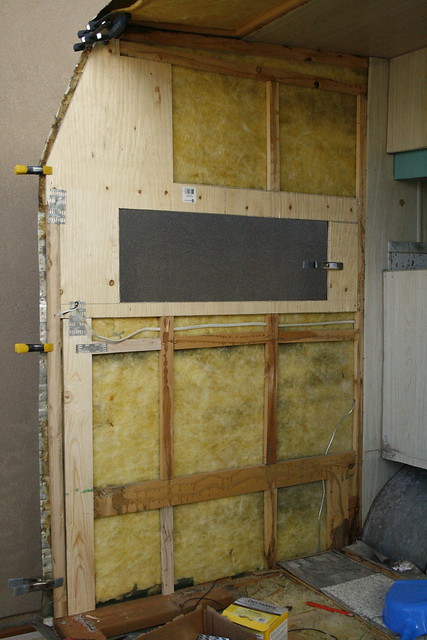
Then Richard took out the paneling on the side walls, just back to the first seam, about 4 feet. He wanted to make sure there wasn't any water damage that we didn't know about.
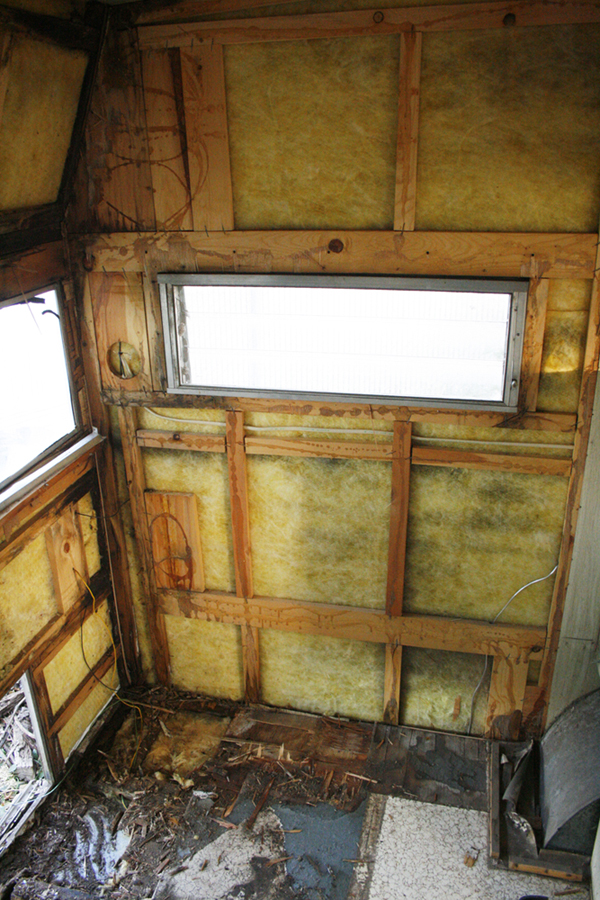
And it mostly looks pretty good. We'll only need to replace a few boards on the left side, and just the corners on the right. We're still figuring out the best way to do that.
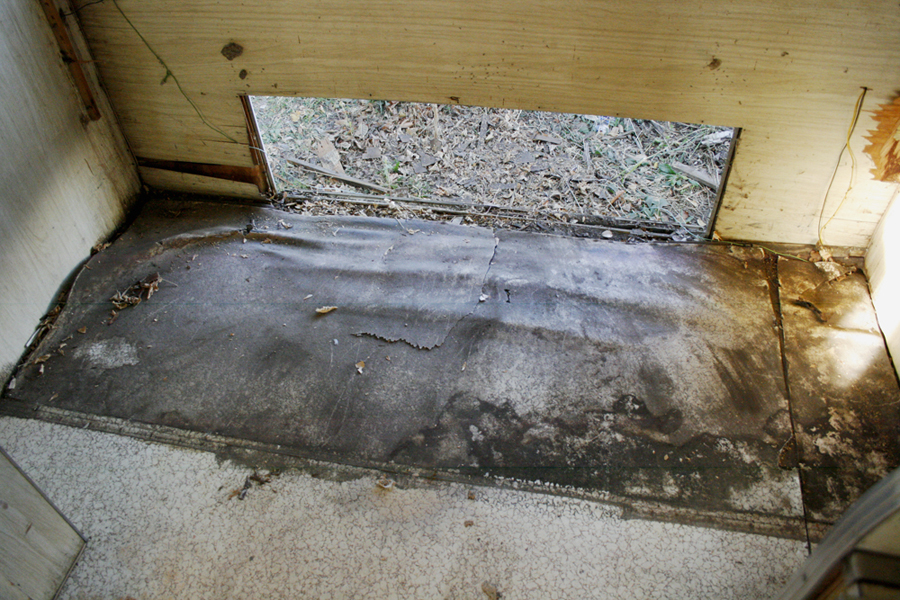
Lastly we dealt with the floor.
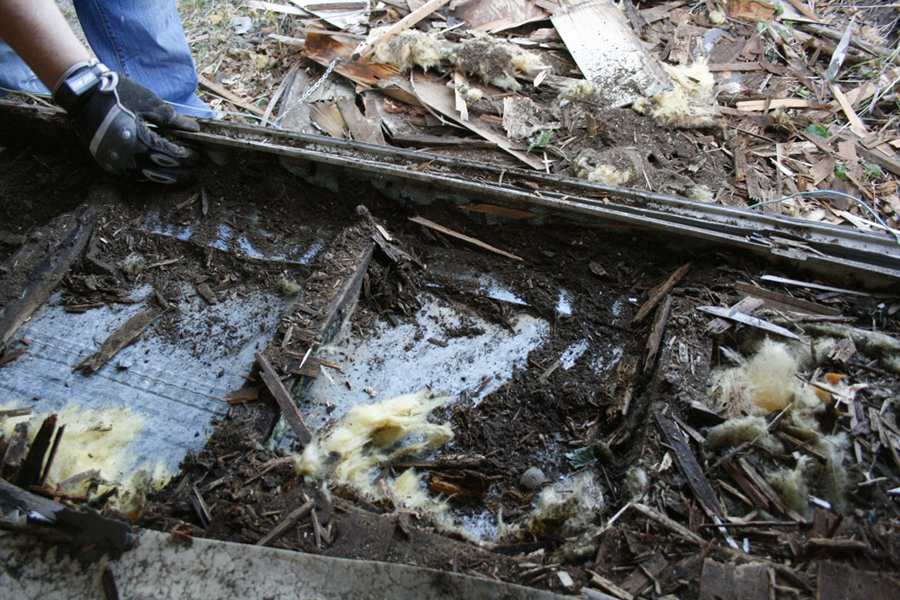
Lots of it came up really easy. The wood had basically turned to mulch at this point
I crumbled that wood with my own hands!
Once we had pulled up what we could with the pry bars, Richard used a rotary saw set to 1/2" and cut through the floor right at the point where the front of the bench sat. Then we pulled all that flooring and wood out too.
It wasn't as bad underneath as we thought it was going to be. Richard is a very Better-Safe-Than-Sorry guy, whereas I am more of a Better-Lazy-Than-Having-To-Do-Any-Extra-Work, kind of a girl, but we did it his way. And now we know what we're dealing with. We can pull out the damaged wood and replace it with new using something more secure than 40 year old staples.
It was just about dark outside at this point, so we covered the old girl with a tarp. I considered buying one of those fancy pop up canopies, but they are about $150.00. So we bought a big tarp and some nifty little bungee cords and rope to hold it down for $53.52. And if some day we don't need the tarp to cover the trailer anymore, we can use it to line the back of our pickup and make another mobile swimming pool. That is spending wisely.
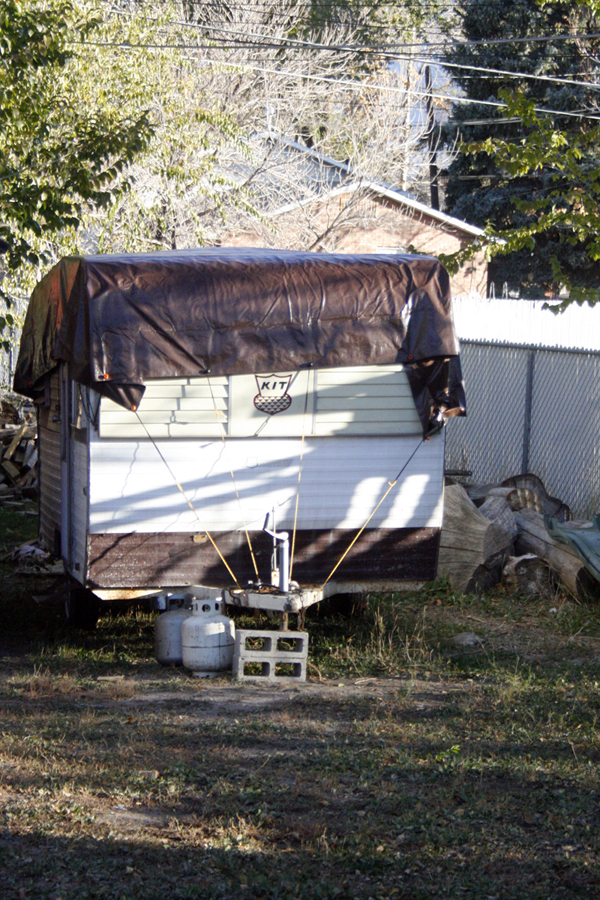
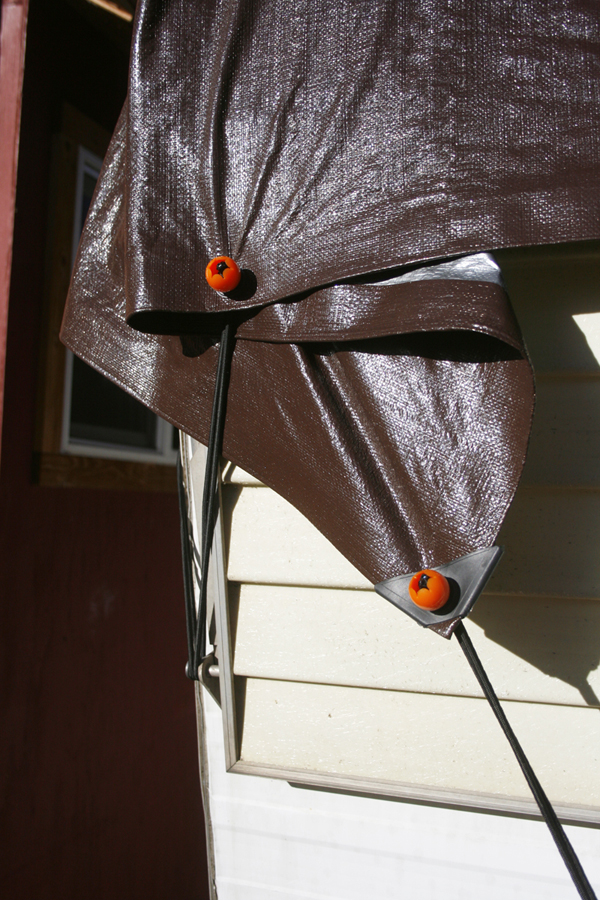
Exhibit A:
But sometimes when you start fixing things, at first they just look worse.
See here, where we pulled out the bunk bed. Pretty..
Then we pulled the paneling off the back wall. It was all pretty soft. Richard did most of it with a pry bar in the time it took me to set up my camera.
This is where the majority of the water damage was. Some of the framing came right out with the siding, if that tells you how structurally unsound it was.
Next using a prybar and a hammer, we took out the bench.
Mmm, boy, just look at that floor. It was all kinds of wiggly.
And please note the wasps nests that were in the wall behind the bench.
They are industrious little devils.
Then Richard took out the paneling on the side walls, just back to the first seam, about 4 feet. He wanted to make sure there wasn't any water damage that we didn't know about.
And it mostly looks pretty good. We'll only need to replace a few boards on the left side, and just the corners on the right. We're still figuring out the best way to do that.
Lastly we dealt with the floor.
Lots of it came up really easy. The wood had basically turned to mulch at this point
I crumbled that wood with my own hands!
Once we had pulled up what we could with the pry bars, Richard used a rotary saw set to 1/2" and cut through the floor right at the point where the front of the bench sat. Then we pulled all that flooring and wood out too.
It wasn't as bad underneath as we thought it was going to be. Richard is a very Better-Safe-Than-Sorry guy, whereas I am more of a Better-Lazy-Than-Having-To-Do-Any-Extra-Work, kind of a girl, but we did it his way. And now we know what we're dealing with. We can pull out the damaged wood and replace it with new using something more secure than 40 year old staples.
It was just about dark outside at this point, so we covered the old girl with a tarp. I considered buying one of those fancy pop up canopies, but they are about $150.00. So we bought a big tarp and some nifty little bungee cords and rope to hold it down for $53.52. And if some day we don't need the tarp to cover the trailer anymore, we can use it to line the back of our pickup and make another mobile swimming pool. That is spending wisely.
Jun 12, 2017
A Farewell to Fibers
First thing I did in this old trailer was pull the cushions out. We want to keep them until we have the replacements, but I didn't want them in there anymore, so I put them in the shed. Then I went to work on the carpet. I figured this was the spot to start in, right by the door.
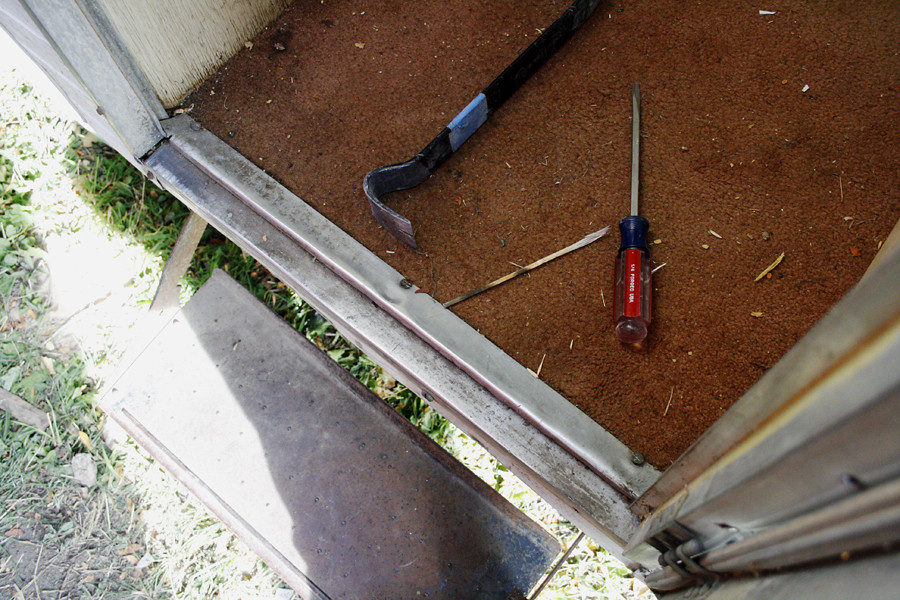
I tried taking the screws out, but they just turned and turned without ever coming out so I just pried the whole thing up. Pop!
The rest of the carpet was just held in place with rusty old staples every six inches or so along the edge and those popped out with almost no resistance. I just grabbed the carpet and pulled.
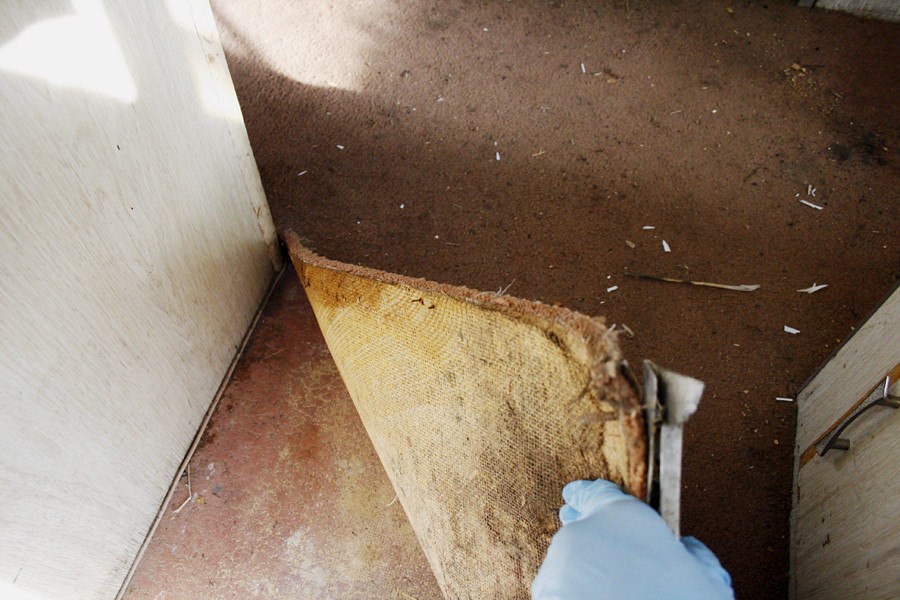
It only took me about 10 minutes all together. Then I rolled that dirty carpet up and threw it away! Success!
It already smells so much better in there. Not bad for spending about as much time as it takes me to go to the bathroom.
I'm a slow pooper.
I tried taking the screws out, but they just turned and turned without ever coming out so I just pried the whole thing up. Pop!
The rest of the carpet was just held in place with rusty old staples every six inches or so along the edge and those popped out with almost no resistance. I just grabbed the carpet and pulled.
It only took me about 10 minutes all together. Then I rolled that dirty carpet up and threw it away! Success!
It already smells so much better in there. Not bad for spending about as much time as it takes me to go to the bathroom.
I'm a slow pooper.
Jun 10, 2017
Tiny Travel Trailer Time Warp
In 2014 we were about a month away from tearing off our kitchen and having a new addition built on to our house. We were trying to get our Family Room drywalled and completed so that we would have somewhere to put all our stuff during the remodel. Halloween was a couple of days away and I still needed to make the Fez for Harrison's Doctor Who costume and make some adjustments to Colin's Harry Potter robe. Obviously we were bored out of our minds, so we bought a Vintage Travel Trailer to restore.
I guess Richard and I are both the same kind of crazy, cuz we both thought it seemed like a good idea. I fear for our future, I really do.
I'd wanted a tiny travel trailer forever. Or at least ever since I saw a picture of one on the internets 5 or 6 years ago, which is basically the same as forever. I used to look at used ones on KSL every once in a while and dream. But then our builder told us we should find somewhere else to stay while they worked on our house. I looked at some places for rent locally, and most of them were over $1000 a month and I suddenly realized if we got a trailer we could stay in that and not have to pay rent at all. It was brilliant. Richard was totally on board.
Around the time the reality of sleeping in a trailer during winter was finally dawning on us Charlie told us we could stay at his parents house for $100 a month which sounded MUCH nicer. But by then the trailer idea had gotten hold and wasn't about to let go.
We found a few we really liked. I fell in love with one for sale in Idaho for around $2000. Then we fell in love with one in Southern Utah for about $1400. We knew it was probably a bad idea to spend that much and drive that far, but then on 10/25/14, we found one for sale 5 miles away for $500 and we both just thought, "Why Not?" It was in better shape than we could have hoped for the price and we are crazy people and we bought it.
Then we parked it. We had time to work on it a little bit, but mostly our house remodel took up all the free time we had. BUT NOW, almost 3 years later, the travel trailer is back and we are ready to work on it again. I am a bit nervous showing it to you before we finish, because, WHAT IF WE DON'T? Hopefully, knowing that both of you are watching and waiting will motivate us to keep working on it even when we run out of steam.
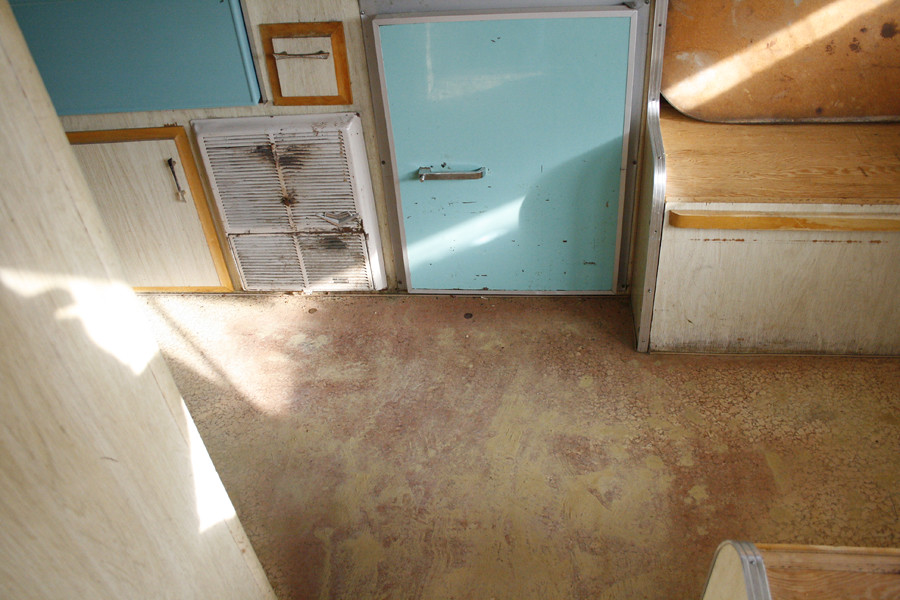
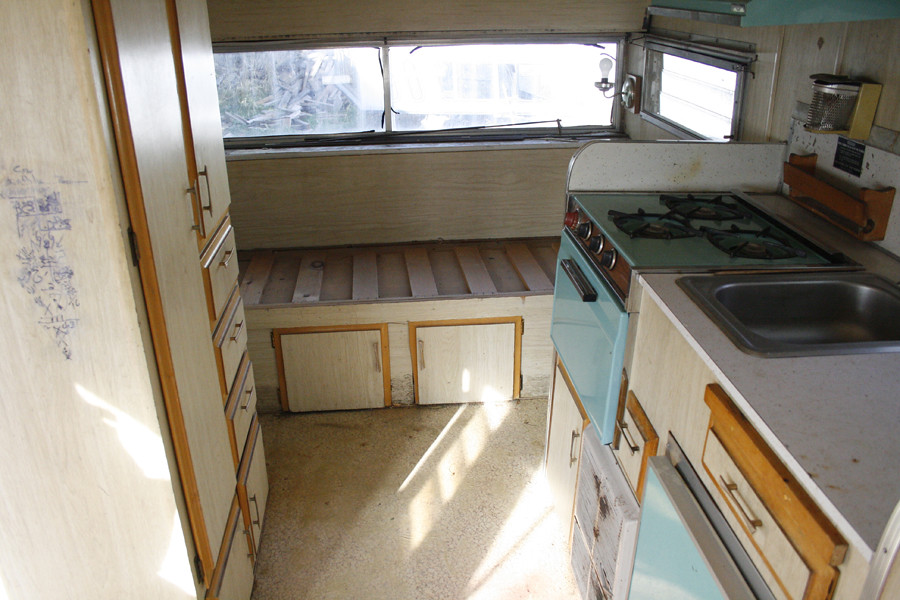
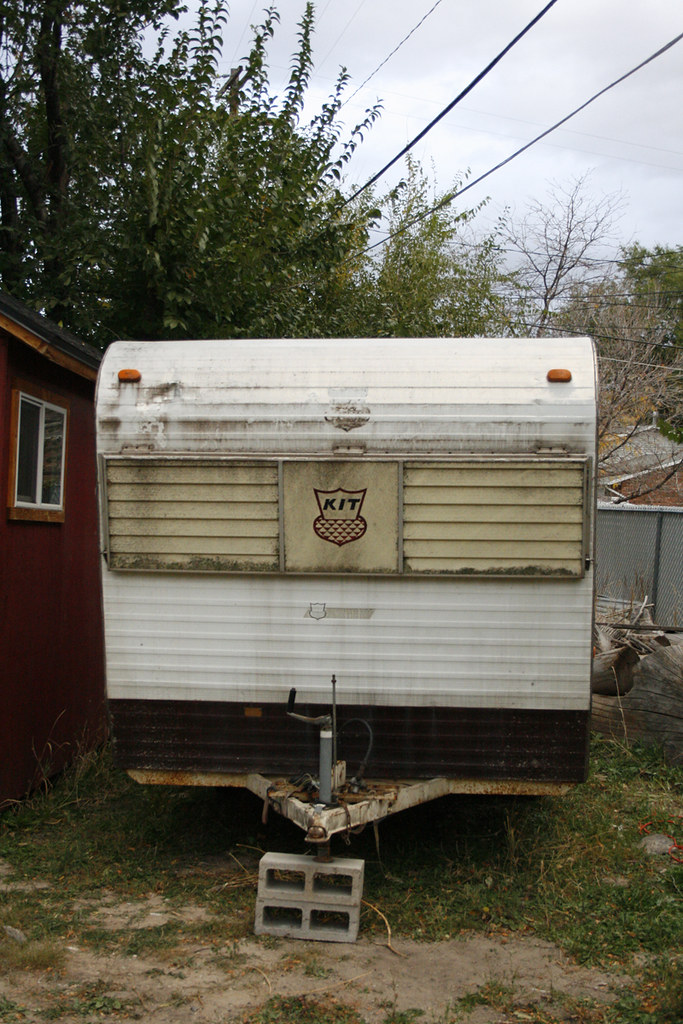
So, here she is, the 1968 Kit Companion
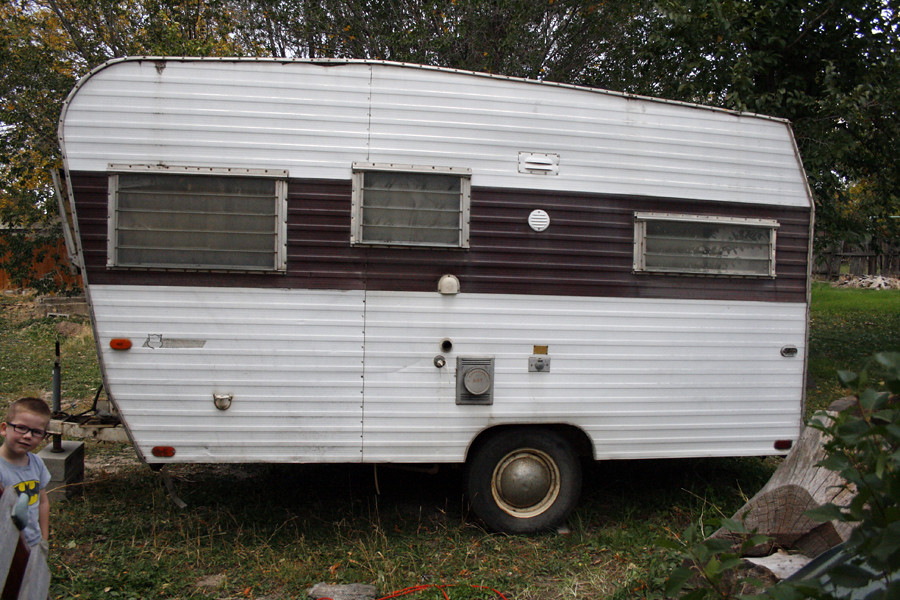
She is 16' long, I think? I couldn't take a picture of the other side at the time. There was a shed in the way. Sometimes a person's back yard is more like a junk yard, and that is okay
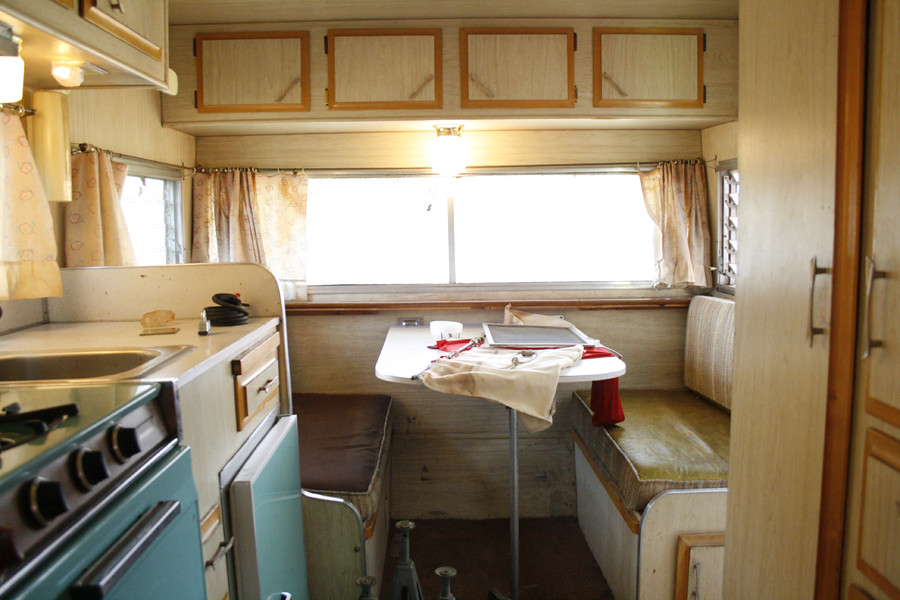
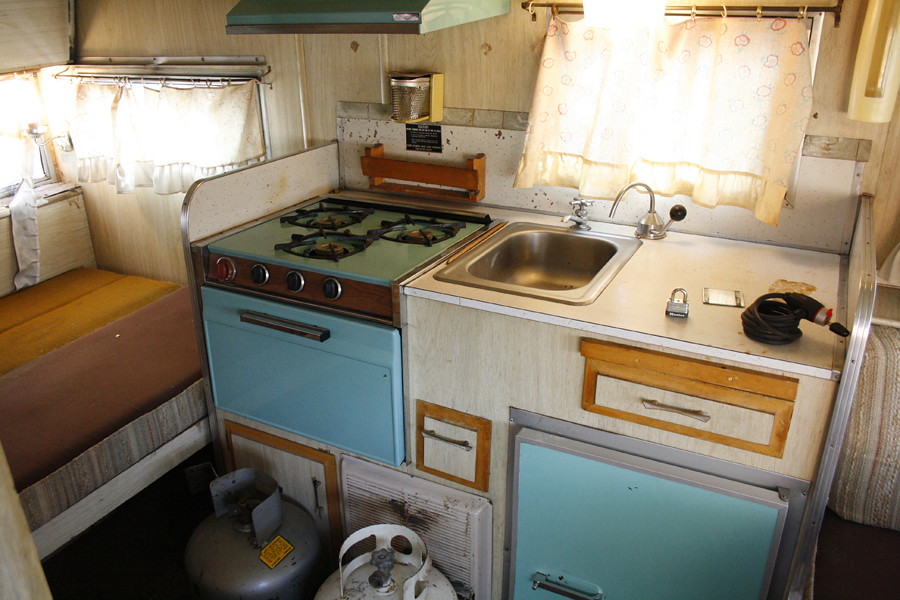
Look at these adorable appliances. How could I resist?
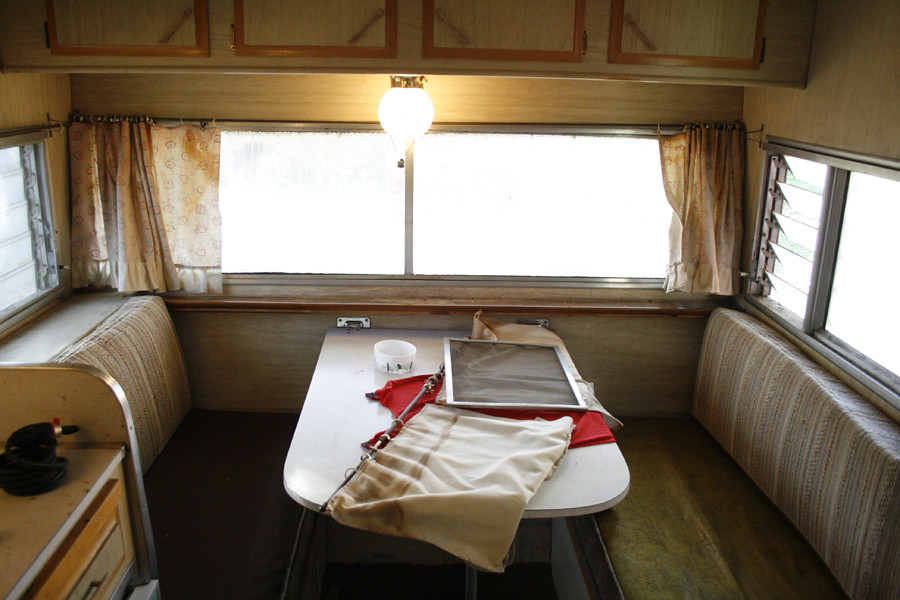
The guy we bought it from said the curtains could probably use a good washing. I was thinking a good burning would be more like it. Those curtains ended up in the trash almost as soon as we got home. I don't think any curtains were meant to last 46 years.
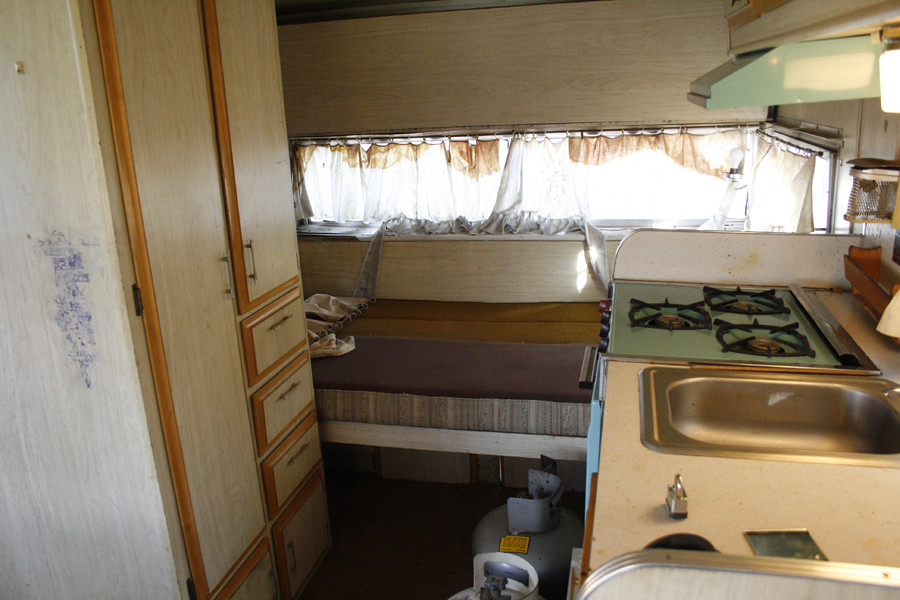
There is a bunk bed that folds down above that bench in the back. Behind it there is some water damage in the wall. They said they had some squatters living in the trailer and they left the tiny widow above the bunk bed open. So that is a fun little piece of history to know.
But look at this ceiling! 49 years old and that ceiling looks pristine. The perfect ceiling sealed the deal for us, even with the water damage in the back.
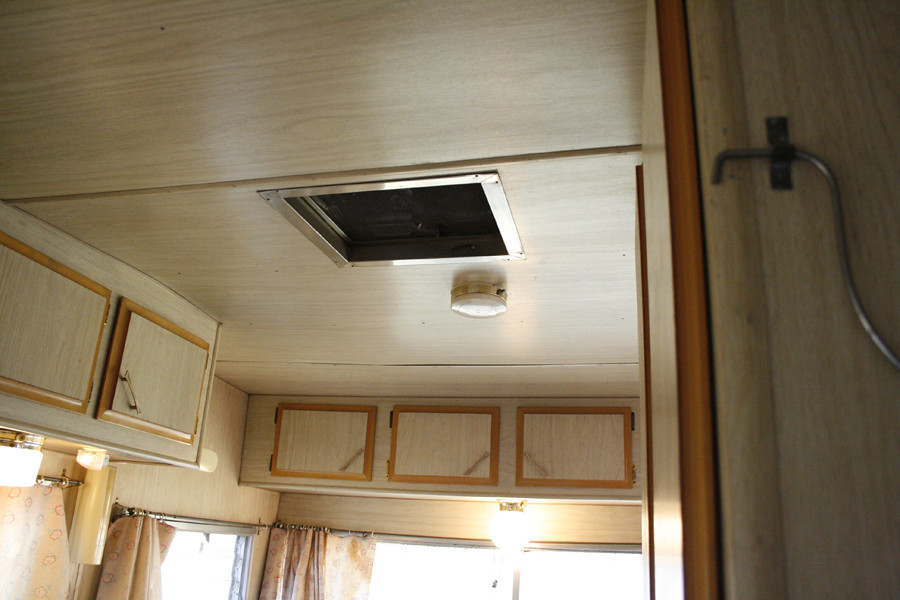
HOWEVER, there is a hatch in the back that we couldn't look at before we bought the trailer because it was backed up to a ratty old couch. Look what we found in the hatch when we got home?
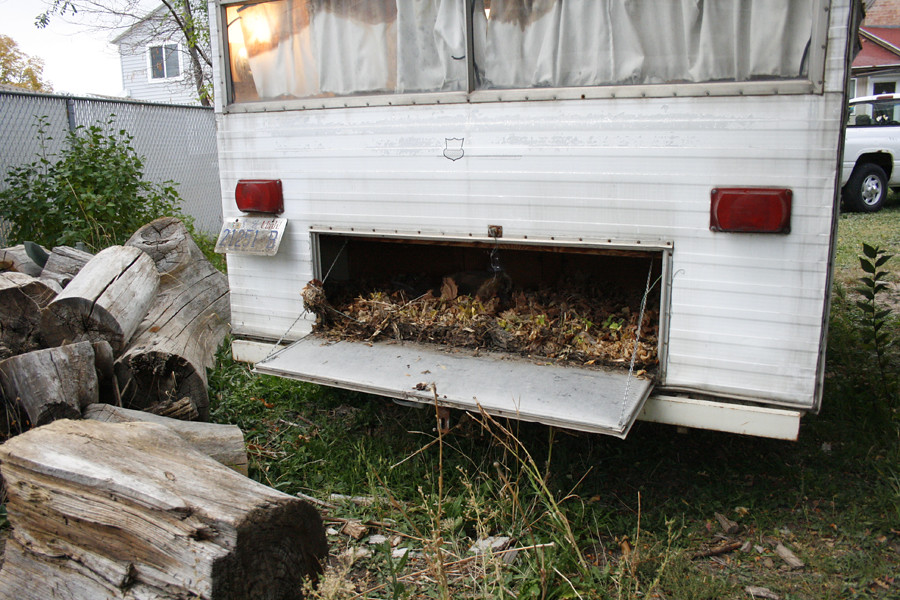
Uh, not a great sign. All that wood is rotted. I don't know if we would have bought it if we knew about this. I doubt the owners knew about it. So it isn't like they were trying to pull a fast one on us. But we would have at least asked them to drop the price a couple hundred dollars had we known.
And that is all I have for you. I am SO, SO excited to finish up the project. We camp a LOT over here. And packing up and unpacking the stuff, setting up and taking down the tent, etc, just lose their magic a little every time we do it. Being able to hop in the Travel Trailer and take off at a moment's notice will change everything! I can't wait!
Total Cost So Far: $500.00
I guess Richard and I are both the same kind of crazy, cuz we both thought it seemed like a good idea. I fear for our future, I really do.
I'd wanted a tiny travel trailer forever. Or at least ever since I saw a picture of one on the internets 5 or 6 years ago, which is basically the same as forever. I used to look at used ones on KSL every once in a while and dream. But then our builder told us we should find somewhere else to stay while they worked on our house. I looked at some places for rent locally, and most of them were over $1000 a month and I suddenly realized if we got a trailer we could stay in that and not have to pay rent at all. It was brilliant. Richard was totally on board.
Around the time the reality of sleeping in a trailer during winter was finally dawning on us Charlie told us we could stay at his parents house for $100 a month which sounded MUCH nicer. But by then the trailer idea had gotten hold and wasn't about to let go.
We found a few we really liked. I fell in love with one for sale in Idaho for around $2000. Then we fell in love with one in Southern Utah for about $1400. We knew it was probably a bad idea to spend that much and drive that far, but then on 10/25/14, we found one for sale 5 miles away for $500 and we both just thought, "Why Not?" It was in better shape than we could have hoped for the price and we are crazy people and we bought it.
Then we parked it. We had time to work on it a little bit, but mostly our house remodel took up all the free time we had. BUT NOW, almost 3 years later, the travel trailer is back and we are ready to work on it again. I am a bit nervous showing it to you before we finish, because, WHAT IF WE DON'T? Hopefully, knowing that both of you are watching and waiting will motivate us to keep working on it even when we run out of steam.
So, here she is, the 1968 Kit Companion
She is 16' long, I think? I couldn't take a picture of the other side at the time. There was a shed in the way. Sometimes a person's back yard is more like a junk yard, and that is okay
Look at these adorable appliances. How could I resist?
The guy we bought it from said the curtains could probably use a good washing. I was thinking a good burning would be more like it. Those curtains ended up in the trash almost as soon as we got home. I don't think any curtains were meant to last 46 years.
There is a bunk bed that folds down above that bench in the back. Behind it there is some water damage in the wall. They said they had some squatters living in the trailer and they left the tiny widow above the bunk bed open. So that is a fun little piece of history to know.
But look at this ceiling! 49 years old and that ceiling looks pristine. The perfect ceiling sealed the deal for us, even with the water damage in the back.
HOWEVER, there is a hatch in the back that we couldn't look at before we bought the trailer because it was backed up to a ratty old couch. Look what we found in the hatch when we got home?
Uh, not a great sign. All that wood is rotted. I don't know if we would have bought it if we knew about this. I doubt the owners knew about it. So it isn't like they were trying to pull a fast one on us. But we would have at least asked them to drop the price a couple hundred dollars had we known.
And that is all I have for you. I am SO, SO excited to finish up the project. We camp a LOT over here. And packing up and unpacking the stuff, setting up and taking down the tent, etc, just lose their magic a little every time we do it. Being able to hop in the Travel Trailer and take off at a moment's notice will change everything! I can't wait!
Total Cost So Far: $500.00
Jun 9, 2017
MORE WALL TRASH
Here is more stuff I stuck on my wall! The carpet worked better on the floor though, so that is where we put it.
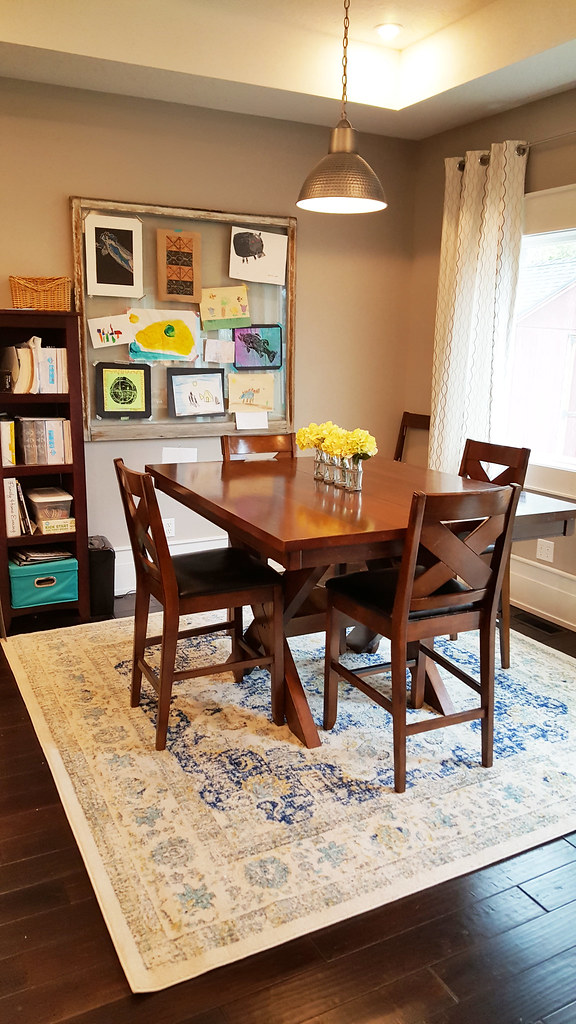
It is very echoey in this large room, and I'm just gonna keep putting carpets on the floor until it gets better because I don't know what else to do.
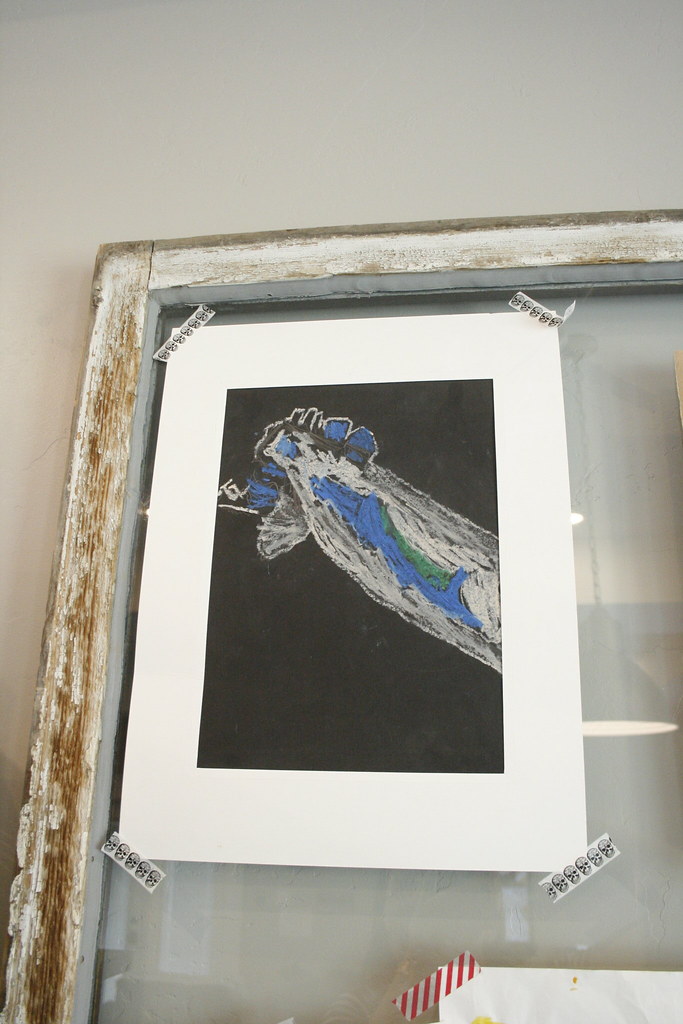
Behind the table, on the wall, we hung up the old window that came out of our front room. And on it hangs great works of art made by my children.
Like this one:
This picture also shows how very old and worn this wood is after being exposed to the elements for 100 years.
So, you know. words. thoughts. etc.
Jun 7, 2017
BATHROOM ART
Behold, the power of FONTS!
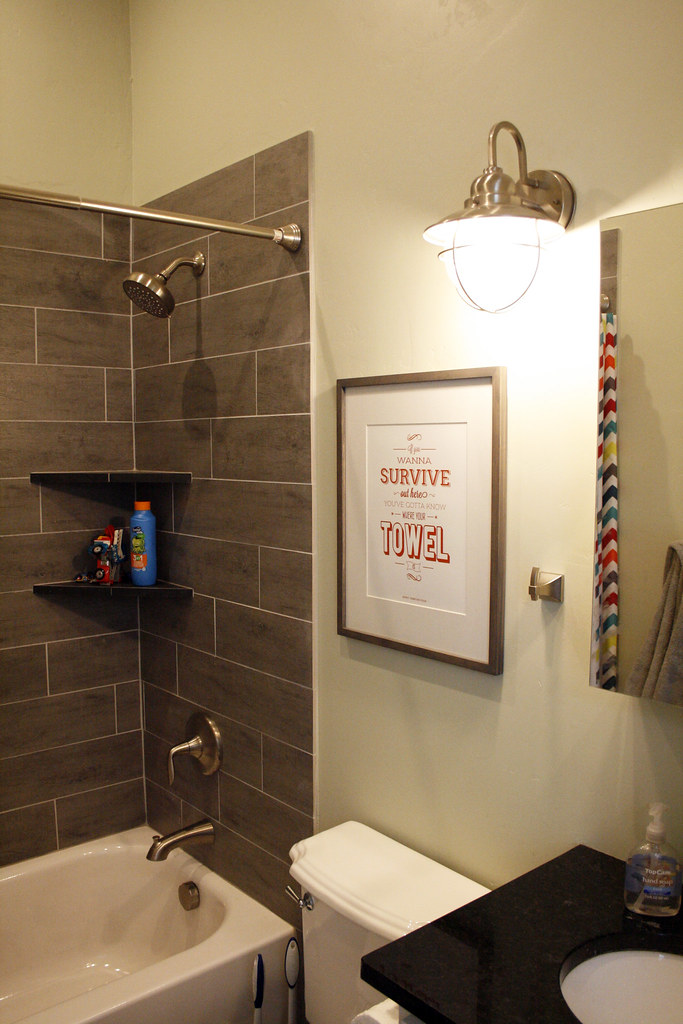
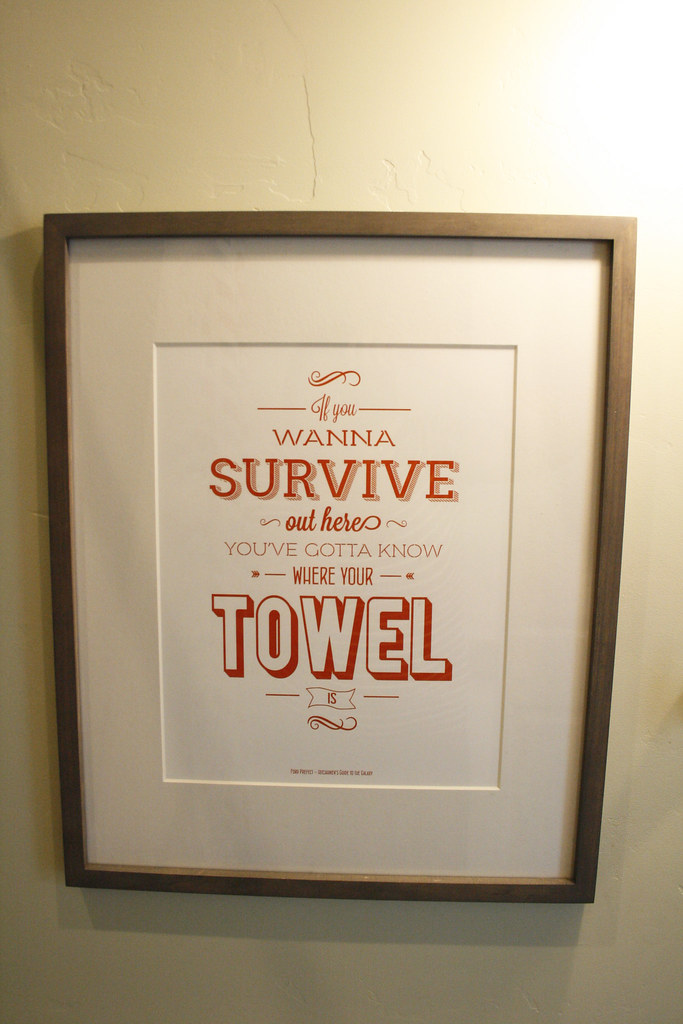
With the power of fonts, you can make a thing (you can even straight up remake a thing you saw online) and then print it at your local print shop for $3.00 and kablooie! You've got art on your bathroom wall!
Having this right outside the shower seems so incredibly fitting to me, I'm surprised everyone doesn't have the same thing on their bathroom wall.
I should point out that this quote is from Hitchhikers Guide to the Galaxy the MOVIE, not the book.

Subscribe to:
Posts (Atom)
