Mar 22, 2016
PROJECT DARKSTONE: Day 414
I'm not dead yet. I'm still kicking around over here. And we will not be able to close the book on Project Darkstone until the city has done their final inspection and declared our house COMPLETED.
Not much has happened since we last checked in with you, so here is what we have:
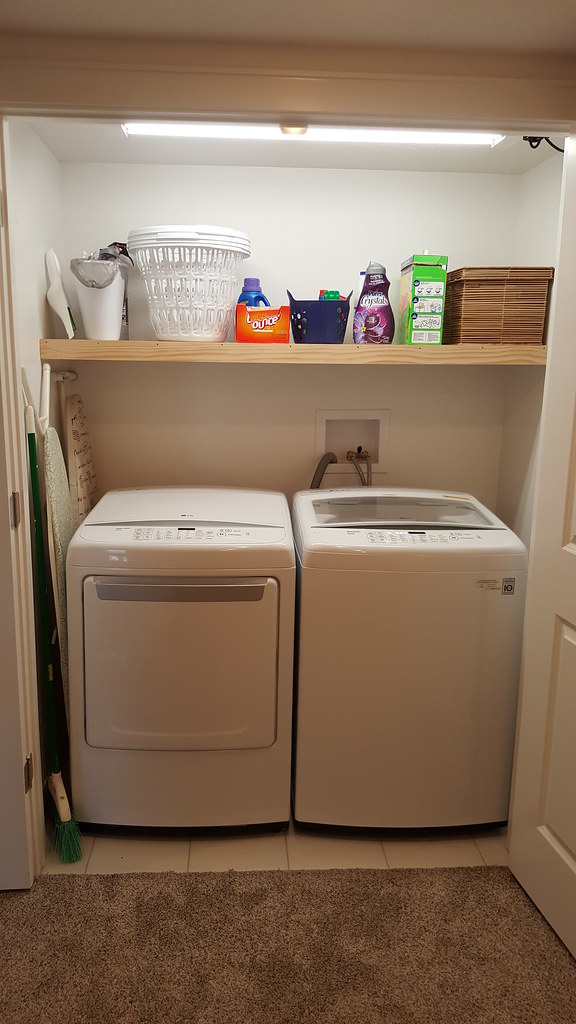
A New Shelf in the Laundry Room
It started like this.
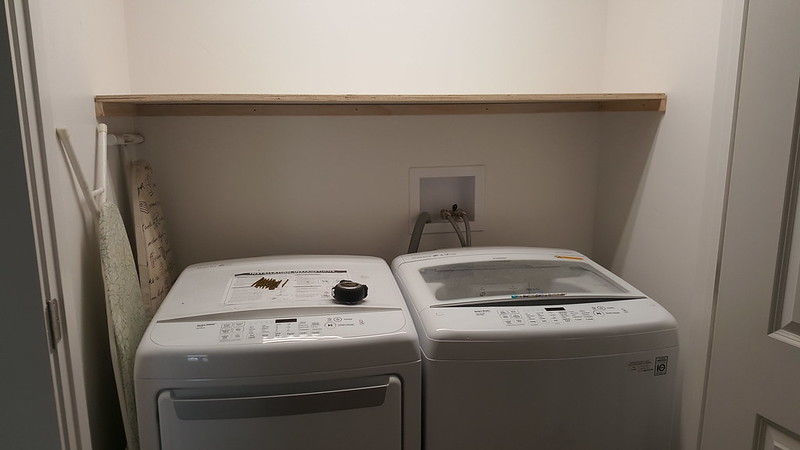
Purely functional. Shelves like these are really easy to build. All I had to do was find the studs, choose my height and then make sure I screwed the support boards up level before screwing the plywood on top.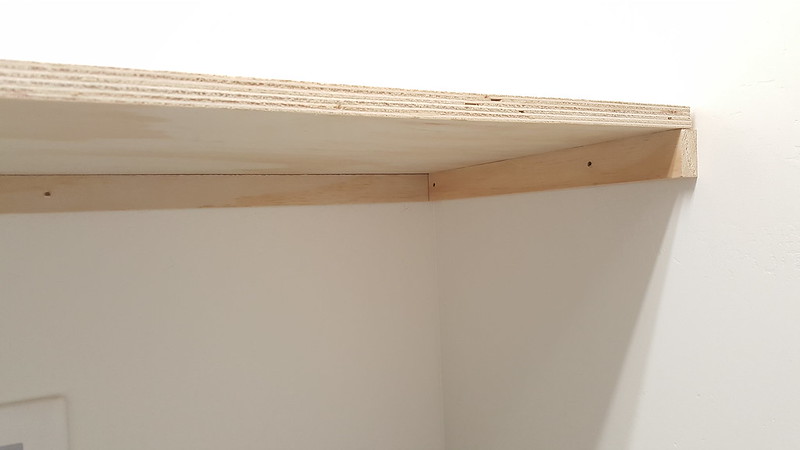
And then all it took was a board screwed to the front to give it a more finished look.
Heck, I may even go so far as to fill the screw holes and then paint or stain it. I just might!
Moving on to the master bathroom:
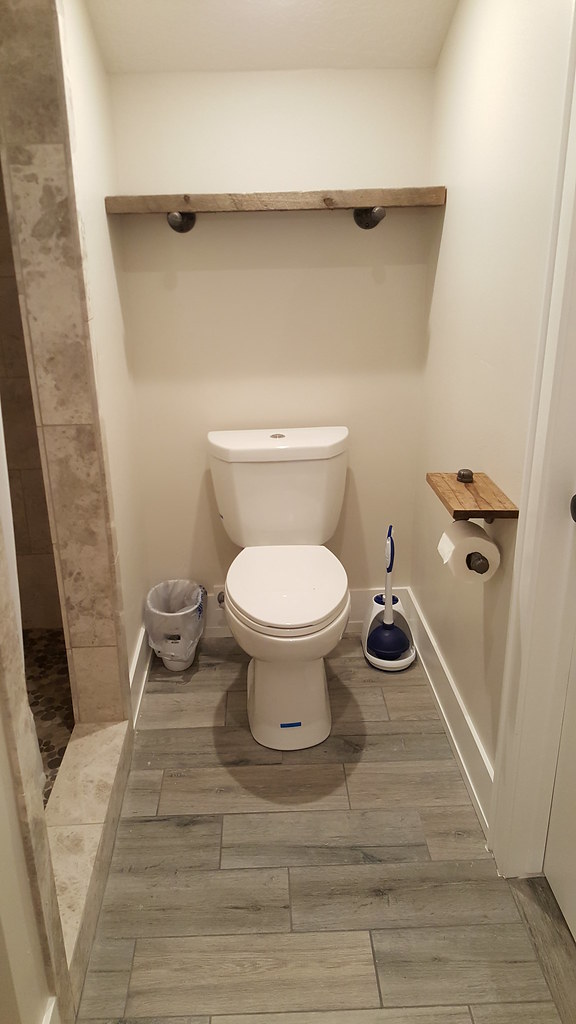
Shelves like these are all over pinterest and I had to get in on the action.
All it takes is some black pipe, a cap and a flange screwed together to make your supports, screwed into the wall using drywall anchors.
Then I got a board from my back yard, cut it to length, and set it on top. I think this wood was one of the original floor joists from my house.
I didn't sand it, or stain it or anything. That is the fun of reclaimed wood. Its fine just as it is.
I also made this using black pipe:
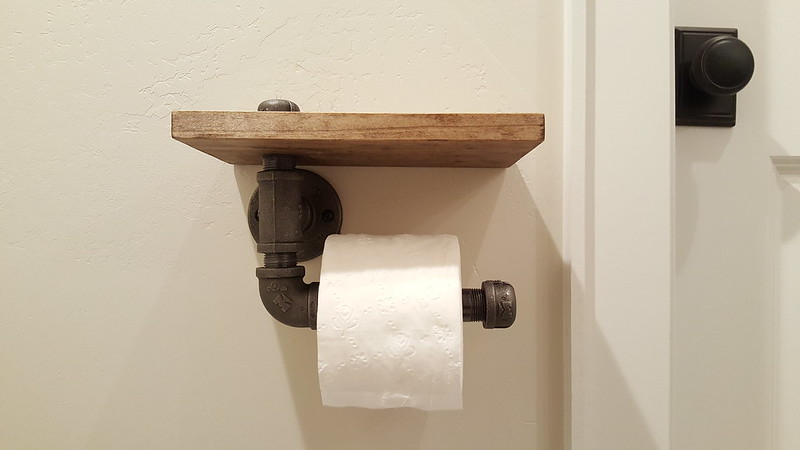
But I used the wood from the vanity for the little shelf. It turns out it is really handy to have somewhere to set your cell phone while you are on the toilet. You can buy these for around $40.00 on etsy, but it was really easy to make. Black pipe isn't cheap though, and it still cost me about $18.00, just for the parts.
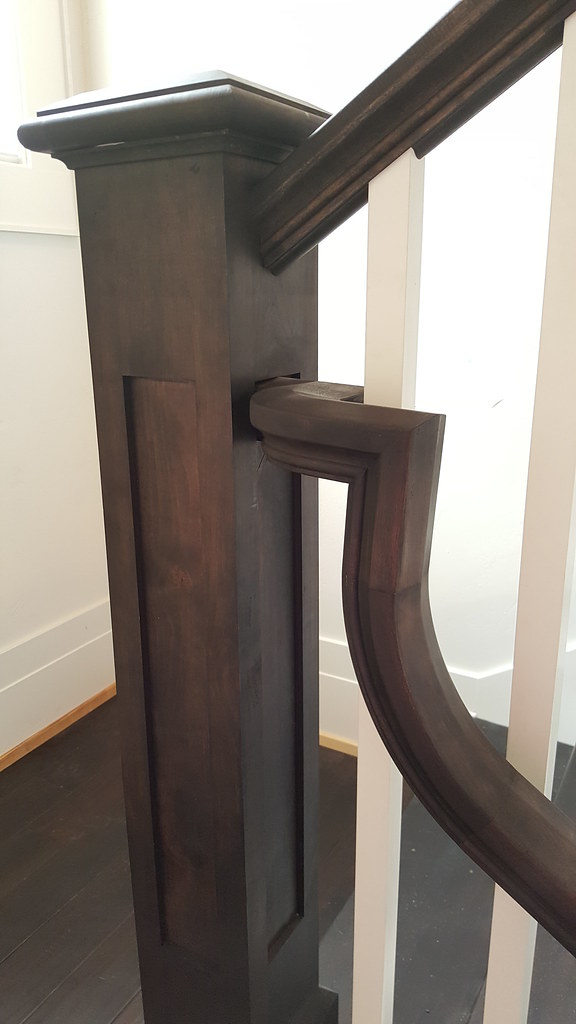
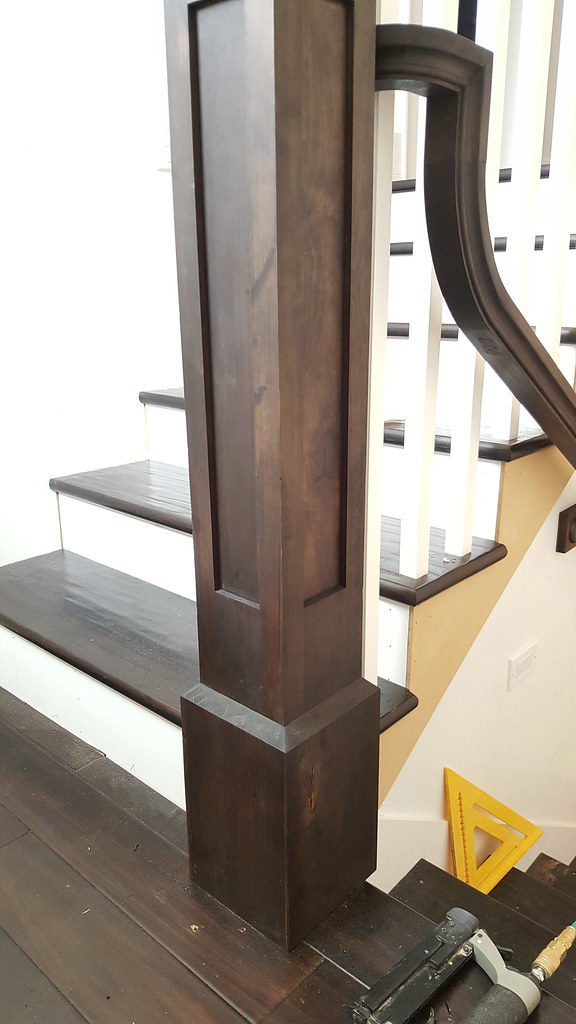
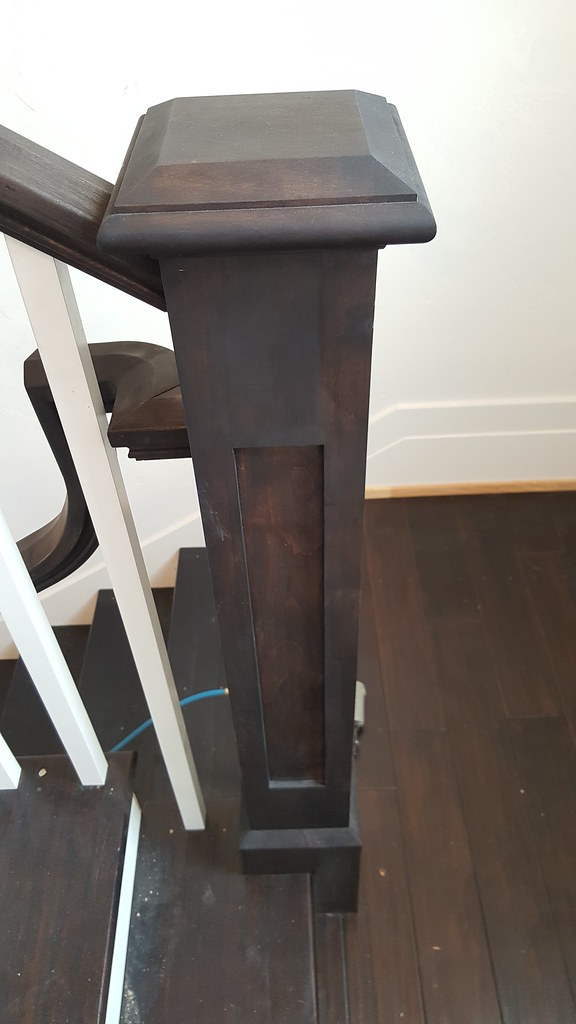
Last of all, we have the stair rail.
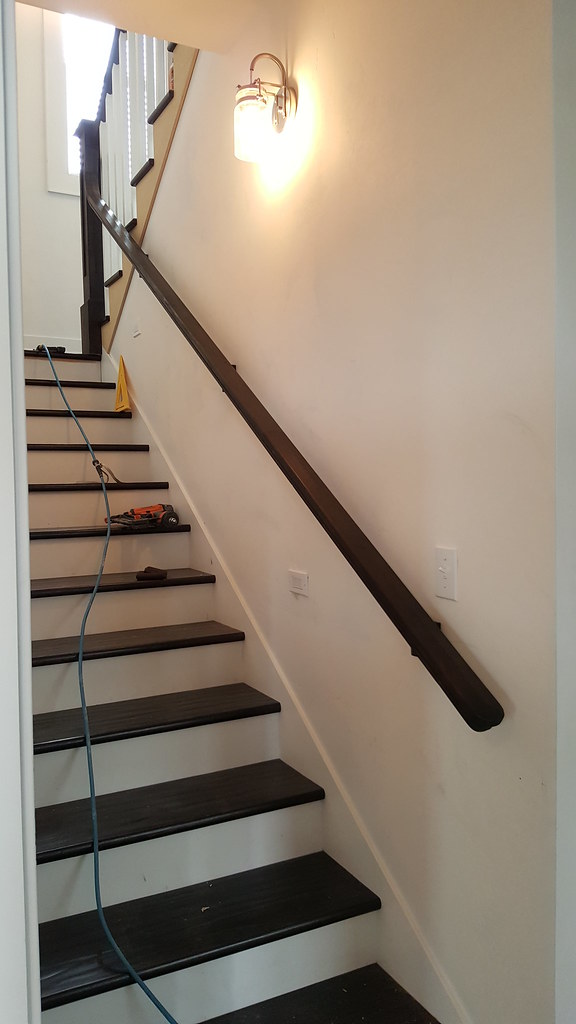
I could have cleaned the tools off the stairs before I took this picture I suppose. But why?
Lani the Builder also finished off the newel posts with all the necessary trim pieces and it looks beautiful!
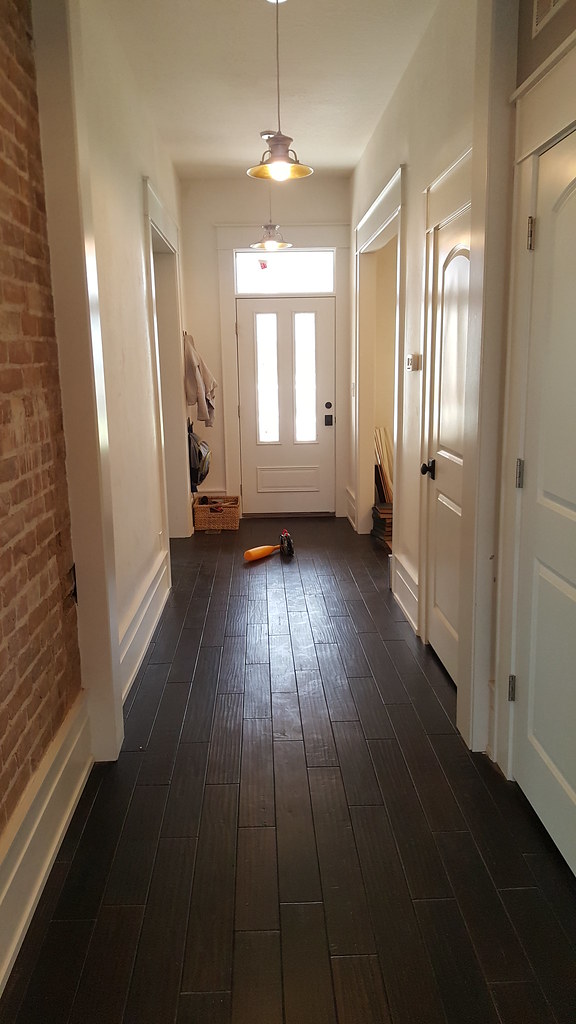
Oh, I also pulled up the rest of the paper that was laid down to protect the floors during painting. And as quick as I could pull out my camera to take a picture, my kids had left some toys in the middle of it.
Not much has happened since we last checked in with you, so here is what we have:
A New Shelf in the Laundry Room
It started like this.
Purely functional. Shelves like these are really easy to build. All I had to do was find the studs, choose my height and then make sure I screwed the support boards up level before screwing the plywood on top.
And then all it took was a board screwed to the front to give it a more finished look.
Heck, I may even go so far as to fill the screw holes and then paint or stain it. I just might!
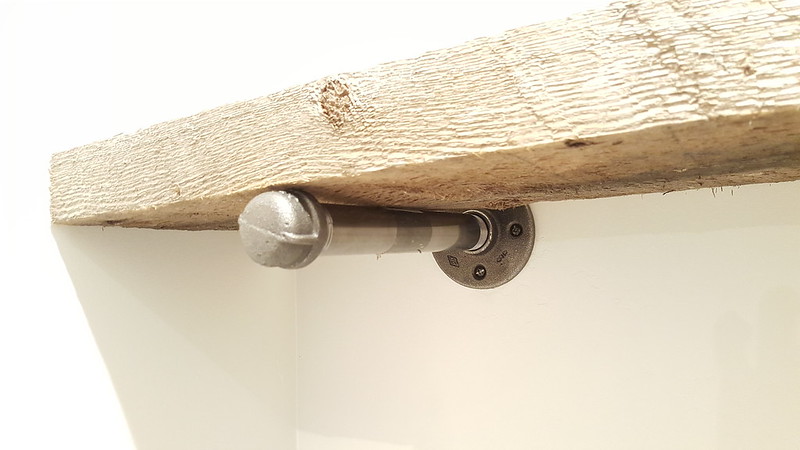
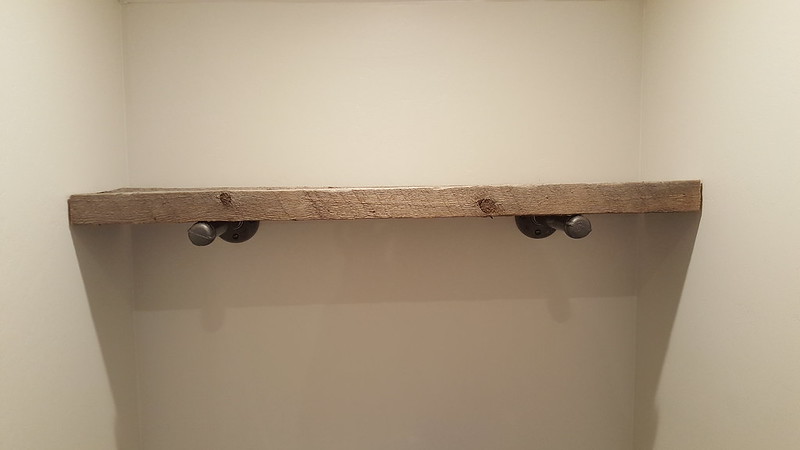
Moving on to the master bathroom:
Shelves like these are all over pinterest and I had to get in on the action.
All it takes is some black pipe, a cap and a flange screwed together to make your supports, screwed into the wall using drywall anchors.
Then I got a board from my back yard, cut it to length, and set it on top. I think this wood was one of the original floor joists from my house.
I also made this using black pipe:
But I used the wood from the vanity for the little shelf. It turns out it is really handy to have somewhere to set your cell phone while you are on the toilet. You can buy these for around $40.00 on etsy, but it was really easy to make. Black pipe isn't cheap though, and it still cost me about $18.00, just for the parts.
Last of all, we have the stair rail.
I could have cleaned the tools off the stairs before I took this picture I suppose. But why?
Lani the Builder also finished off the newel posts with all the necessary trim pieces and it looks beautiful!
Oh, I also pulled up the rest of the paper that was laid down to protect the floors during painting. And as quick as I could pull out my camera to take a picture, my kids had left some toys in the middle of it.
But gosh it is pretty, isn't it?
Mar 2, 2016
PROJECT DARKSTONE: Day 394
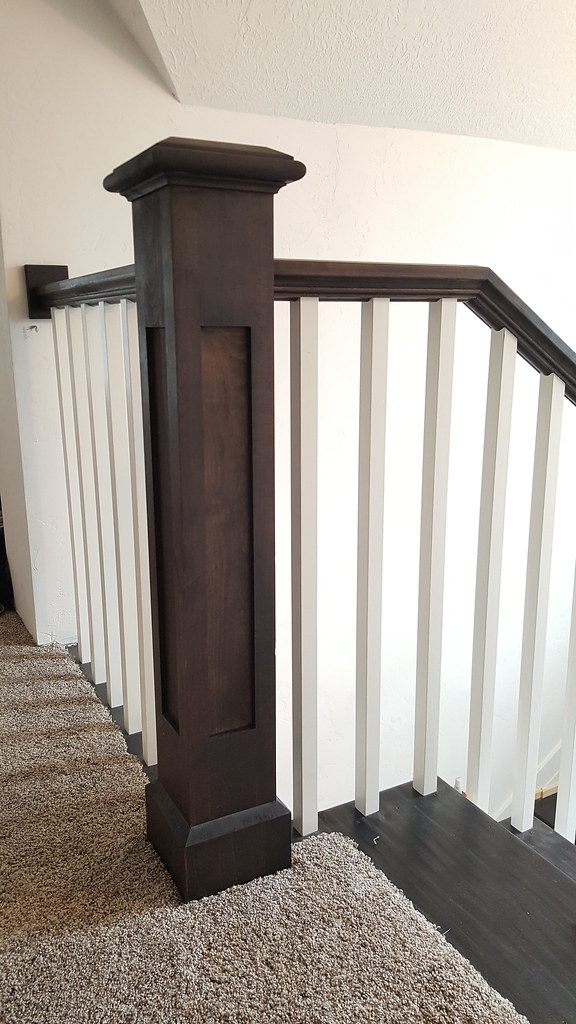
THIS HAPPENED.
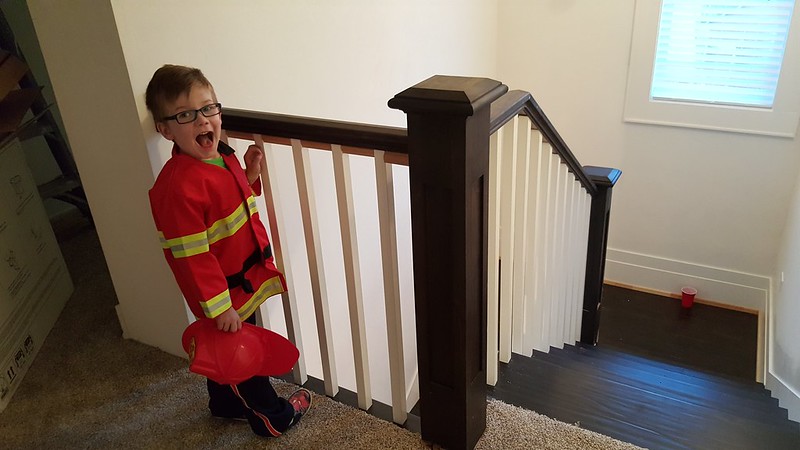
I asked Colin to make a face to show how he felt about the new banister. I feel the same!
I asked Colin to make a face to show how he felt about the new banister. I feel the same!
Mar 1, 2016
PROJECT DARKSTONE: Day 393
A few items worth of note:
I made this vanity:
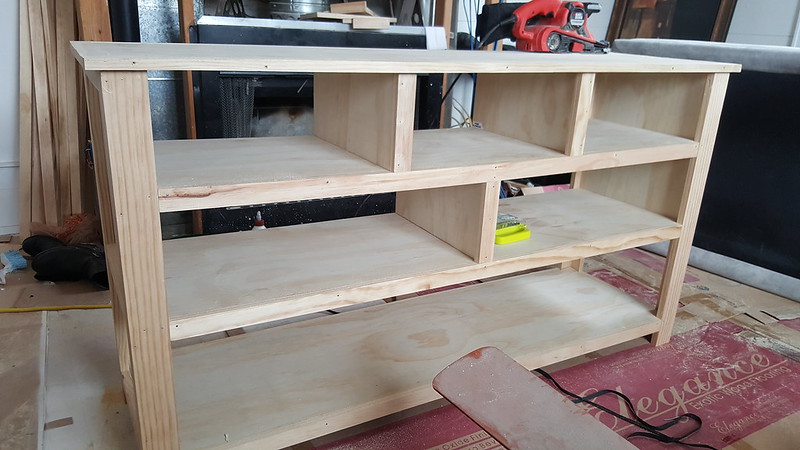
Using plans from Ana White. A year ago I got it into my head that I wanted to build the bathroom vanity. I'm ambitious like that. As time progressed and as I got busier, I started to think it was a bad idea. But I had already told the builder that I was going to make it so the cabinet maker wouldn't have to (his price was $800) and I didn't want to deal with telling him that I had got too lazy. So, after putting it off as long as possible, I just did it.
I finally got the walls painted in my bathroom too and tried to put the vanity in the space designed for it, but it was too big.
Boo.
So I got out the belt sander, sanded some off until it would fit, then stained it and pushed it into place.
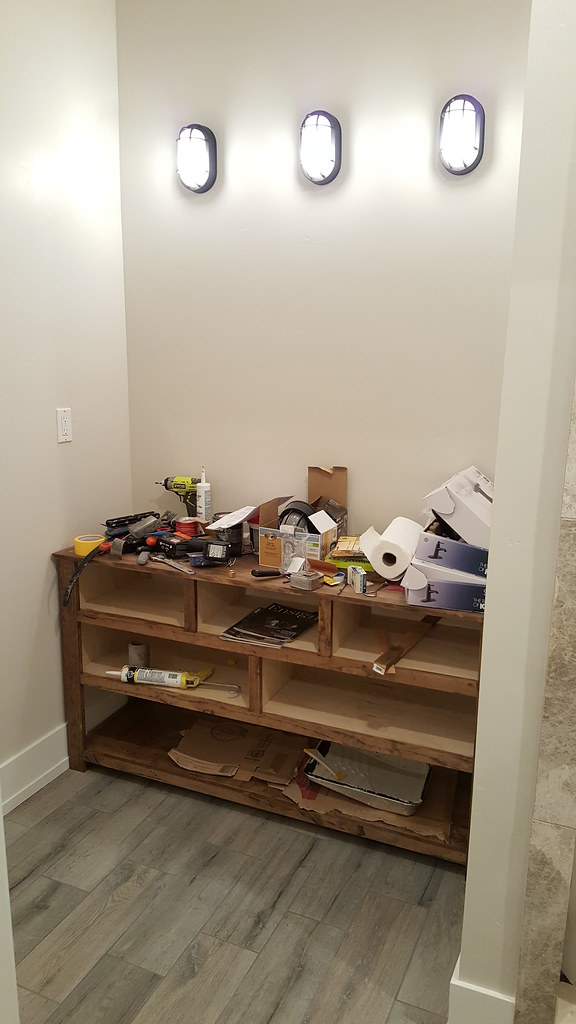
You know how that scientific phenomena goes: Nature abhors a vacuum and clutter abhors a surface. We really need to figure out somewhere to put our tools, but right now most of them are on our bathroom vanity. I haven't built the drawers for it yet, because we've still got to put the sink in and run the plumbing to it and I'd like to build the drawers to fit AFTER that part is done.
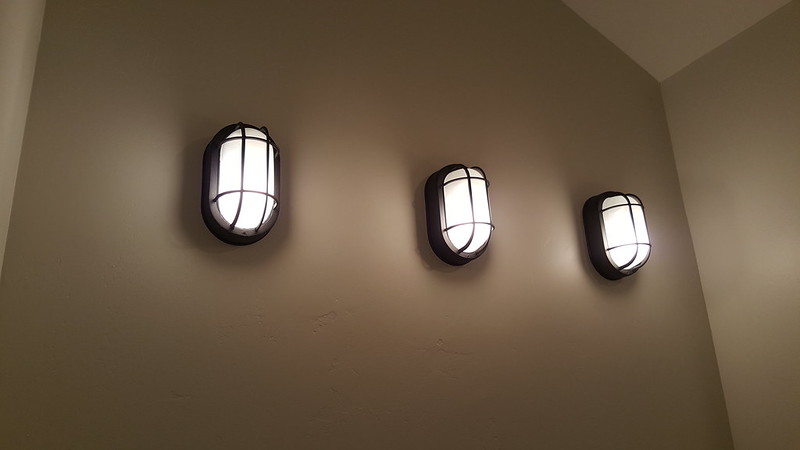
We're going for kind of an industrial look in here, and I thought these bulkhead lights would be cool as vanity lights. Plus, they are only $16.00 a piece from Home Depot. Win-win!
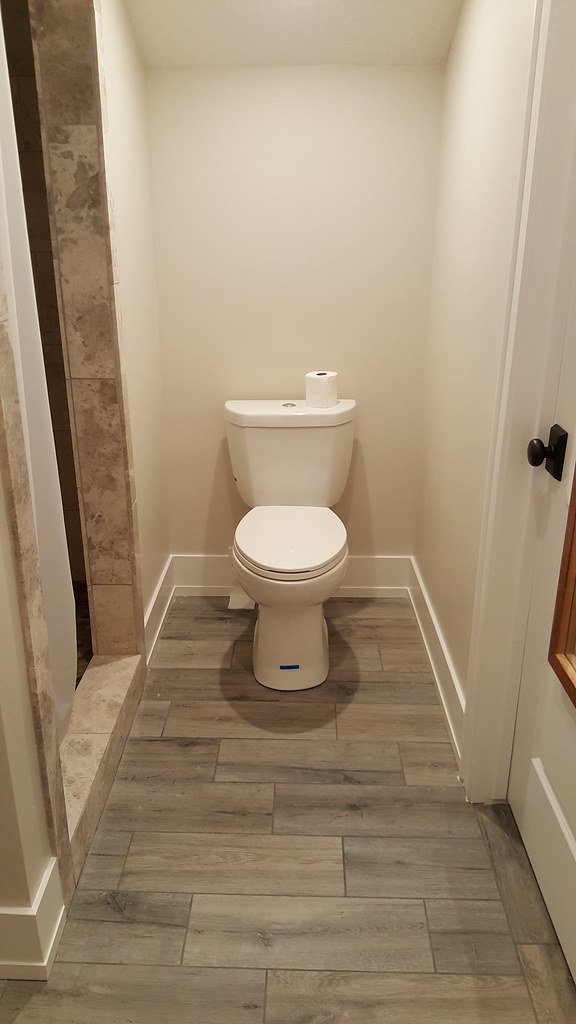
Last night Richard installed the toilet. He kept saying, "As soon as you are done painting, I can just plop that toilet right in there." or "It should only take me a minute to plop that toilet right down." or "I can't wait to plop that toilet in!"
And when the time was right, that is exactly what he did:
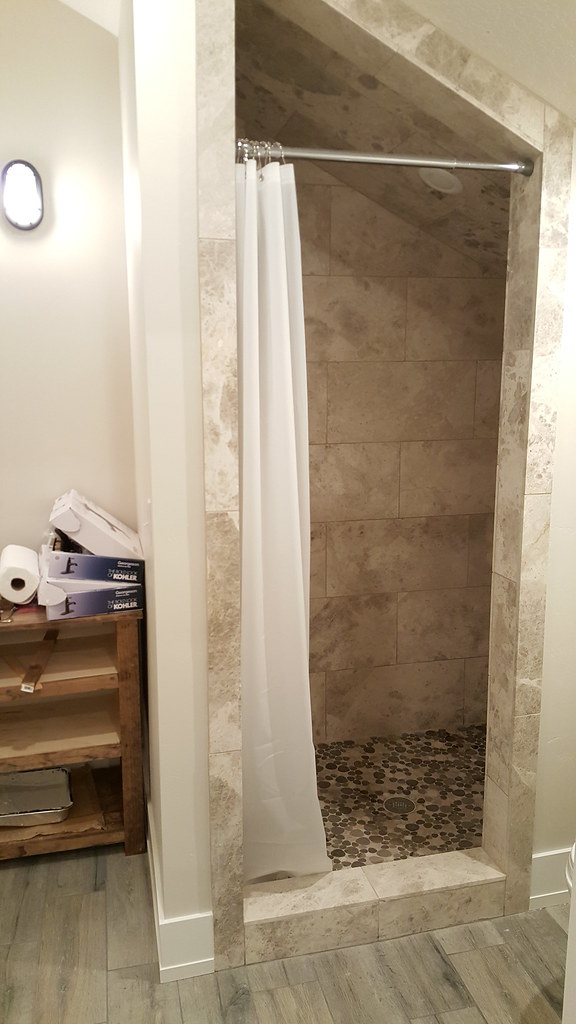
And here is the shower, if you care:
Here are some more light fixtures for the light fixture lover in you. If simplicity is your thing, then maybe this light fixture is your thing as well.
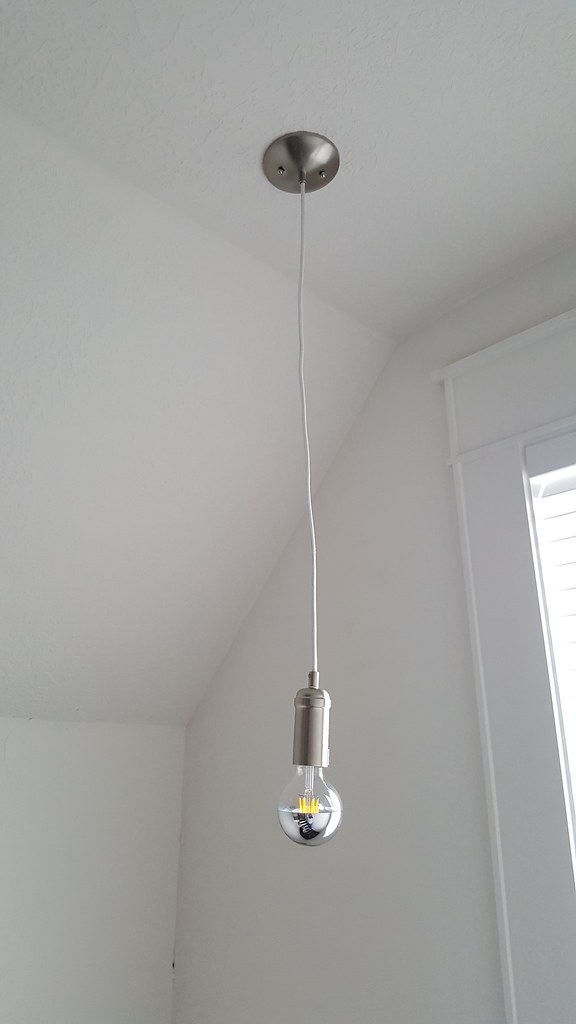
(I know it isn't hanging straight. I just installed it today and I'm confident that given time, gravity will do its thing and straighten it out.)
The light fixture, without the bulb, is only $14.99. 14.99! I paid $13.00 for the light bulb, but it is an LED, so it ought to be worth it. BUT, on 1000bulbs.com, you can get a 5" silver bowl light bulb like that one (non LED) for $6.99. A five inch bulb in there could turn that into a serious pendant light. It is a Globe Electric Mini Pendant, if you are interested.
And last of all, these:
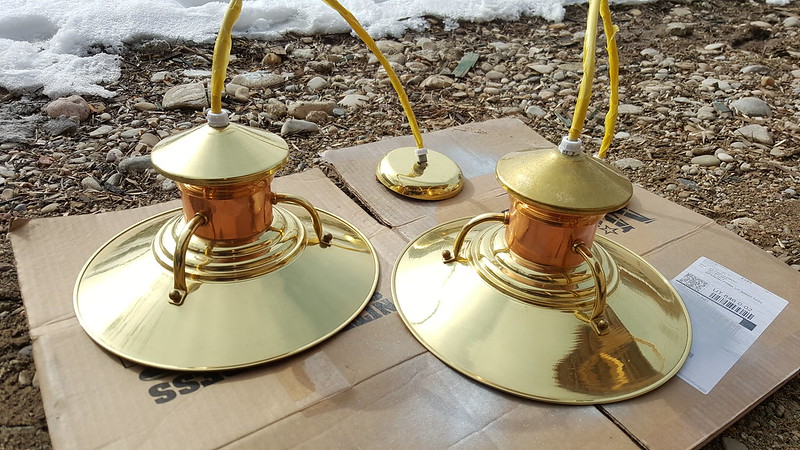
I found these lights at a yard sale for $5.00 a piece. 3 of them, actually. But I wasn't really into the copper and brass. So I spray painted them silver. Big surprise. The underside, however, was kind of this cool brushed gold, and I thought it might look awesome with silver on top and gold underneath, so I left the underside alone.
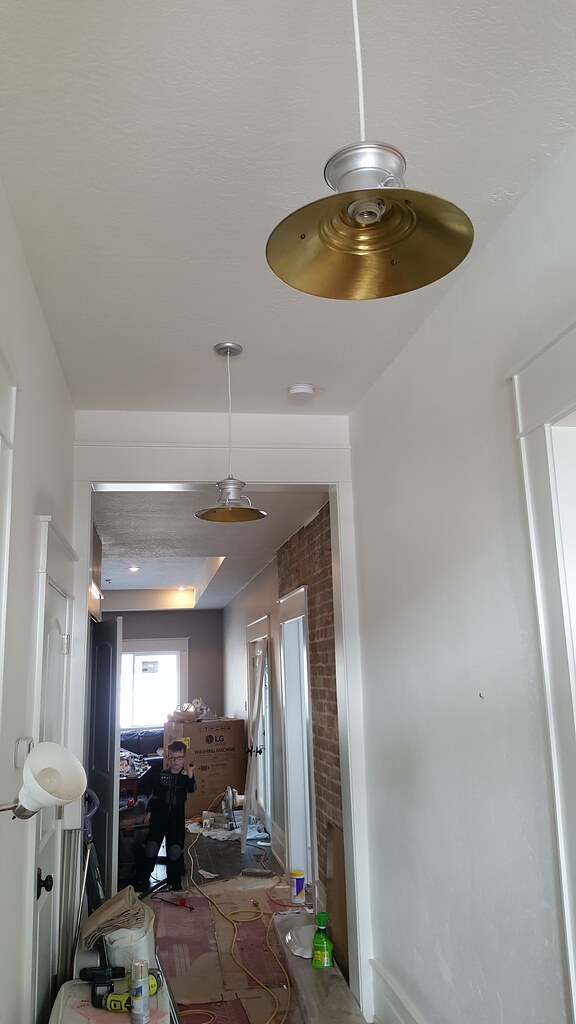
And guess what? I love it. These are my favorite thing in the house right now, so I give them two thumbs way up!
In other news, I washed dishes in the bathtub today. It was easier than I thought it would be. Like washing in a giant sink. And the tub has only been used once, so I figure there isn't any gross people residue in the tub to contaminate the dishes, right?
I made this vanity:
Using plans from Ana White. A year ago I got it into my head that I wanted to build the bathroom vanity. I'm ambitious like that. As time progressed and as I got busier, I started to think it was a bad idea. But I had already told the builder that I was going to make it so the cabinet maker wouldn't have to (his price was $800) and I didn't want to deal with telling him that I had got too lazy. So, after putting it off as long as possible, I just did it.
I finally got the walls painted in my bathroom too and tried to put the vanity in the space designed for it, but it was too big.
Boo.
So I got out the belt sander, sanded some off until it would fit, then stained it and pushed it into place.
You know how that scientific phenomena goes: Nature abhors a vacuum and clutter abhors a surface. We really need to figure out somewhere to put our tools, but right now most of them are on our bathroom vanity. I haven't built the drawers for it yet, because we've still got to put the sink in and run the plumbing to it and I'd like to build the drawers to fit AFTER that part is done.
We're going for kind of an industrial look in here, and I thought these bulkhead lights would be cool as vanity lights. Plus, they are only $16.00 a piece from Home Depot. Win-win!
Last night Richard installed the toilet. He kept saying, "As soon as you are done painting, I can just plop that toilet right in there." or "It should only take me a minute to plop that toilet right down." or "I can't wait to plop that toilet in!"
And when the time was right, that is exactly what he did:
Here are some more light fixtures for the light fixture lover in you. If simplicity is your thing, then maybe this light fixture is your thing as well.
(I know it isn't hanging straight. I just installed it today and I'm confident that given time, gravity will do its thing and straighten it out.)
The light fixture, without the bulb, is only $14.99. 14.99! I paid $13.00 for the light bulb, but it is an LED, so it ought to be worth it. BUT, on 1000bulbs.com, you can get a 5" silver bowl light bulb like that one (non LED) for $6.99. A five inch bulb in there could turn that into a serious pendant light. It is a Globe Electric Mini Pendant, if you are interested.
And last of all, these:
I found these lights at a yard sale for $5.00 a piece. 3 of them, actually. But I wasn't really into the copper and brass. So I spray painted them silver. Big surprise. The underside, however, was kind of this cool brushed gold, and I thought it might look awesome with silver on top and gold underneath, so I left the underside alone.
And guess what? I love it. These are my favorite thing in the house right now, so I give them two thumbs way up!
In other news, I washed dishes in the bathtub today. It was easier than I thought it would be. Like washing in a giant sink. And the tub has only been used once, so I figure there isn't any gross people residue in the tub to contaminate the dishes, right?
Subscribe to:
Posts (Atom)
