As you might remember from 5 short months ago, we had just finished up running all of the wiring in our 1968 Kit Companion. I was very excited to put the aluminum siding back on, but first we had to finish all the framing inside, since the framing inside would need to be attached to the walls. So we got to work on the back bench. First, we built this:

It's a wall.
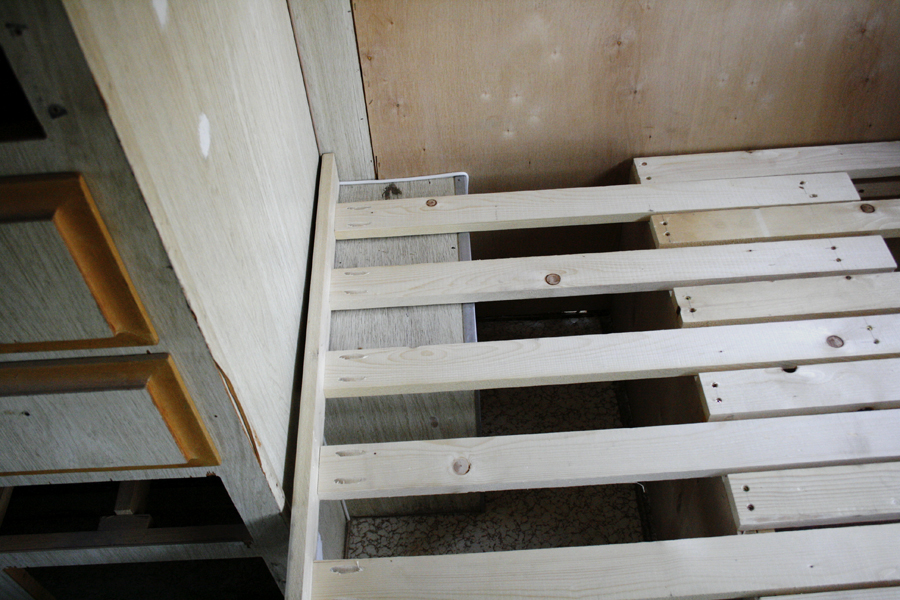
Then we laid some slats across the top.

THEN we realized that we might want some flooring in this storage compartment, to make sliding our stuff in and out a little easier, and to give our stuff something to sit on besides plywood. So we took the slats back off and put down some flooring.

Then we put the slats back on, then built the slide out part and put that in. I don't have instructions for how to do this. Here are some I found online: SLAT BED INSTRUCTIONS
You could also search for something like "sliding slat bed diy" and hopefully find something that makes sense to you. Here is our slide out bench bed in its bench position.

And here it is in its bed position.

Bench Position:

Bed Position: You can see in the pictures above and below that the trailer has those little built in boxes. They cover up part of the wheel well and are designed for the bed to sit on top of.
Crystal clear?
Then we had to deal with the bunk bed. Here is the original one:

Keeping the original stuff is always a good idea. This dumb piece of wood cluttering up my otherwise pristine back yard came in very handy when we used it as the pattern for the new bunk bed. We copied the measurements and reused the piano hinges and ended up with this:

Even knowing what this is, at first glance it is hard for me to tell what they are pictures of. You can see in these pictures that I had also started puttying all the nail holes.

In the picture below you can see the aluminum L Brackets (I am totally making these names up) attached to the wall that the bunk bed sits on top of. The aluminum leaves marks on everything, including the wood that sits on top of it, so I have since covered the side of the bracket that the bed sits on with clear packing tape so those black marks don't keep appearing.

Richard wanted to make sure those brackets were extra secure, so he put bolts all the way through the wall. That meant he had to cut off the ends that poke out the other side.

Fun!
Last, but not least, is the insulation.
Originally, the insulation consisted of the entire trailer being wrapped with 1/4 inch fiberglass insulation. A lot of it had fallen apart. I'm not sure how much it helped anyway. We decided to up the insulation game with this:

It is just 3/4" foam insulation that we got at Home Depot. We measured an opening, cut the foam to size using utility knives, and pushed the insulation into place.

It was actually kind of fun. It was simple and results were quick which made it very satisfying.
Thar she blows!

I guess I don't have a picture of the wall entirely filled with insulation, but I think you get the idea.
And that is all for now. Come back in 5 months and I'll finally get around to talking about putting the siding back on. Can't wait!
