Posts with the label Travel Trailer
Showing posts with label Travel Trailer. Show all posts
Showing posts with label Travel Trailer. Show all posts
Apr 29, 2019
The Not-Quite-Finished 1968 Kit Companion Travel Trailer
There are gonsta be lots-o-pictures, my friends, so I hope your eyeballs are ready for a world of lookin'!
PICTURE ONE!

There is the dinette, looking stunning in aqua and white. That is the original table, a white laminate with flecks of gold in it which works just fine for me. Sitting on top of it is a plant I stole from my fireplace mantle. It only took one camping trip for me to learn that decorative items are just in the way.


Those two little eagles you see on the walls have little levels in them. I wanted gold/antique brass accents in our Travel Trailer Friend, so I sprayed those eagles with my Antique Brass spray paint and bam, now they are the fanciest leveling eagles (I'm sure they have a name but I am too lazy to look it up.) at the aviary.
Now we have another picture. Tis a picture of the map that I stuck above the window.

Now for the story, and get ready cuz it is fascinating. I found the map for free online. Oh, heck, let me see if I can find it to share with you.
https://mrprintables.com/printable-map-of-the-united-states.html

There you go. I hope you appreciate the lengths I go to. That took me like two minutes. So I printed that out and attached it to a cheap cork board from Walmart. But after one cold night when all the windows were closed and the four of us were breathing all night long (as one does) the paper got all warped from the moisture in the air. So this one is laminated. Printed and laminated at my local print shop for like $5.00 was totally worth it.
Here is a picture of curtains:




PICTURE ONE!
There is the dinette, looking stunning in aqua and white. That is the original table, a white laminate with flecks of gold in it which works just fine for me. Sitting on top of it is a plant I stole from my fireplace mantle. It only took one camping trip for me to learn that decorative items are just in the way.
Now we have another picture. Tis a picture of the map that I stuck above the window.
Now for the story, and get ready cuz it is fascinating. I found the map for free online. Oh, heck, let me see if I can find it to share with you.
https://mrprintables.com/printable-map-of-the-united-states.html
There you go. I hope you appreciate the lengths I go to. That took me like two minutes. So I printed that out and attached it to a cheap cork board from Walmart. But after one cold night when all the windows were closed and the four of us were breathing all night long (as one does) the paper got all warped from the moisture in the air. So this one is laminated. Printed and laminated at my local print shop for like $5.00 was totally worth it.
Here is a picture of curtains:
I made them out of shower curtains I got at Target. This was probably not the cheapest way to go, but it can get moist in there sometimes (as we learned from my previous story about the map), and I figured shower curtains are made to withstand moisture. Plus, this curtain had a really nice textured pattern, so I just went for it. Curtains aren't that complicated to make, but there are a ton of windows in this tiny trailer and it took FOREVER. The grommets were the easy part. Let me see if I can find them on Joann.com. Hang on.....
Ok Here are the ones I used:

They come with a little template to show you what size to cut your circle. The grommets themselves are plastic, and the front and back just snap together. Zip Zap Zooie.
They are a little pricey though, so use coupons. I bought these in a dozen separate trips to two separate Joann stores. I kept buying all they had, which was maybe just as well so I could get them all for at least 40% off.
Here is a light fixture, which clearly isn't big enough to cover the hole it was installed in.
I also painted the base Antique Brass, so it would match everything else.
We wanted everything to be able to run off batteries, but 12 volt light fixtures don't offer a lot of options. However, you can get 12 volt light bulbs. So this light is a regular fixture with a 12 volt bulb in it. Problem solved.
The following picture illustrates two things.
1) RV light switches are adorable.

2) White walls were a bad idea. I love the look of white. But I have kids. I camp with my kids. And they get DIRTY. And it shows. Everywhere. PROCEED WITH WHITE WITH CAUTION.
And here is the kitchen.
It is painted a different color than the rest of the trailer. A slightly off white beigy gray. I'd love to tell you what the color is called, but I can't remember. But it is a lovely color. I wish I did the whole trailer this color. It is just off white enough to hide a lot of fingerprints. The hole in the cabinet wall there is where the original heater went. Which we got rid of. We'll have to cover that hole at some point before we can count this thing as done.
The tiles for the backsplash we got on Amazon.
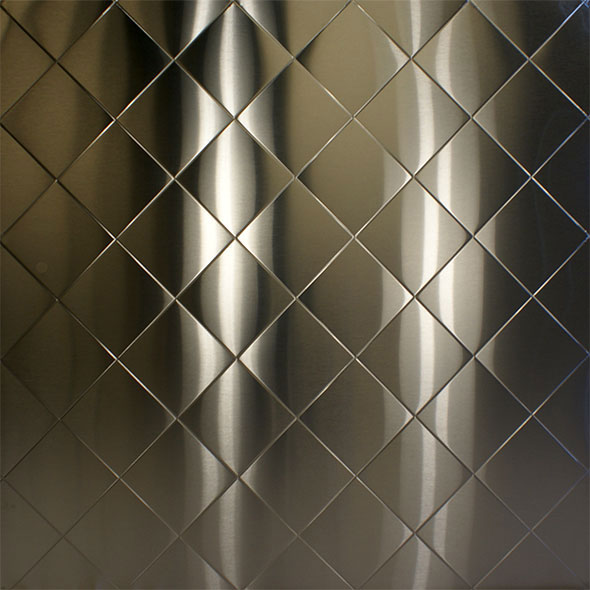
I still need to put some kind of trim on each edge of this back splash, but I haven't decided what yet. They are sticky back, so theoretically easy to install, but it was still a fair amount of work. What I should have done was this:
That is a sheet of stainless steel Diamond Quilted. You can buy it online at the link above, or check at some local sheet metal supplier for a better price. I bet they would do it for less than I bought those tiles for, and install would be a snap.
The other thing to note is that in the 1968 Kit Companion, on the face of the cabinetry in front of the sink was just a big blank space. See:
So I found a towel rack that fit in the space, painted it Antique Brass, and voila.
Let's turn around and look at the other wall.
More cabinets. All the cabinet pulls are original. Except I hit them with my trusted Antique Gold Spray Paint. You probably saw that coming, didn't you?
I was gonna put Wallpaper on that wall, but I am too cheap. So I drew it using a gold paint pen.
Behold my mad measuring and marking using a straight edge skills!
Here's some of the original paperwork we found in the trailer, laminated to protect it.
Next we've got the section of the trailer still needing the most work.
The back bench and bunk bed. All these cushions still need to be upholstered. I have the fabric and everything, I just really don't want to do it. The board that makes up the bunk bed also hasn't been painted for some reason. That's another thing that I don't want to do, but I'm going to have to suck it up and paint it eventually.
Also note, this board that goes across the bed cracked and will have to be replaced.
BOO.
The lighting and USB outlet over the back bed:
At some point I just gave up finding light fixtures in gold and spray painted everything. Everything!!
Here is another view of the finished half of the trailer.
And here are more unfinished things.
In the spot where that board sits should be a hatch that opens into the space under the back bench. In case you don't remember, here it is when we bought it.
That door was just particle board covered in sheets of metal. So, what with the weed farm growing in the back of the trailer the door also completely fell apart.
Then there is the hole where the vent for the heater came out.
Another place we handily covered with some wood. Fancy!
Last of all we need to paint.
But that is at the very bottom of the list, for reasons that I hope are obvious. That's all. Thanks for donating your eyeballs to this endeavor. I'm going to have dinner now. Toodles!
Apr 16, 2019
Finishing Up the Travel Trailer - and a Tip for Sewing Cushion Covers
Our 1968 Kit Companion is still technically not finished. Shocker. But it is 100% USABLE, and use it we have. Which is why they say "Done is better than Perfect." (or something. I usually tune out when they start talking.)
Here are a few more things we had to do before we could start hauling this bad boy around:
We put the siding back on.

My, isn't it stunning? First we cleaned it off. A wire brush stuck in a cordless drill worked best. Then we cleaned off the J-Trim and put that on too. Don't forget to put the putty underneath!


Here are a few more things we had to do before we could start hauling this bad boy around:
We put the siding back on.
My, isn't it stunning? First we cleaned it off. A wire brush stuck in a cordless drill worked best. Then we cleaned off the J-Trim and put that on too. Don't forget to put the putty underneath!
Is it a goopy mess? Then you know you've done your job!
We got all the lights working. Here is one with an LED bulb installed.
Before we put the windows in, they needed to be cleaned. Exhibit A:
That's Better!
I replaced the lining in all of the drawers. And since I found $0.03 cents while I was at it, I'd say that was time well spent!
I also painted the entire interior of the trailer. But since I assume you are probably familiar with how painting works, I shan't be going into detail.
Last of all was upholstering the dinette benches. I got a bunch of color samples from DIYUpholsterySupply.com (I can't find their website anymore, so maybe they went out of business?) and picked some fabric that exactly matched the fridge and stove.
I wanted blue cushions with white piping and I watched a lot of videos online so that I could do it myself. But with the piping I was essentially trying to sew 4 layers of vinyl, and double that on the seams. And I broke my sewing machine. I loved that sewing machine. But I killed it dead.
So I found some local upholsterer and paid him to upholster the cushions. But here was the problem: though we had measured and cut the cushions to size, once they were upholstered they no longer fit in the dinette. They were too big to lay flat as a bed. That was really, really annoying, but I also wasn't impressed with the upholstery job the guy had done. The fabric was kind of baggy. The sewing was nothing to write home about.
So I unstitched everything and did it over. We trimmed the cushions again, leaving plenty of extra room for padding and upholstery. I got a new sewing machine. And by giving up on the white piping, there were few enough layers of fabric that I was able to sew it myself.
I wanted my cushions to be wrapped in batting before being upholstered. Batting gives them the nice, rounded, full look I like.
TIP: Remember to take your cushion measurements BEFORE wrapping them in batting.
This way the fabric is still nice and tight and the batting fills in any gaps inside just like ice cream does in a full stomach.
And that's all I've got for now. Tune in next time and I'll show you the "finished" travel trailer!
Dec 10, 2017
Travel Trailer Benches, Bunk Beds, and Insulation
As you might remember from 5 short months ago, we had just finished up running all of the wiring in our 1968 Kit Companion. I was very excited to put the aluminum siding back on, but first we had to finish all the framing inside, since the framing inside would need to be attached to the walls. So we got to work on the back bench. First, we built this:

It's a wall.
Then we laid some slats across the top.

THEN we realized that we might want some flooring in this storage compartment, to make sliding our stuff in and out a little easier, and to give our stuff something to sit on besides plywood. So we took the slats back off and put down some flooring.

Then we put the slats back on, then built the slide out part and put that in. I don't have instructions for how to do this. Here are some I found online: SLAT BED INSTRUCTIONS
You could also search for something like "sliding slat bed diy" and hopefully find something that makes sense to you. Here is our slide out bench bed in its bench position.

And here it is in its bed position.

Bench Position:

Bed Position: You can see in the pictures above and below that the trailer has those little built in boxes. They cover up part of the wheel well and are designed for the bed to sit on top of.
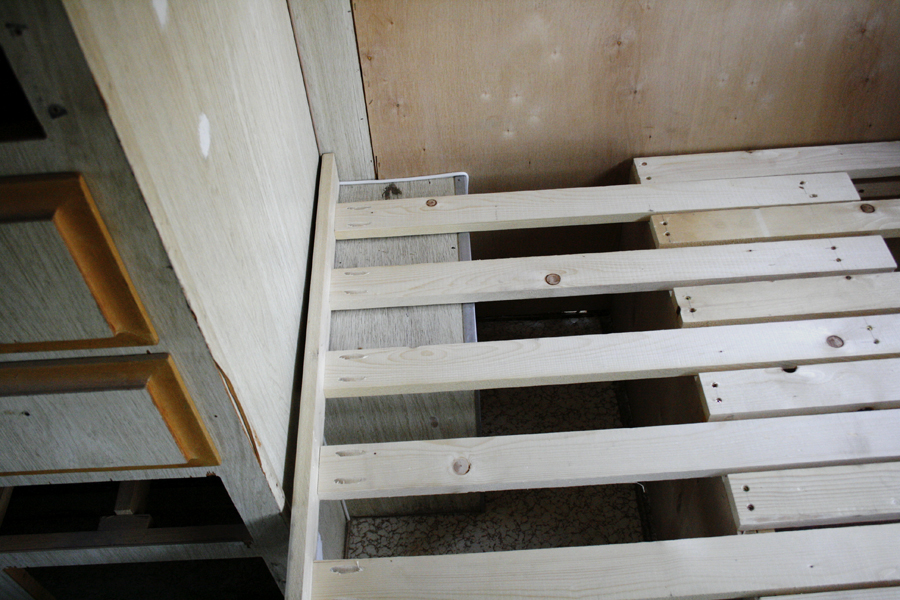
Crystal clear?
Then we had to deal with the bunk bed. Here is the original one:

Keeping the original stuff is always a good idea. This dumb piece of wood cluttering up my otherwise pristine back yard came in very handy when we used it as the pattern for the new bunk bed. We copied the measurements and reused the piano hinges and ended up with this:

Even knowing what this is, at first glance it is hard for me to tell what they are pictures of. You can see in these pictures that I had also started puttying all the nail holes.

In the picture below you can see the aluminum L Brackets (I am totally making these names up) attached to the wall that the bunk bed sits on top of. The aluminum leaves marks on everything, including the wood that sits on top of it, so I have since covered the side of the bracket that the bed sits on with clear packing tape so those black marks don't keep appearing.

Richard wanted to make sure those brackets were extra secure, so he put bolts all the way through the wall. That meant he had to cut off the ends that poke out the other side.

Fun!
Last, but not least, is the insulation.
Originally, the insulation consisted of the entire trailer being wrapped with 1/4 inch fiberglass insulation. A lot of it had fallen apart. I'm not sure how much it helped anyway. We decided to up the insulation game with this:

It is just 3/4" foam insulation that we got at Home Depot. We measured an opening, cut the foam to size using utility knives, and pushed the insulation into place.

It was actually kind of fun. It was simple and results were quick which made it very satisfying.
Thar she blows!

I guess I don't have a picture of the wall entirely filled with insulation, but I think you get the idea.
And that is all for now. Come back in 5 months and I'll finally get around to talking about putting the siding back on. Can't wait!
Subscribe to:
Posts (Atom)
