Dec 10, 2017
Travel Trailer Benches, Bunk Beds, and Insulation
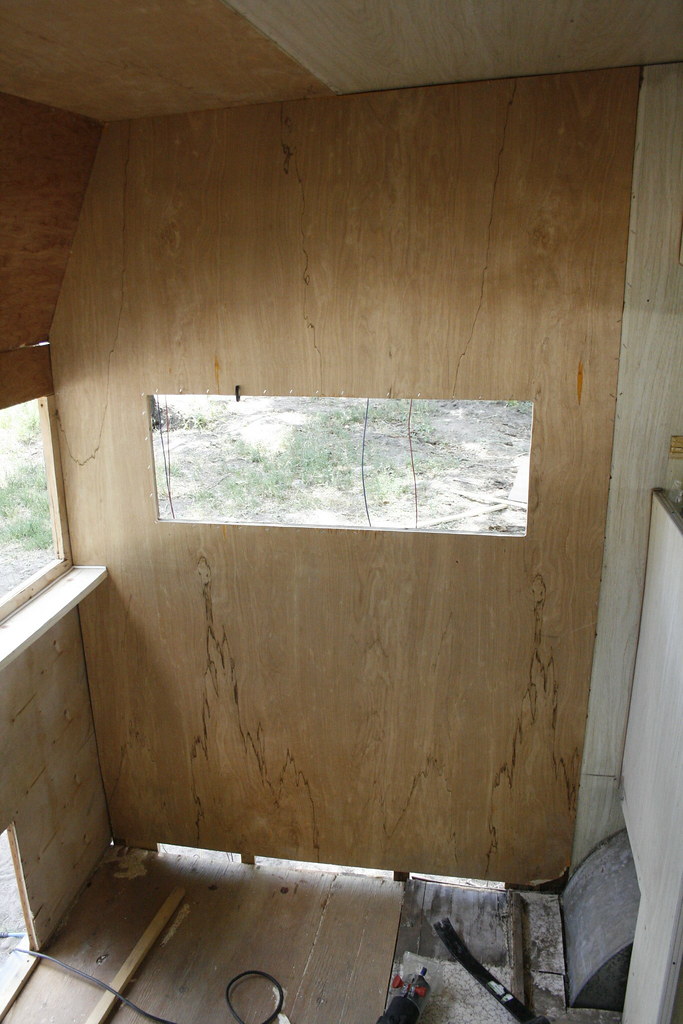
As you might remember from 5 short months ago, we had just finished up running all of the wiring in our 1968 Kit Companion. I was very excited to put the aluminum siding back on, but first we had to finish all the framing inside, since the framing inside would need to be attached to the walls. So we got to work on the back bench. First, we built this:

It's a wall.
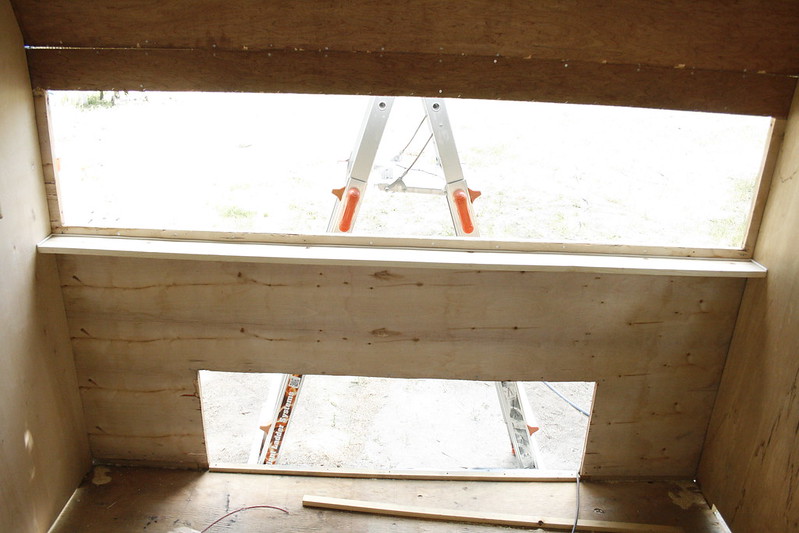
Then we laid some slats across the top.

THEN we realized that we might want some flooring in this storage compartment, to make sliding our stuff in and out a little easier, and to give our stuff something to sit on besides plywood. So we took the slats back off and put down some flooring.

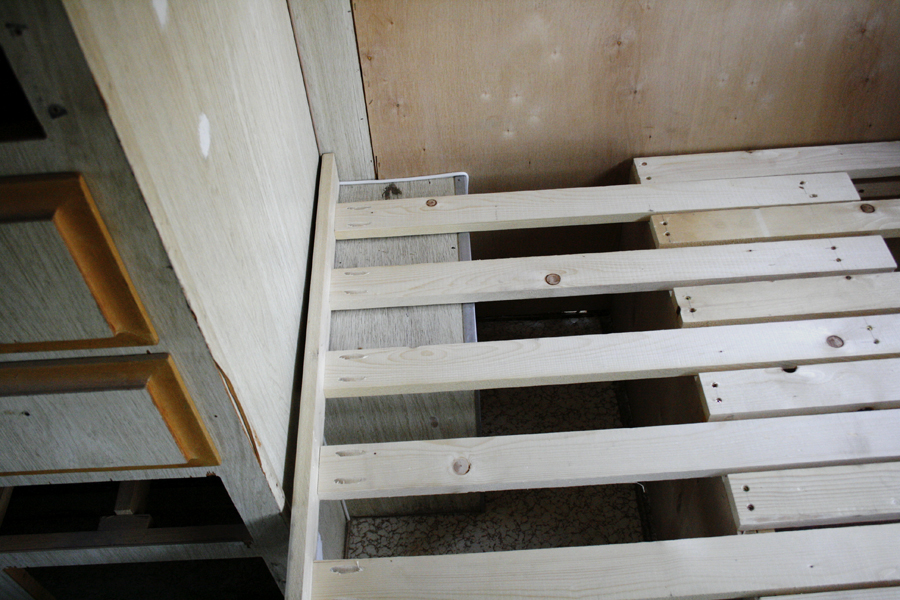
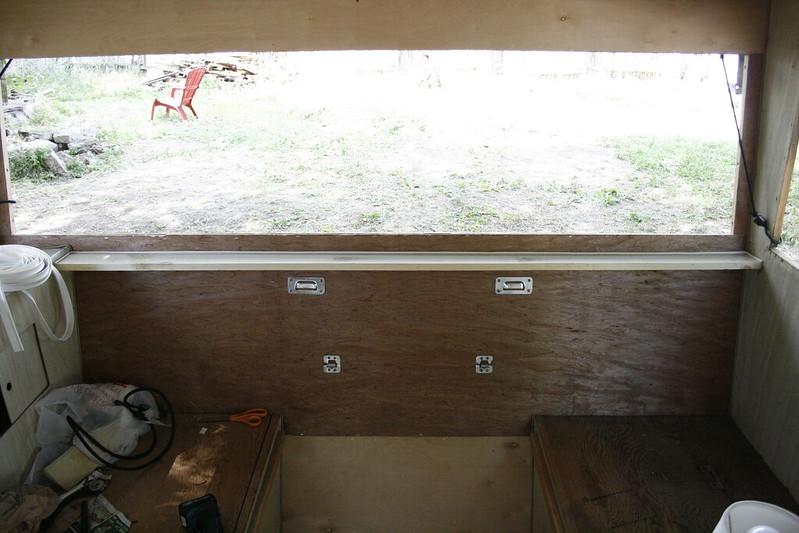
Then we put the slats back on, then built the slide out part and put that in. I don't have instructions for how to do this. Here are some I found online: SLAT BED INSTRUCTIONS
You could also search for something like "sliding slat bed diy" and hopefully find something that makes sense to you. Here is our slide out bench bed in its bench position.

And here it is in its bed position.

Bench Position:

Bed Position: You can see in the pictures above and below that the trailer has those little built in boxes. They cover up part of the wheel well and are designed for the bed to sit on top of.
Crystal clear?
Then we had to deal with the bunk bed. Here is the original one:

Keeping the original stuff is always a good idea. This dumb piece of wood cluttering up my otherwise pristine back yard came in very handy when we used it as the pattern for the new bunk bed. We copied the measurements and reused the piano hinges and ended up with this:

Even knowing what this is, at first glance it is hard for me to tell what they are pictures of. You can see in these pictures that I had also started puttying all the nail holes.

In the picture below you can see the aluminum L Brackets (I am totally making these names up) attached to the wall that the bunk bed sits on top of. The aluminum leaves marks on everything, including the wood that sits on top of it, so I have since covered the side of the bracket that the bed sits on with clear packing tape so those black marks don't keep appearing.

Richard wanted to make sure those brackets were extra secure, so he put bolts all the way through the wall. That meant he had to cut off the ends that poke out the other side.

Fun!
Last, but not least, is the insulation.
Originally, the insulation consisted of the entire trailer being wrapped with 1/4 inch fiberglass insulation. A lot of it had fallen apart. I'm not sure how much it helped anyway. We decided to up the insulation game with this:

It is just 3/4" foam insulation that we got at Home Depot. We measured an opening, cut the foam to size using utility knives, and pushed the insulation into place.

It was actually kind of fun. It was simple and results were quick which made it very satisfying.
Thar she blows!

I guess I don't have a picture of the wall entirely filled with insulation, but I think you get the idea.
And that is all for now. Come back in 5 months and I'll finally get around to talking about putting the siding back on. Can't wait!
Dec 1, 2017
Christmas Decor
It's that time once again. Time to pull out your buffalo plaid, wear leggings instead of pants, and be subjected to horrible Christmas Music wherever you go! Ack! I mean, Hurray!
So allow me to share with you my Christmas Decorations from last year. I'd like to show you this year's, but that would require having the house decorated, clean, and me still having enough energy to take pictures and then write about it. Nice try, Christmas. Maybe next year.
Let me shuffle through my box of Christmas photos and see what I can find.
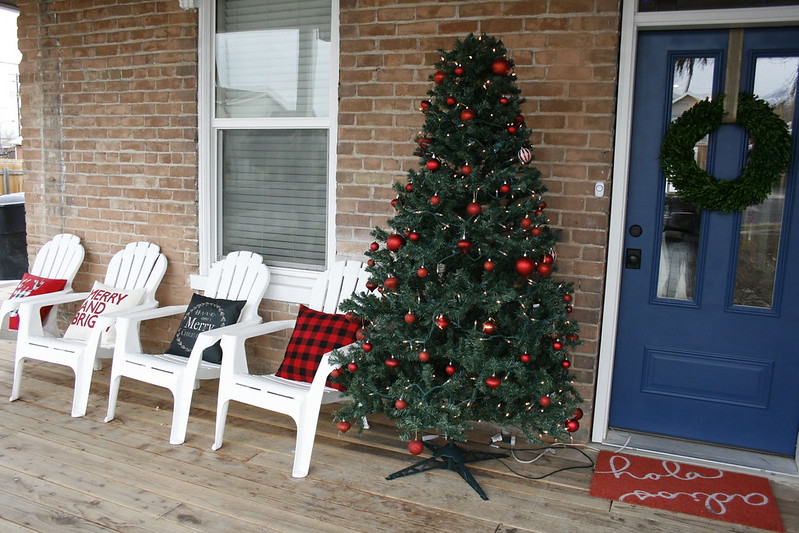
A tree on the front porch = FUN! Someone I knew had an old tree they were getting rid of, and no one else seemed to want it so she gave it to me. The stand was missing and the lights didn't work, but we have enough old Christmas stuff sitting around that we put something together.
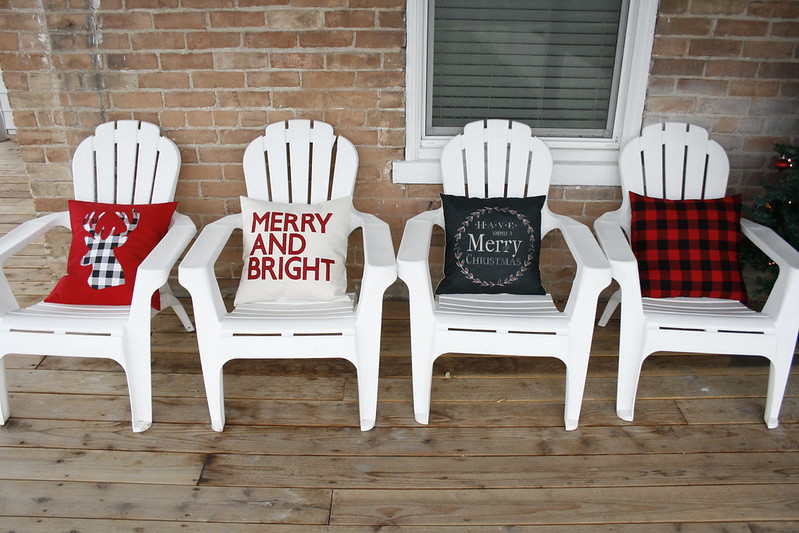
Pillows! Did you know you can get REALLY CHEAP pillow covers on Amazon? Like, under $5.00? If that doesn't sound cheap to you, then I don't know how to help you.
I made some of these covers, but in the end they probably cost me more than the ones from Amazon (which I think came from China.)
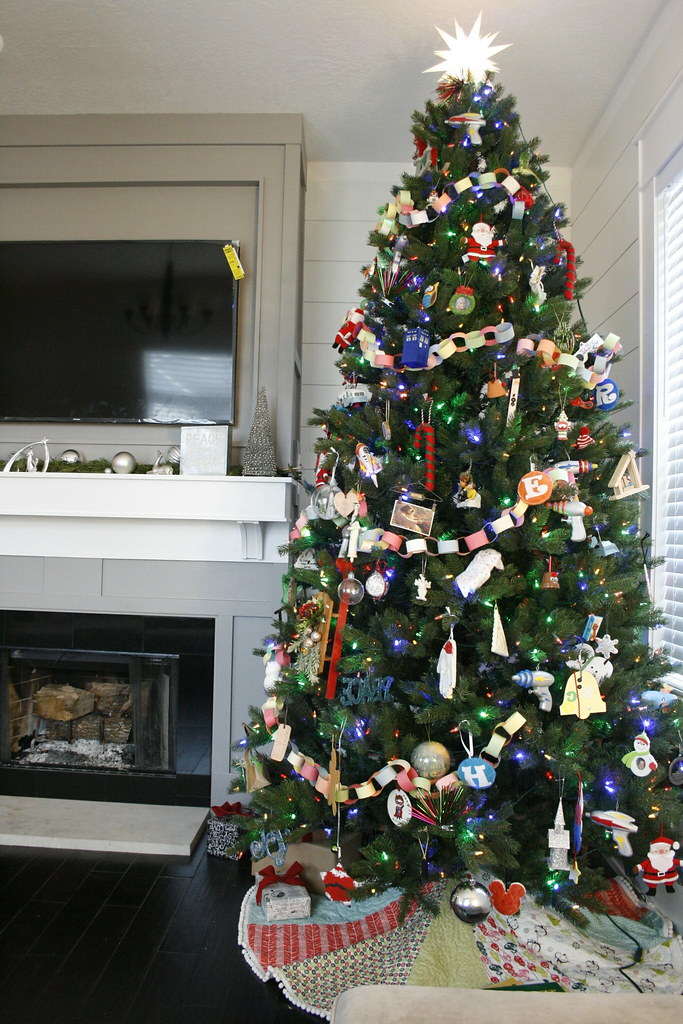
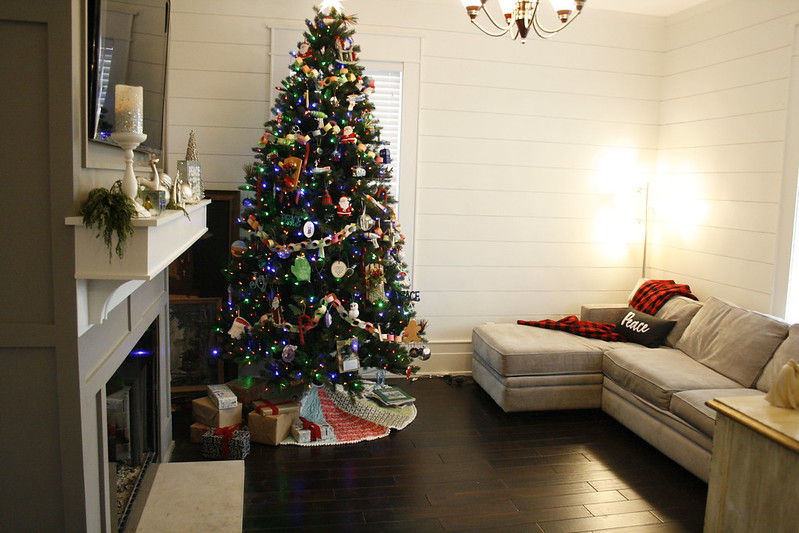
Uh, what else? Christmas Tree: BOOM


So allow me to share with you my Christmas Decorations from last year. I'd like to show you this year's, but that would require having the house decorated, clean, and me still having enough energy to take pictures and then write about it. Nice try, Christmas. Maybe next year.
Let me shuffle through my box of Christmas photos and see what I can find.
A tree on the front porch = FUN! Someone I knew had an old tree they were getting rid of, and no one else seemed to want it so she gave it to me. The stand was missing and the lights didn't work, but we have enough old Christmas stuff sitting around that we put something together.
Pillows! Did you know you can get REALLY CHEAP pillow covers on Amazon? Like, under $5.00? If that doesn't sound cheap to you, then I don't know how to help you.
I made some of these covers, but in the end they probably cost me more than the ones from Amazon (which I think came from China.)
Uh, what else? Christmas Tree: BOOM
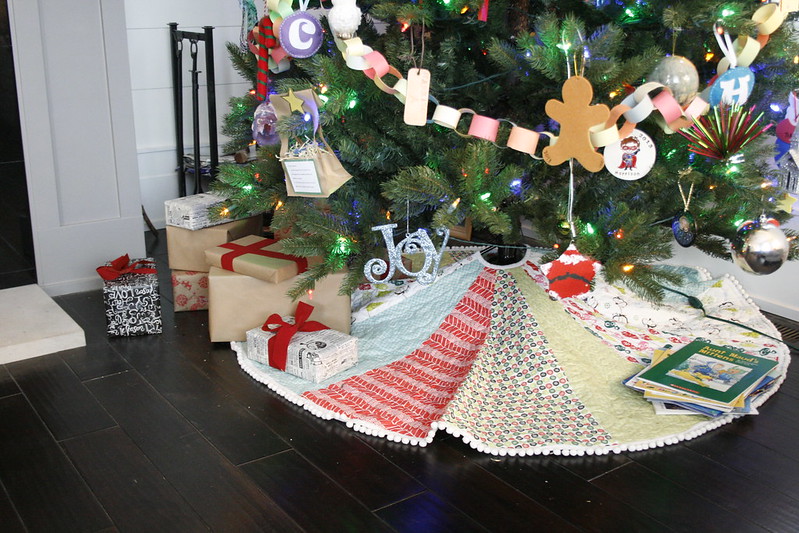
Guess what? The presents under the tree in this picture are fake. We never put the presents out until the kids go to bed on Christmas eve. But presents under the tree are cute. So I wrapped some empty boxes. And the kids loved it. If they were actually presents I would have to keep telling the kids to leave them alone, but since these were fake, the kids could play with them all they wanted.
I love our tree. Its just a hodge podge of stuff the kids have made, silly things I have made, and lots of things that look like toys. But it makes me happy.
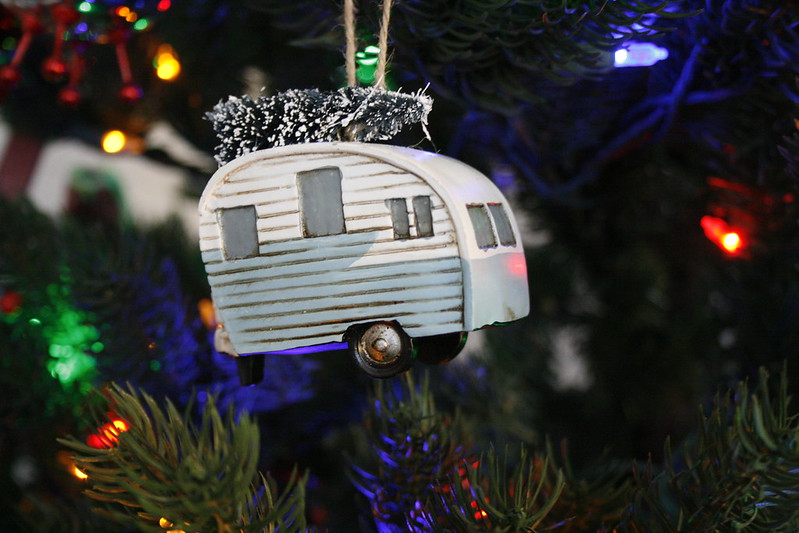
Here are a few of my favorite ornaments:
That one of Khan is my favorite. I bought that on Etsy to give to Richard. I actually paid money for it. The fact that the wreath is hanging upside down just cracks me up.
Here are some that I made. Whenever December comes around I start itching to make stuff out of felt.
While I made these I watched Christmas romances on TV. They are all very cheesy, and every single one ended with a proposal. Because that is what Christmas is all about, I guess.
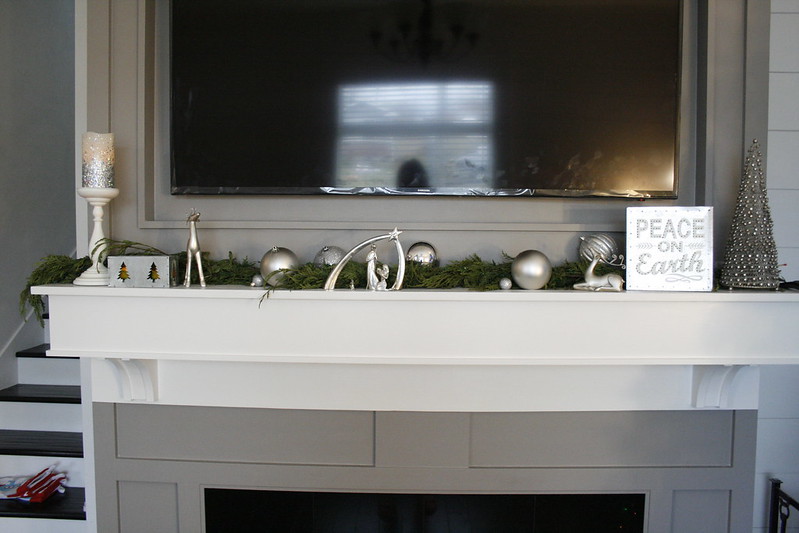
And here we have the Mantle! With stuff on it!
Where are the stockings? I don't know!
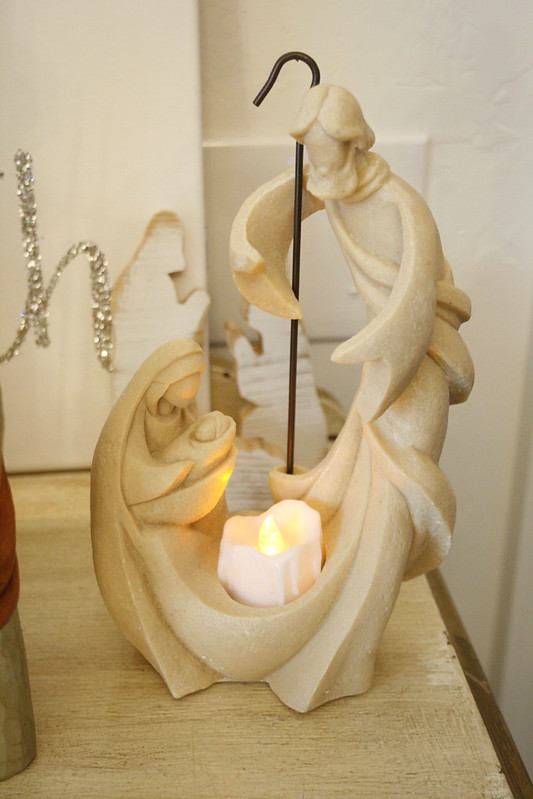
You may have thought we were done but that is never going to happen. You are going to be here forever! Because now I will show you my Nativities! Only a few. I have more than I currently have room to display. Here they are! Look at them now!
I'm sorry. I don't know why I'm yelling. Christmas makes me do that. Especially at my kids.
This one came from the Philippines
This one came from Bolivia
And this one came from Ebay:
And here is our Advent Calendar. I feel like I have posted it before, but who knows? My sister has one very much like this. I liked it, so I shamelessly copied it. Thanks Fae!
That is probably enough for the moment. Thanks for stopping by! And a Merry Christmas to you and your leggings!
Jul 12, 2017
Travel Trailer Electrical, and Other Things That May Bore You
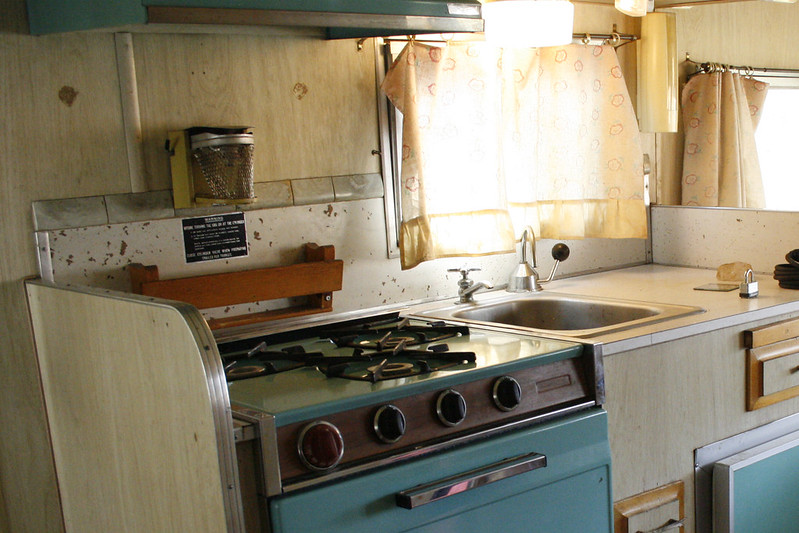
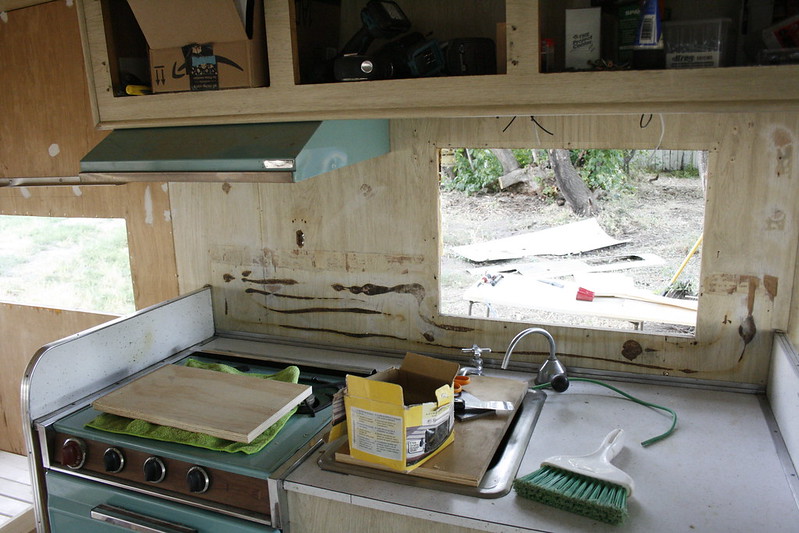
First, the other things. Remember this backsplash?
And then someone stole my camera!
So, wiring. I can tell you what I know, which isn't much.
Since the siding is STILL off the trailer, it made it really easy to work on the wiring.
Here is how it works. (I think. I keep having to ask Richard how this works because it refuses to stay in my brain.)
A/C is the kind of power our houses run on. Current goes in both directions (i.e. Alternating Current.)
D/C is the power that comes from Batteries, which only supply current in one direction. (i.e. Direct Current). Honestly, I have no idea what that means. But if our Travel Trailer is wired for D/C, the stuff inside of it can run on batteries.
A car battery is 12 volts, and they make light fixtures and fans, etc. to run on 12 volts, since that is what RV's and boats use. So.
Originally our trailer had one D/C light in it. So if we were out in the middle of nowhere, running off a 12 volt battery, we would have one measly light. The rest of the lights required A/C, so to use those we'd have to be hooked up to A/C power, with an extension cord or whatever.
So we rewired all the lights to run off D/C.
This is where the original D/C light was.
Both batteries and light bulbs have improved a lot in the last 50 years. Using his magical brain, Richard calculated
that even running all the lights in our Travel Trailer 24 hours a day, one 12 volt battery should still last us four and a half days.
So, yeah. Pretty awesome. And that is all I have for you to day. Tune it next time for whatever other drivel I throw at you! Good night!
The countertop is a white laminate with gold flecks, but instead of carrying that up onto the walls for the backsplash, they used some kind of particle board with white paint on it. Or something. And then, they topped it off with what appeared to be plastic, marbled, bullnose tile. Of a sort. The picture doesn't really capture their beauty. Because they have none.
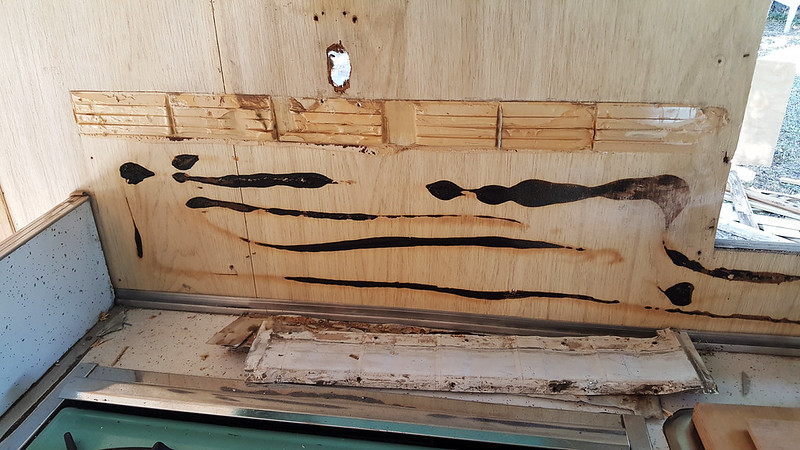
So I pried it all off!
The particle board came off easy. As the glue was no longer sticky at all. The plastic tiles were hollow, and filled with some kind of adhesive putty. It was committed to sticking to the wall.
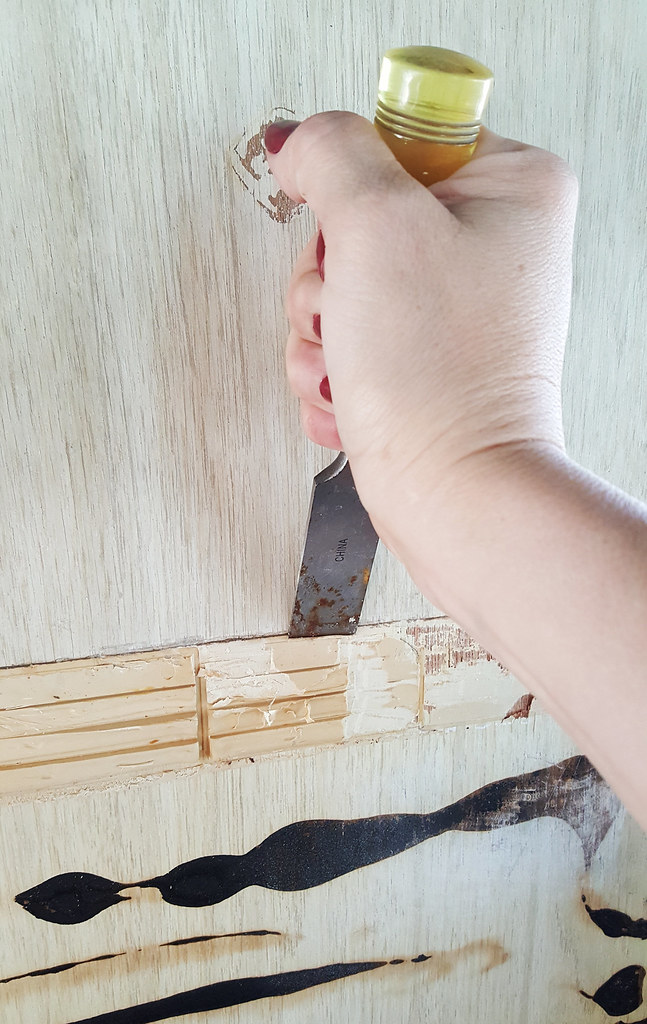
First I tried chipping away at it with a putty knife. Ha. It laughed in my face. Then I tried sanding it off. It completely ignored me. Then Richard told me to just go get a chisel, already. So I did.
I started out hitting the chisel with a hammer, but I kept going too deep and taking bits of wall off with the putty. Eventually I figured out that it worked best if I just used the power of my hand, and pushed straight through the putty. It came off in a few sliced layers.
Anyway, a very rambly way to say I got all the crap off the wall. Yeah. Told you you'd be bored.
And then someone stole my camera!
So, wiring. I can tell you what I know, which isn't much.
Since the siding is STILL off the trailer, it made it really easy to work on the wiring.
Here is how it works. (I think. I keep having to ask Richard how this works because it refuses to stay in my brain.)
A/C is the kind of power our houses run on. Current goes in both directions (i.e. Alternating Current.)
D/C is the power that comes from Batteries, which only supply current in one direction. (i.e. Direct Current). Honestly, I have no idea what that means. But if our Travel Trailer is wired for D/C, the stuff inside of it can run on batteries.
A car battery is 12 volts, and they make light fixtures and fans, etc. to run on 12 volts, since that is what RV's and boats use. So.
Originally our trailer had one D/C light in it. So if we were out in the middle of nowhere, running off a 12 volt battery, we would have one measly light. The rest of the lights required A/C, so to use those we'd have to be hooked up to A/C power, with an extension cord or whatever.
So we rewired all the lights to run off D/C.
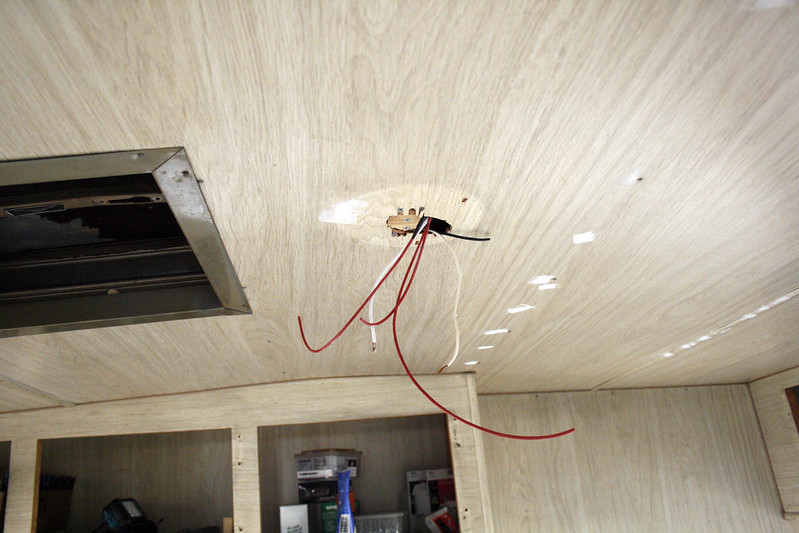
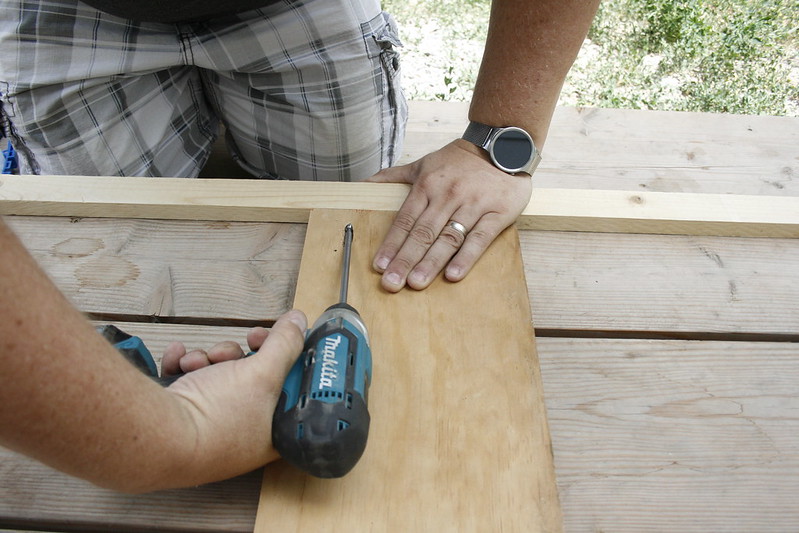
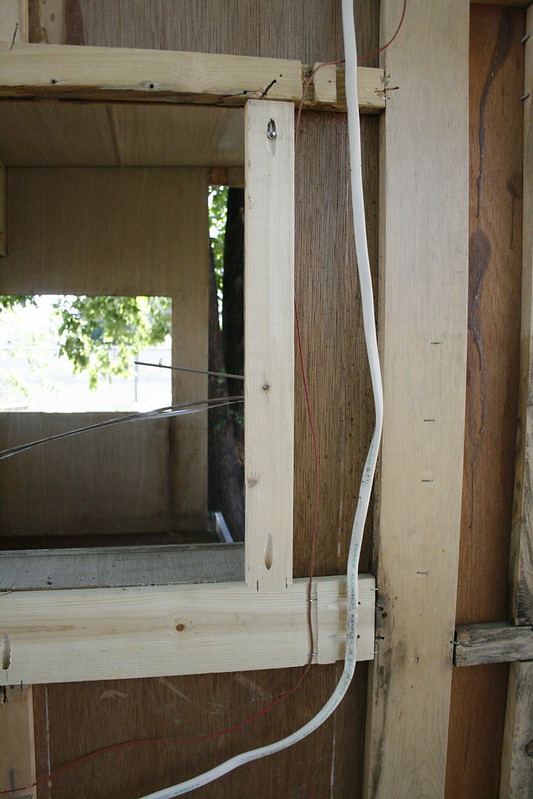
This is where the original D/C light was.
The black wire is power coming in, the white is the ground, and the red is running to other light fixtures and a light switch. These wires are all 14 gauge, so you can use all the different colors for whatever you want. This is just what worked for us.
We are adding another light about 3 feet to the left of this one.
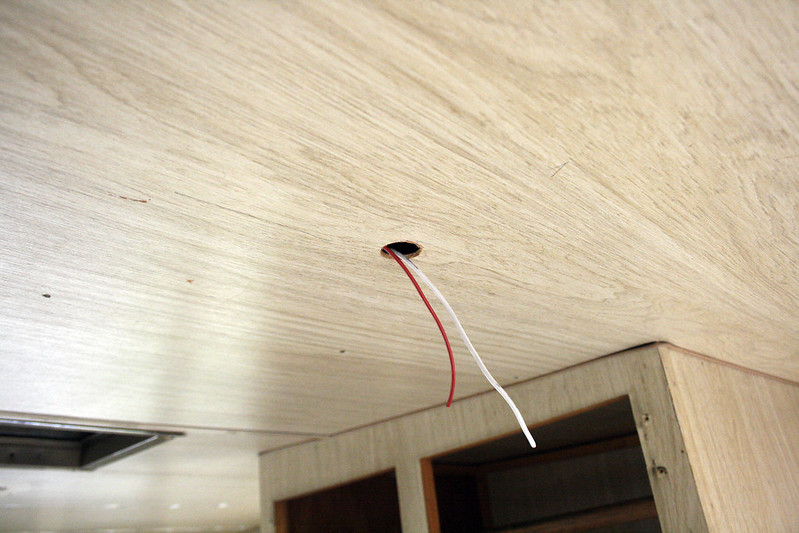
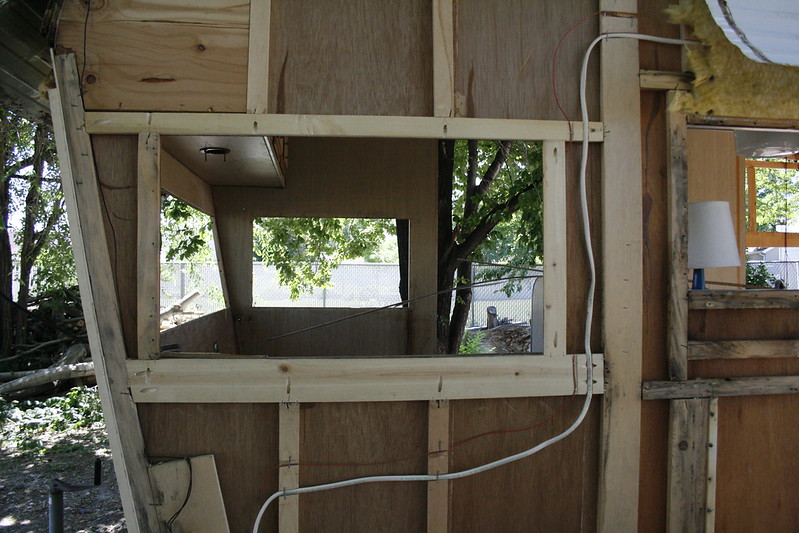
Ah, yes! What an incredibly useful picture!
Here's another!
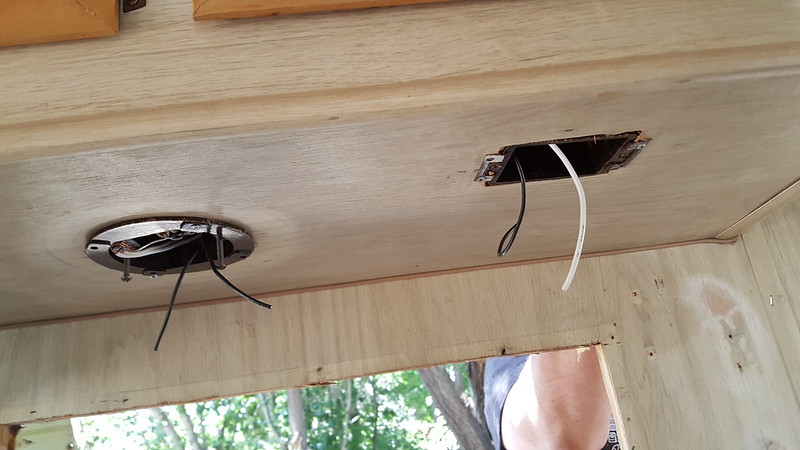
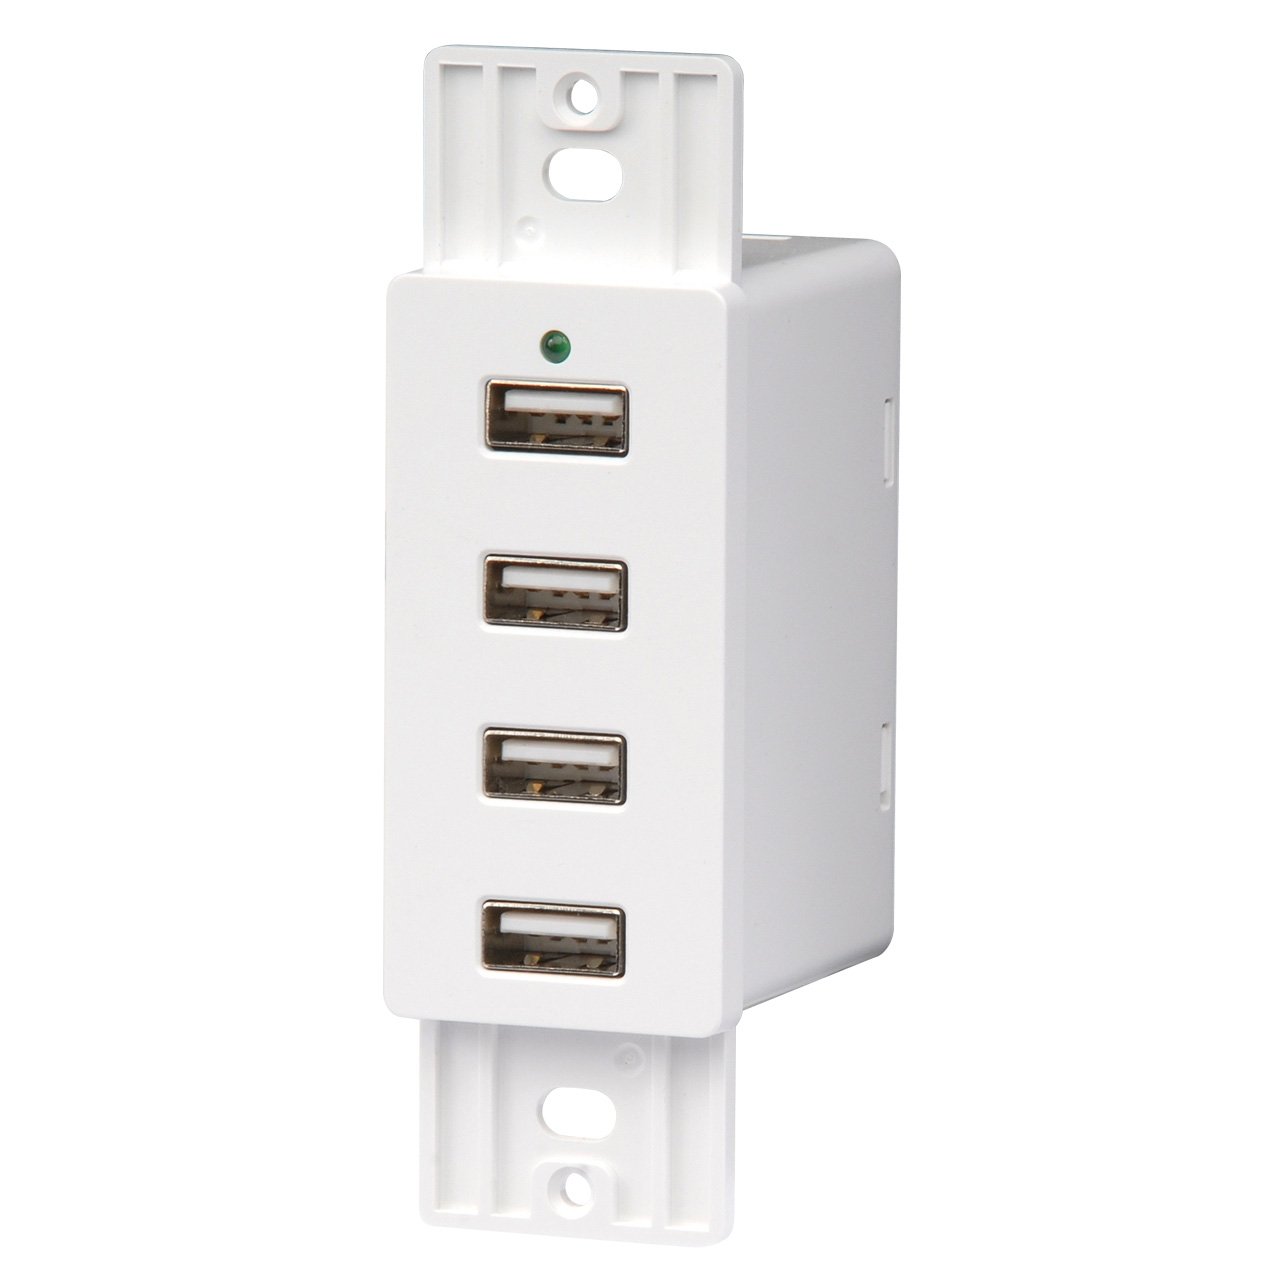
Above the sink was a light we rewired, and an outlet we re-purposed. We're sticking a USB outlet in its place. I gotta admit. That gets me pretty excited.
Here's another!
Above the sink was a light we rewired, and an outlet we re-purposed. We're sticking a USB outlet in its place. I gotta admit. That gets me pretty excited.
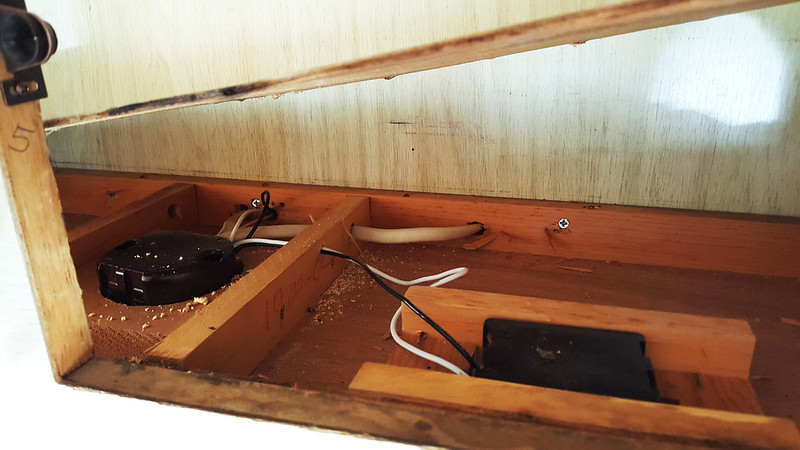
We got those on Amazon, but there are probably lots of similar options out there in the world. Accessing the wiring for those boxes is no problem. Just lift up the board in the cabinet above them:
And there you are.
There is another light over the dinette and two sconces on the back wall above the bench. We're putting another USB charging outlet back there. I could include pictures, but I think you've got the gist. Colorful wires sticking out of holes. Good stuff.
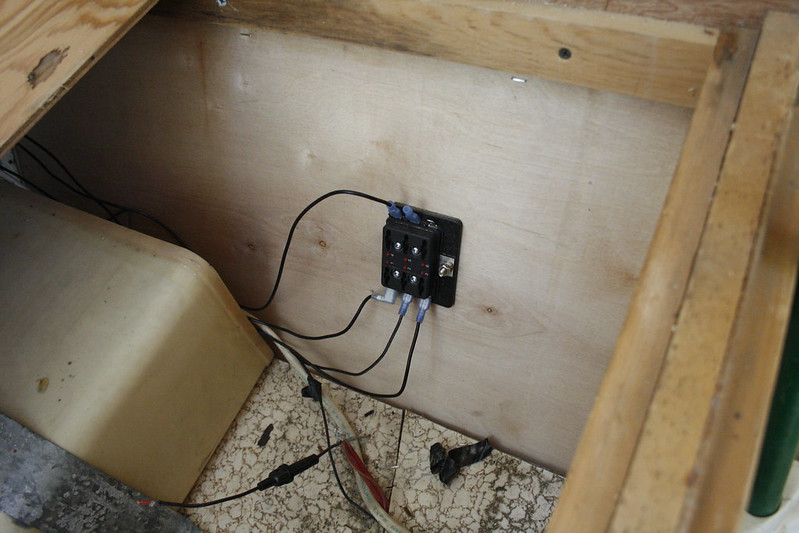
Then Richard installed this fuse box.
Then Richard installed this fuse box.
Which sits under one of the benches. It works like the fuse box in your car. I don't know how the one in my car works. But I do know that if the fuse blows, you replace it. So all the interior lights, (and the fan we are going to install!) run into here. The Trailer's running lights--those on the outside that are on while you're driving--are hooked up directly to the car's power.
You can use these in a regular old light fixture and get the same effect as a 12 volt light fixture. Pretty cool, right? So that is what we are doing over the dinette.
A few of the light fixtures we are using are specifically designed to run on 12 volts. But the 12 volt light fixture community doesn't have the biggest selection in the world. But don't despair! There are other options! You can also buy 12 volt LED light bulbs.
Both batteries and light bulbs have improved a lot in the last 50 years. Using his magical brain, Richard calculated
that even running all the lights in our Travel Trailer 24 hours a day, one 12 volt battery should still last us four and a half days.
So, yeah. Pretty awesome. And that is all I have for you to day. Tune it next time for whatever other drivel I throw at you! Good night!
Jul 2, 2017
Travel Trailer Interior Walls
One of the nice things about building a wall lying flat on the ground is Ease of Access. These back walls needed some interior wall board--I have no idea what to call it. Paneling, maybe?--but since the walls where already in place we had to slide the wall panel in through the back window, fanagle it around between the stove and the cabinets, and then slide it into place. And since it took a while to get a perfect fit, we had to do this about eight times for each wall.

To Get that angle in the back, Richard traced it onto some cardboard. It still required lots of adjusting to make it fit. And there are some gaps we need to deal with. Somehow. But, the interior walls are in.
Along with the hardware that holds up the table. For both of these shelves, before putting them up we first stapled gimp around one edge. It is also known as welt, but why would I call it welt when I can call it gimp? I'm sure you can get white gimp online lots of places. We got ours from Vintage Trailer Shop.
It was a bit fatter than the original gimp used in the trailer, and really, I don't love it. The gimp itself was fine, but in general, I guess I'm not a gimp fan. It was tricky to get a nice clean line. I'd like to use caulk in the future, but I don't really know how it will hold up to all the twisty and stretchy that goes on in a travel trailer.
So, that is where we are right now. And if all my nieces and nephews would stop getting married, we might actually have time to finish this thing! Sheesh!
To Get that angle in the back, Richard traced it onto some cardboard. It still required lots of adjusting to make it fit. And there are some gaps we need to deal with. Somehow. But, the interior walls are in.
Then we put in a shelf across the back wall. Orginally this shelf exsisted as part of the bench back here, but we're going to build the bench a bit differently, so we put the shelf in all on its own. And it made a huge difference to how sturdy the whole thing feels.
We each kept grabbing the wall, giving it a good shake, and yelling, "So sturdy!" We're fun people.
So then we had to replace the shelf across the front of the trailer as well.
Along with the hardware that holds up the table. For both of these shelves, before putting them up we first stapled gimp around one edge. It is also known as welt, but why would I call it welt when I can call it gimp? I'm sure you can get white gimp online lots of places. We got ours from Vintage Trailer Shop.
It was a bit fatter than the original gimp used in the trailer, and really, I don't love it. The gimp itself was fine, but in general, I guess I'm not a gimp fan. It was tricky to get a nice clean line. I'd like to use caulk in the future, but I don't really know how it will hold up to all the twisty and stretchy that goes on in a travel trailer.
So, that is where we are right now. And if all my nieces and nephews would stop getting married, we might actually have time to finish this thing! Sheesh!
Jun 25, 2017
HOW TO REPAIR TRAVEL TRAILER WALLS
Step 1: Remove Siding
I'm pretty sure trailers and motorhomes like this were built by building the wall flat on the ground (or whatever surface they were using. Don't lets get hung up on semantics here.) They laid out their framing and stapled it together. Then they laid the interior paneling on top and stapled it in place. Then the whole completed wall could be lifted up and secured to the floor. Once all the walls were in place the trailer could be wrapped with aluminum siding.
My point is, if you need to gain access to the framing inside the trailer walls, your best bet is to do it from the outside.
You'll have to remove all the drip trim, lights and other do-dads attached to the exterior of the trailer. After that it is just a matter of pulling out all the staples holding the siding in place - a flat head screw driver and a pair of needle-nose pliers should do the trick.
Step 2: Assess the Damage
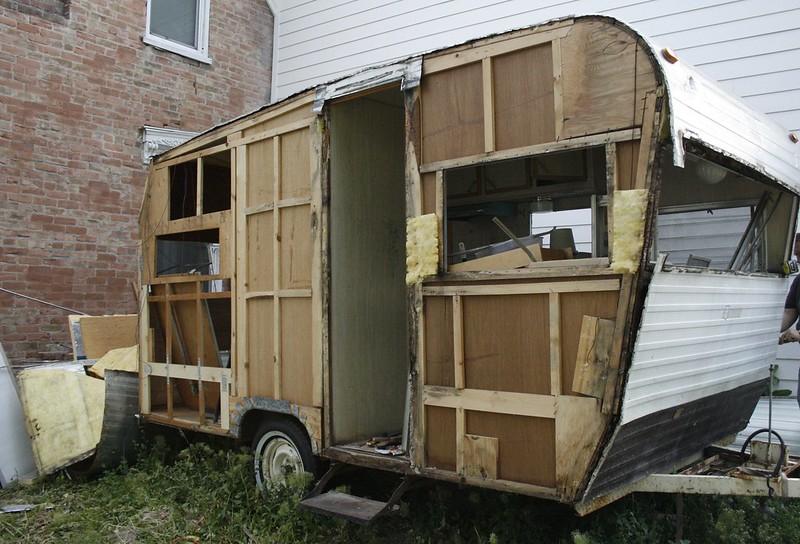
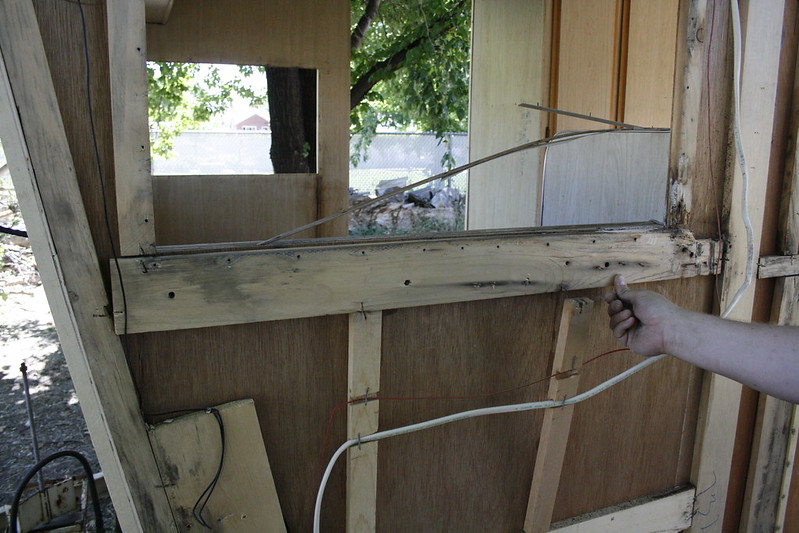
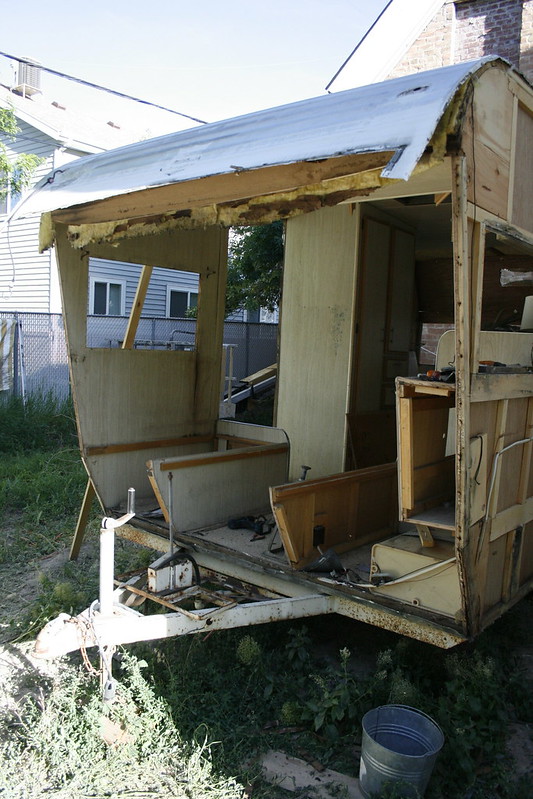
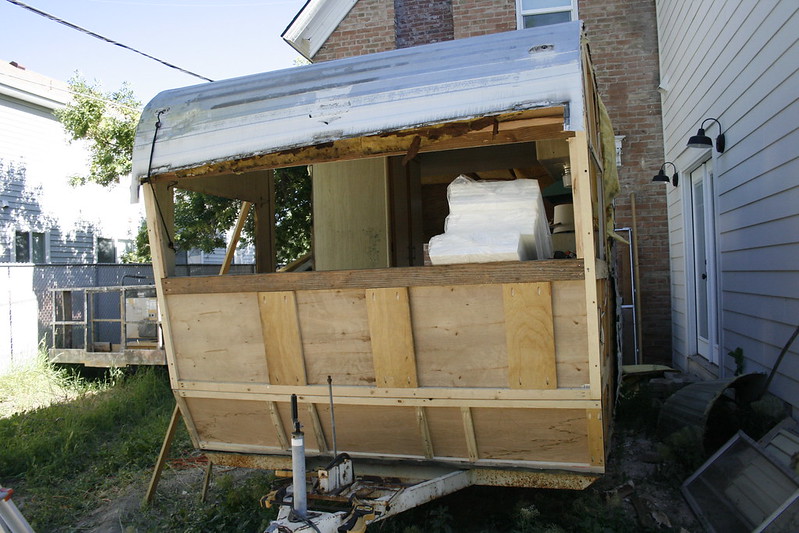
The problem is, sometimes you can't tell what is damaged until you get the siding off and look at it. We were getting ready to finish up the rear of our travel trailer and just call it good, but both of us started thinking "What if there is more damage that we don't know about?" Especially because there was a pretty big dent near the roof in the front that had been repaired with metal tape.
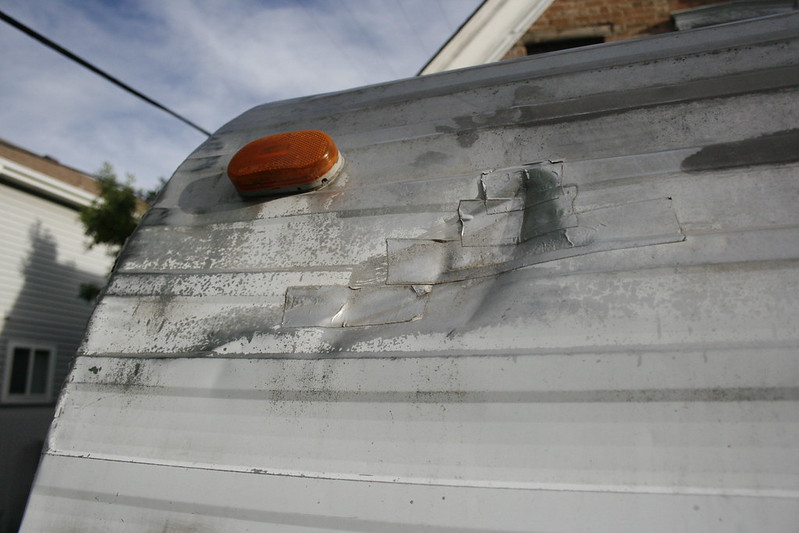
What were the chances that hadn't caused some problems? So we pulled the rest of the siding off.
What were the chances that hadn't caused some problems? So we pulled the rest of the siding off.
And see what we found?

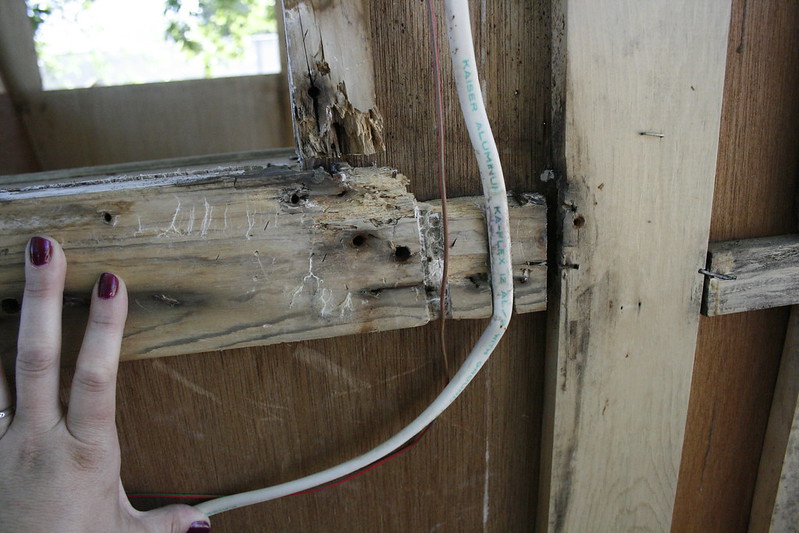
This wood in the above picture rotted because the seal behind the light up near the roof had gotten old and worn away. So this was just from water dripping through the hole the wires for the light ran through. One tiny hole can cause so much damage.
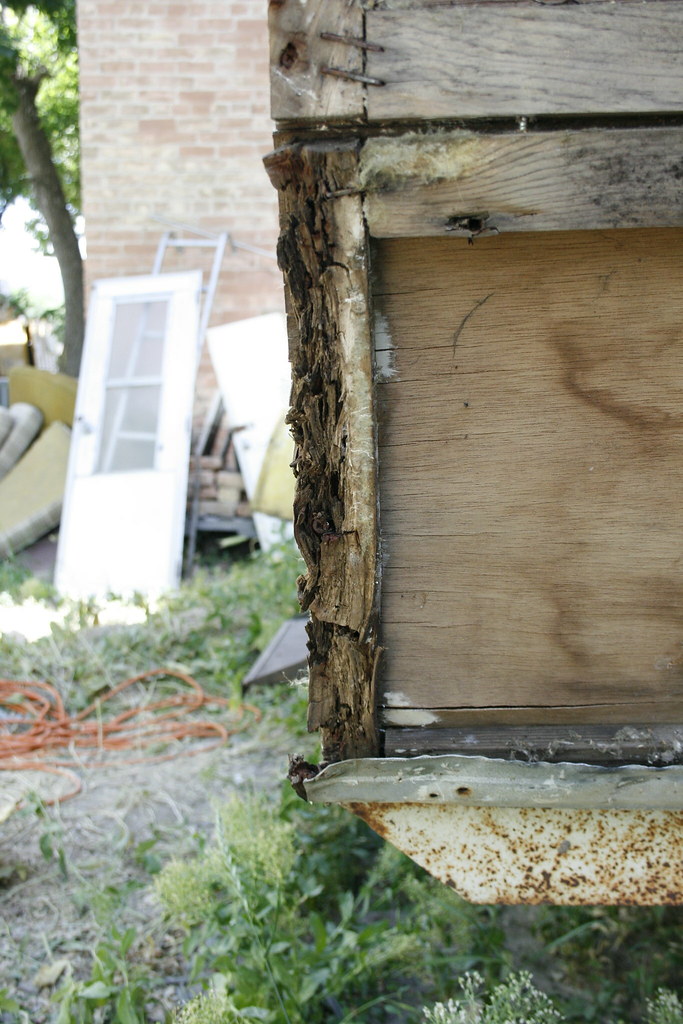
From the inside the walls looked okay, but clearly they were NOT. I'm so glad we checked. How much longer would we have been able to tow the trailer around before the front of it just collapsed? There were enough bad boards in the front wall we decided to replace the whole thing.
Maybe so many boards are bad, or maybe the interior paneling is so bad that it makes more sense to replace the whole wall. Lucky you, you have that whole wall in front of you to use at a life size pattern of exactly what the wall should look like. If your wood has rotted so bad that you can no longer tell what should go where, then, dang, I don't know how to help you.
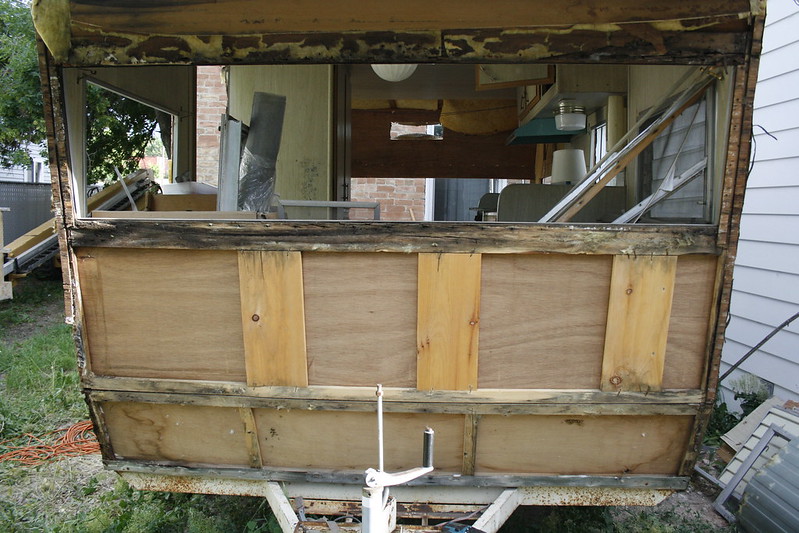
Using the exposed wall, you now know what size to cut all your wood. So, Cut it! And hook it together! In the Right Places! Like so!
Step 3: Use the Existing Wall as your Template
If just a few boards are rotted and soft, cut new ones and replace them. Our bad boards were held in place with glue, and big staples, but it wasn't too much work to get them out, on account a them being mostly dead.
What follows is a story in pictures representing how this is done:
What follows is a story in pictures representing how this is done:
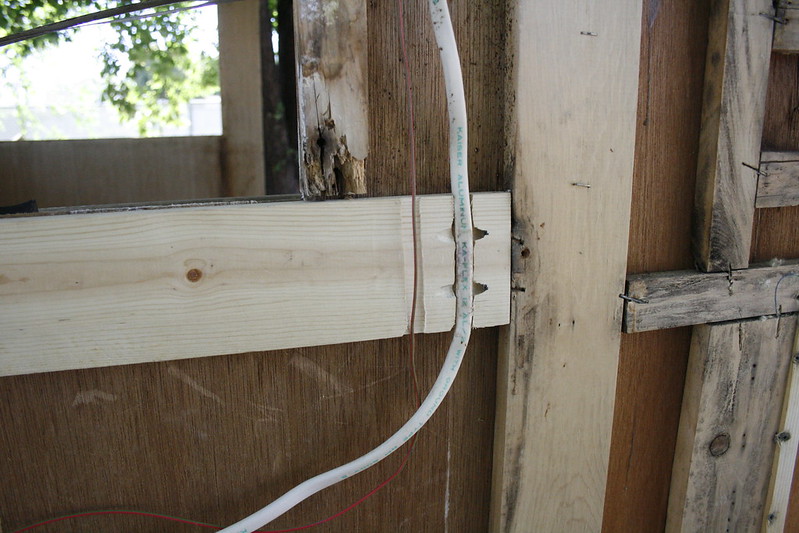
See the ugly, sad piece of wood.
So, so ugly. And also sad.
Happy, new piece of wood! But no! The piece above it is also sad!
New, happy piece of wood!
Happy Wall!
Ok. so I used words in my picture story. But I clearly made my point, very eloquently: Remove the bad board, cut a new board the same size (or you can measure the space you pulled the bad board out of), put the new board in. High Five your friend for a job well done. Or high five yourself if you have no friend.
Step 4: If you need to rebuild the Whole Wall, get busy.
Maybe so many boards are bad, or maybe the interior paneling is so bad that it makes more sense to replace the whole wall. Lucky you, you have that whole wall in front of you to use at a life size pattern of exactly what the wall should look like. If your wood has rotted so bad that you can no longer tell what should go where, then, dang, I don't know how to help you.
Using the exposed wall, you now know what size to cut all your wood. So, Cut it! And hook it together! In the Right Places! Like so!
If you don't have a method for making those pocket holes like you see above, you can also use braces like these:
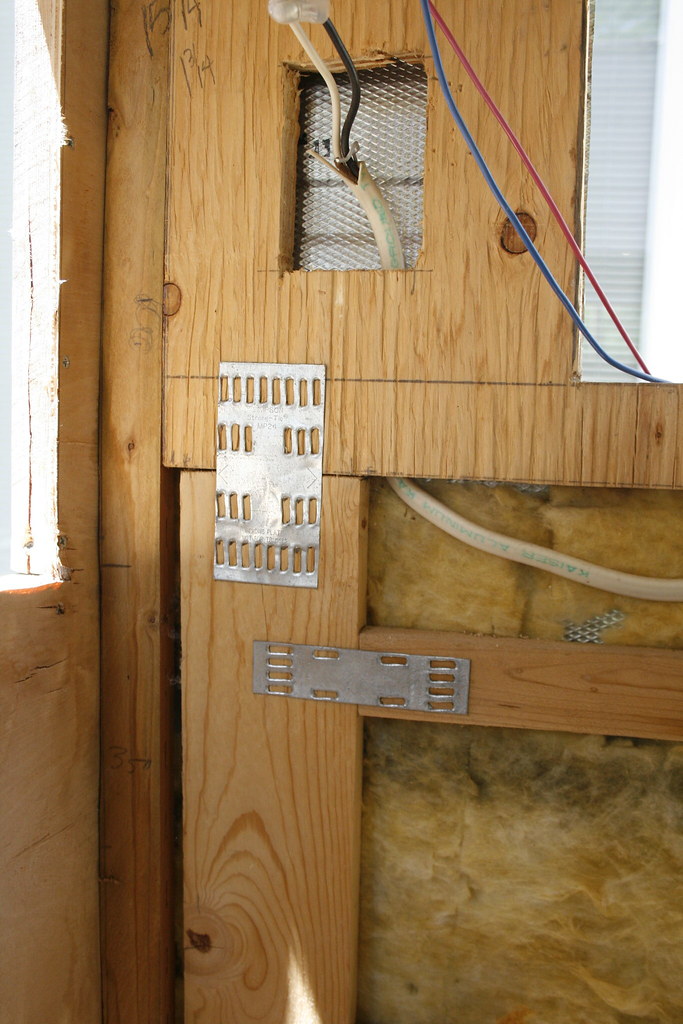
Just remember that they are kind of a pain in the bum. And you might hate me for suggesting them.
Step 5: Attach your interior paneling to the framed wall you just built.
I don't have picture of this. You'll just have to take my word for it that this is a necessary step. We used underlayment, and secured it with staples.
Step 6: Make sure you know exactly where your new wall goes.
If you are using the original siding, you need to make sure your wall is the same as the old one, or your windows and edges won't line up. You could do this by taking pictures of every single joint where one wall meets another. You could make some marks where certain edges are supposed to meet. Or you could do something even smarter that we didn't think of.
Just remember that you have to get that wall back in in the right place, or your holes won't match up and you will be screwed.
Step 7: Pull off the bad wall.
Bad wall! Bad! Take that bad wall down!
Step 7: Attach the New Wall.
This was a little tricky with only two people. Clamps were our friends.
We used screws to attach the front wall to the side walls, but it wasn't until we attached it to the boards that make up those benches you see in the picture above, and to the cabinets you can't see in the picture above, that the wall really became secure.
Keep that in mind as you are rebuilding your trailer. You may be tempted to remove cabinets and shelves and benches to get more space, but every one of those built in pieces of furniture help to strengthen the trailer structurally. So proceed with caution.
And there you have it! New wall! And boy, howdy! is it sturdy! You know, for a trailer.
Things are getting exciting! Until next time, Adieu!
Subscribe to:
Posts (Atom)
