Mar 30, 2014
The Finished Bathroom
Today I visited someone who recently moved into a house built about the same time as mine. They bought it and fixed it up in about a 9 month period. Maybe shorter, I don't know. It still needs some work on the exterior, but they are about 95% done on the inside. And apparently the husband did almost all the work himself.
So what I want to know is, HOW?? I know we have pretty much slowed to a stop in the last few years, but it took me 7 months just to finish my bathroom and I was working HARD. So how did he do it? I have to assume ours was in worse shape overall, and it is a little bit bigger, but none of that accounts for us being THIS much slower. I think he is a warlock. I've just come up with this theory, but I'm sticking with it. No regular old muggle could throw together a renovation like they managed to in such a short amount of time. So that makes me feel better. Like I always say, if you ever meet someone who can do something you can't, just assume they practice magic!
Since I've mentioned it, you should know that we did actually FINISH our upstairs bathroom. See, if I know anything, I know that the best way to build suspense is to make people wait. It has been months since I told you anything about my upstairs bathroom, so you must be DYING by now. Exactly my plan. Now that you are all at the point of death, this is the perfect moment to show you my totally, completely 99% done bathroom. (I just thought of two things I need to finish).
BATHROOM!
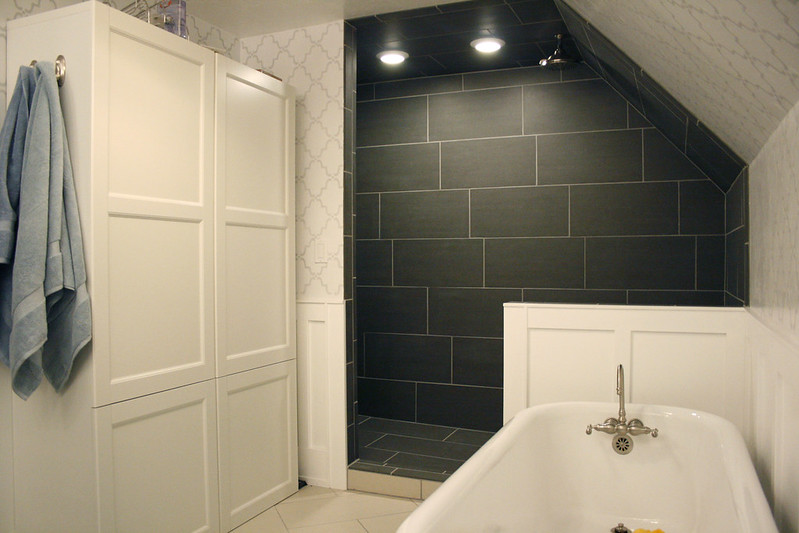
That is a picture of the finished shower before we put the shower doors on. Now that the doors are on it is hard to get a picture to show you what the inside of the shower is like. But I tried.
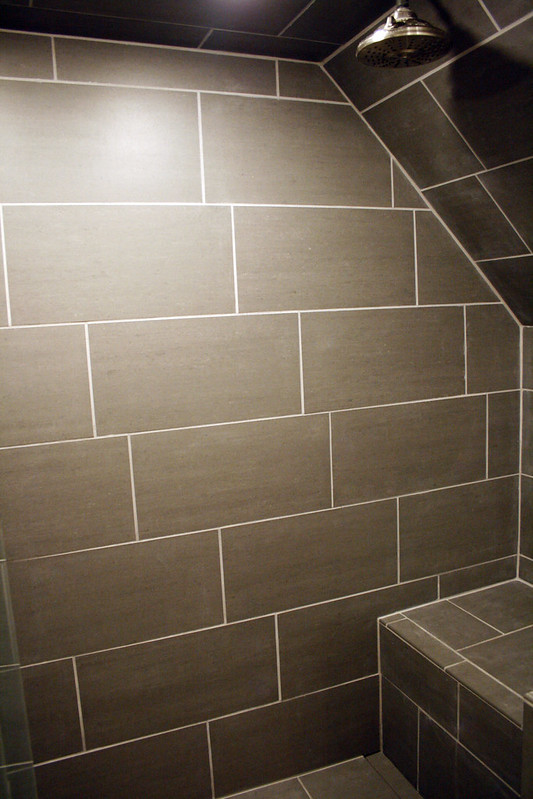
Anyway, that is the best you are going to get. There are two shower heads, one on each side, and a bench, and it really is pretty great. After I tiled the bathroom floor I was exhausted and I thought I'd be fine if I never tiled again. So we hired a friend to tile the shower. He got the ceiling done, but then he couldn't finish until Richard built the bench, and he couldn't build the bench until the cows came home, I guess. It took so long before we were ready to have the rest of the shower tiled that I started getting excited again and I stole the project back from him and finished tiling the rest of the shower myself. I feel a little bad about that. But I'm extremely pleased with myself at the same time. So confusing.
The tiles look better in person, I think. They are called "Cebu" by Arizona. Same brand and line as the ones on the floor, just in a different color.
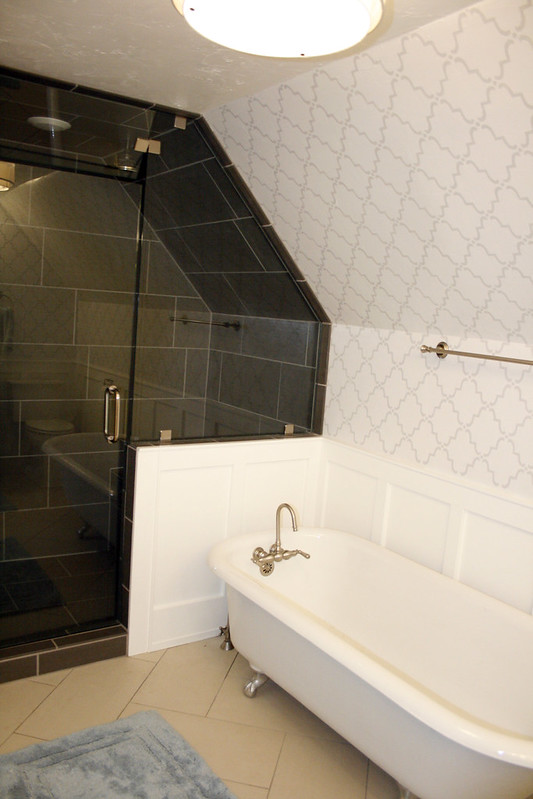
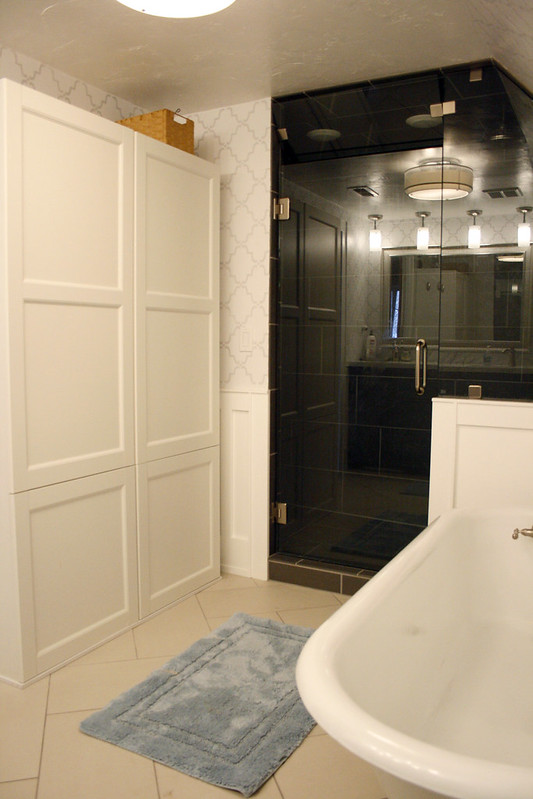
And here is the shower door!
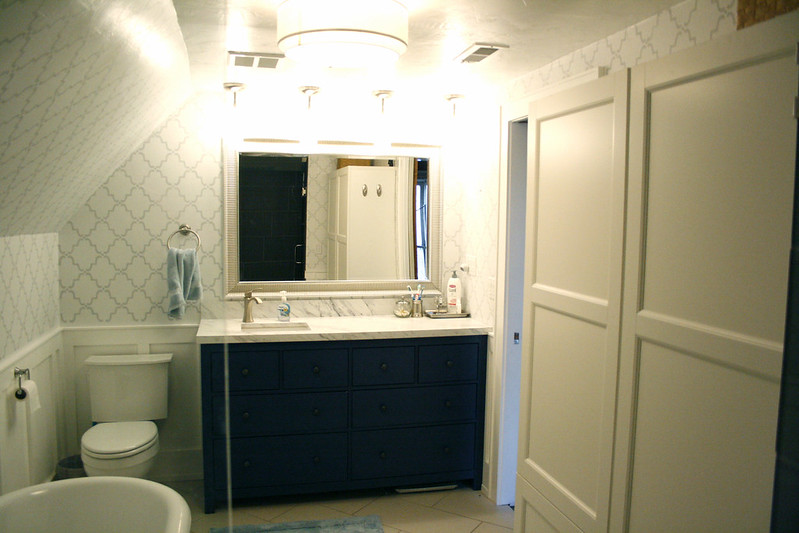
If you noticed that the main light fixture in the following pictures is different than it used to be, you get $10.00! The cabinet doors JUST brushed the bottom of the previous light fixture. It was sort of working, but then, following one rambunctious bath some of the wood (a.k.a. particle board) on our Ikea cabinet started warping, so we raised the cabinet up and put it on top of a PVC frame. No more water damage for us! But that extra half inch was more room than we had to spare, so we replaced the light fixture. You still with me?
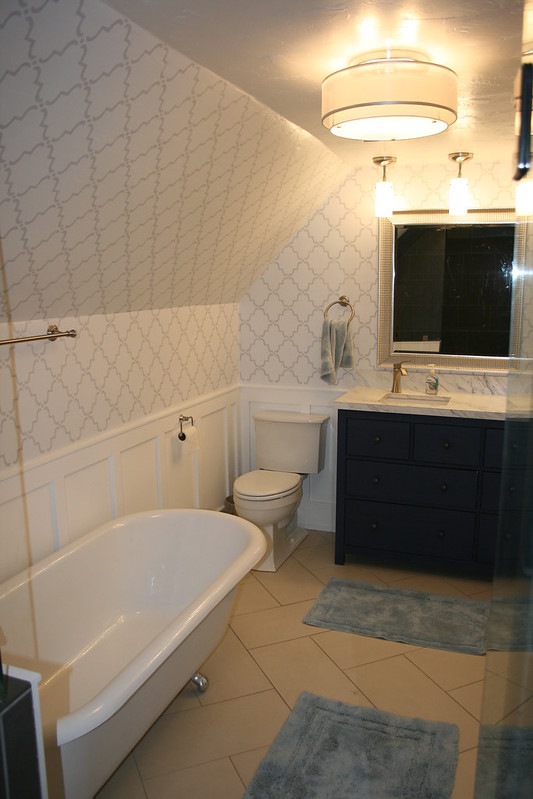
I had been concerned that the bathtub would make the room feel cramped, but of course it doesn't, since it only comes up to knee height.
As it turns out, I love my stenciled walls. I thought about writing a whole post teaching you how to stencil, but I decided it is really unnecessary. You're all clever, resourceful people. The very best thing I figured out was THIS
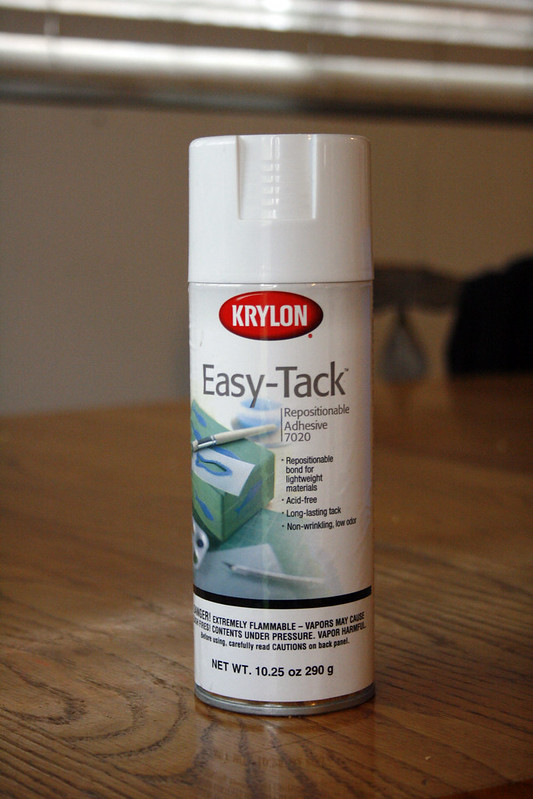
Krylon Easy-Tack Repositionable Adhesive.
I started out using repositionable adhesive made by Martha Stewart because I think the stencil company recommended it, but hers is half the size and costs twice as much and really doesn't stick that great. I was very nervous trying an unrecommended can of spray adhesive, cuz who knew what havoc it might wreak, but it changed everything. Finally the stencil was sticking to the wall. Finally I had enough adhesion to get into the corners. And it still came back off the wall again with no trouble at all. It was wonderful. (And apparently it contains harmful vapors, so that probably explains the hallucinations.) So if you find a brand that is cheaper, try it out. Just be sure it is REPOSITIONABLE, or all heck will break loose and you will want to kill me.
My other stenciling tips are these:
1. Practice. After you do it for a little while you'll get the hang of it.
2. Don't be afraid to paint over it and start over. It if isn't working out, just try something different.
3. It is ok if it isn't perfect. It isn't going to look like wallpaper and that is how it should be. There were a few places I went back over and touched up by hand, but most of the slight imperfections are part of the deal, and part of what makes it beautiful. And if a section of your wall is going to be covered by art or a cabinet, start there, so your first few mistakes will be covered up.
And of course check for level and stuff. These instructions do not guarantee your success if you choose to ignore common sense. Actually these instructions don't guarantee anything.
I really like the vanity countertop. We knew we were going to have to find a way to save money somewhere, and after searching and searching through countertop remnants, we ended up doing laminate.
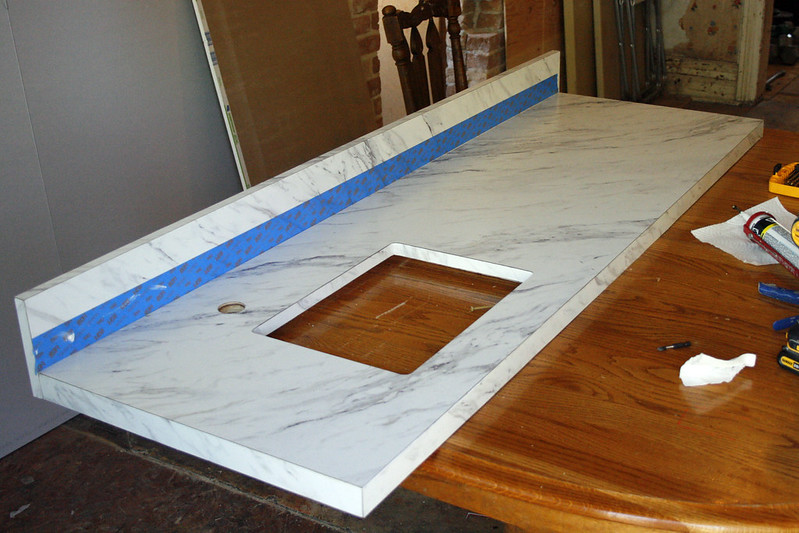
I bought the laminate in a big sheet from Lowes for just over $80.00. Then Richard built the wood countertop and we cut it out and glued it on. For about $100 total, I'm very pleased. But then I've never minded laminate. I'm a simple girl, really. What I DON'T like is the square sink from Ikea. I would go upstairs to take a picture of it for you, but I'm pretty sure I'd have to clean it out first, and it just doesn't seem worth it. Let me see if I can find a picture online. Ah, here it is.
 With the drain on one side like that, the stuff in the opposite side never washes out very well. I wouldn't do it again, given the chance.
Ok! So here are a couple little additions I am really loving:
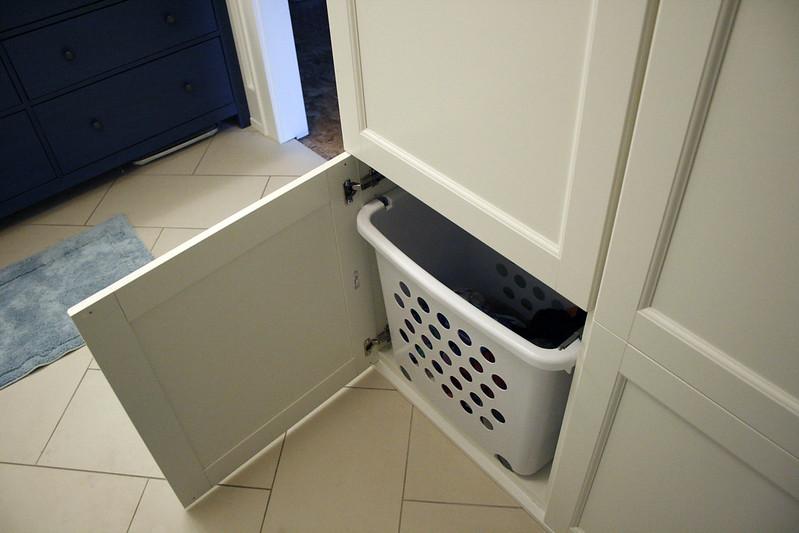
The Bottom half of the cabinet is used for laundry. Colors go on the left, Whites go on the right. I chose this cabinet specifically because I wanted something deep enough to keep laundry baskets in. And when my 3 year old is getting ready for a bath, and I watch him open the cabinet and throw his dirty clothes in the basket, it warms my little heart.
Lastly this:
We put an outlet in the wall behind the vanity and then attached a power strip inside this drawer with double sided tape. Nothing we haven't all seen before, but it really is wonderfully handy.
And that my friends, is it. The whole darn bathroom. Now when I am tired of crumbling plaster and exposed 2x4's, I can go hide out in the bathroom and pretend like the whole house is finished and my life is perfect. That is perfectly normal behavior, right?
So what I want to know is, HOW?? I know we have pretty much slowed to a stop in the last few years, but it took me 7 months just to finish my bathroom and I was working HARD. So how did he do it? I have to assume ours was in worse shape overall, and it is a little bit bigger, but none of that accounts for us being THIS much slower. I think he is a warlock. I've just come up with this theory, but I'm sticking with it. No regular old muggle could throw together a renovation like they managed to in such a short amount of time. So that makes me feel better. Like I always say, if you ever meet someone who can do something you can't, just assume they practice magic!
Since I've mentioned it, you should know that we did actually FINISH our upstairs bathroom. See, if I know anything, I know that the best way to build suspense is to make people wait. It has been months since I told you anything about my upstairs bathroom, so you must be DYING by now. Exactly my plan. Now that you are all at the point of death, this is the perfect moment to show you my totally, completely 99% done bathroom. (I just thought of two things I need to finish).
BATHROOM!
That is a picture of the finished shower before we put the shower doors on. Now that the doors are on it is hard to get a picture to show you what the inside of the shower is like. But I tried.
Anyway, that is the best you are going to get. There are two shower heads, one on each side, and a bench, and it really is pretty great. After I tiled the bathroom floor I was exhausted and I thought I'd be fine if I never tiled again. So we hired a friend to tile the shower. He got the ceiling done, but then he couldn't finish until Richard built the bench, and he couldn't build the bench until the cows came home, I guess. It took so long before we were ready to have the rest of the shower tiled that I started getting excited again and I stole the project back from him and finished tiling the rest of the shower myself. I feel a little bad about that. But I'm extremely pleased with myself at the same time. So confusing.
The tiles look better in person, I think. They are called "Cebu" by Arizona. Same brand and line as the ones on the floor, just in a different color.
And here is the shower door!
If you noticed that the main light fixture in the following pictures is different than it used to be, you get $10.00! The cabinet doors JUST brushed the bottom of the previous light fixture. It was sort of working, but then, following one rambunctious bath some of the wood (a.k.a. particle board) on our Ikea cabinet started warping, so we raised the cabinet up and put it on top of a PVC frame. No more water damage for us! But that extra half inch was more room than we had to spare, so we replaced the light fixture. You still with me?
I had been concerned that the bathtub would make the room feel cramped, but of course it doesn't, since it only comes up to knee height.
As it turns out, I love my stenciled walls. I thought about writing a whole post teaching you how to stencil, but I decided it is really unnecessary. You're all clever, resourceful people. The very best thing I figured out was THIS
Krylon Easy-Tack Repositionable Adhesive.
I started out using repositionable adhesive made by Martha Stewart because I think the stencil company recommended it, but hers is half the size and costs twice as much and really doesn't stick that great. I was very nervous trying an unrecommended can of spray adhesive, cuz who knew what havoc it might wreak, but it changed everything. Finally the stencil was sticking to the wall. Finally I had enough adhesion to get into the corners. And it still came back off the wall again with no trouble at all. It was wonderful. (And apparently it contains harmful vapors, so that probably explains the hallucinations.) So if you find a brand that is cheaper, try it out. Just be sure it is REPOSITIONABLE, or all heck will break loose and you will want to kill me.
My other stenciling tips are these:
1. Practice. After you do it for a little while you'll get the hang of it.
2. Don't be afraid to paint over it and start over. It if isn't working out, just try something different.
3. It is ok if it isn't perfect. It isn't going to look like wallpaper and that is how it should be. There were a few places I went back over and touched up by hand, but most of the slight imperfections are part of the deal, and part of what makes it beautiful. And if a section of your wall is going to be covered by art or a cabinet, start there, so your first few mistakes will be covered up.
And of course check for level and stuff. These instructions do not guarantee your success if you choose to ignore common sense. Actually these instructions don't guarantee anything.
I really like the vanity countertop. We knew we were going to have to find a way to save money somewhere, and after searching and searching through countertop remnants, we ended up doing laminate.
I bought the laminate in a big sheet from Lowes for just over $80.00. Then Richard built the wood countertop and we cut it out and glued it on. For about $100 total, I'm very pleased. But then I've never minded laminate. I'm a simple girl, really. What I DON'T like is the square sink from Ikea. I would go upstairs to take a picture of it for you, but I'm pretty sure I'd have to clean it out first, and it just doesn't seem worth it. Let me see if I can find a picture online. Ah, here it is.
Ok! So here are a couple little additions I am really loving:
The Bottom half of the cabinet is used for laundry. Colors go on the left, Whites go on the right. I chose this cabinet specifically because I wanted something deep enough to keep laundry baskets in. And when my 3 year old is getting ready for a bath, and I watch him open the cabinet and throw his dirty clothes in the basket, it warms my little heart.
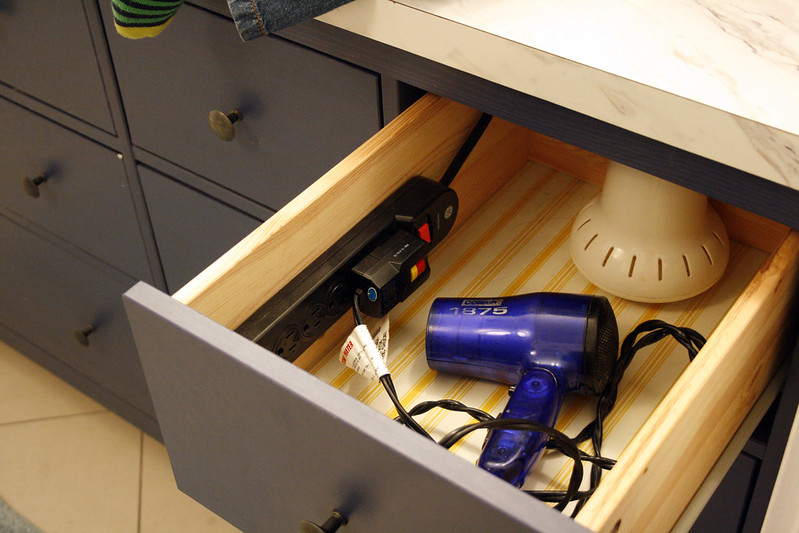
Lastly this:
We put an outlet in the wall behind the vanity and then attached a power strip inside this drawer with double sided tape. Nothing we haven't all seen before, but it really is wonderfully handy.
And that my friends, is it. The whole darn bathroom. Now when I am tired of crumbling plaster and exposed 2x4's, I can go hide out in the bathroom and pretend like the whole house is finished and my life is perfect. That is perfectly normal behavior, right?
Subscribe to:
Posts (Atom)
